
Configure SSO from Salesforce to SharePoint Using WS-Federation
Let your users log in to SharePoint using Web Services Federation and single sign-on (SSO) from your Salesforce org.
Required Editions
| Available in: Lightning Experience and Salesforce Classic |
| Available in: Enterprise, Performance, Unlimited, and Developer Editions |
When you set up Salesforce as a WS-Federation (Web Services Federation) identity provider, users can access SharePoint using SSO from Salesforce.
The easiest way to establish SSO into SharePoint is to use Microsoft Active Directory Federation Services (AD FS) as a front-end to your SharePoint farm. As an alternative to using AD FS as the identity provider, you can configure Salesforce as a WS-Federation identity provider using an Apex implementation.
To configure SSO to SharePoint using Apex and WS-Federation, follow these high-level steps.
Set Up Your Org as a WS-Federation Identity Provider
- To add WS-Federation capabilities to your Salesforce org, install the apex-wsfederation
package using the link
https://login.salesforce.com/packaging/installPackage.apexp?p0=04ti00000008ezm.
After the package installs, you can view the source or see it on GitHub at https://github.com/salesforceidentity/ws-federation.
- To generate the required key information, run the commands in the
cryptocommands.txt file in the Keys directory,
https://github.com/salesforceidentity/ws-federation/tree/master/Keys.
When the commands require a password, provide the same password each time. Running the
script creates a set of files.
- key.pem, your encodedPrivateKey (guard this key carefully and limit its distribution)
- wsfed.crt, your public certificate
- Modulus
- Exponent
 Note To get the modulus and exponent, you need the Java classes in the classes directory.
- Edit the certificate and key files. Remove all line breaks so that just the base64-encoded data remains. For examples of the data format, see the WSFederationControllerTest class.
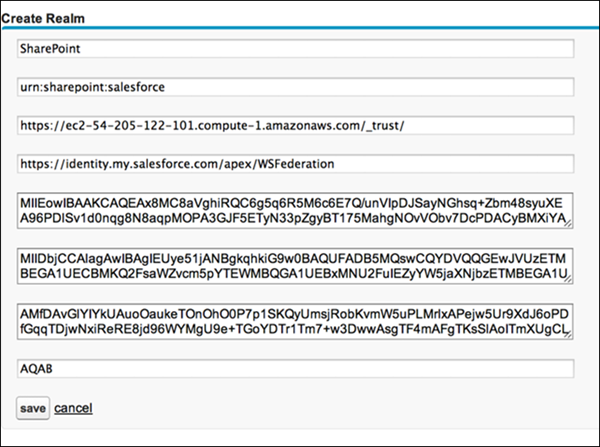
- Go to /apex/WSFederationManagement, and create a realm with the
following settings.
- Name—SharePoint.
- Realm—urn:sharepoint:salesforce, or some other value.
- Audience—urn:sharepoint:salesforce, or some other value.
- Issuer—https://MyDomainName.my.salesforce.com/apex/WSFederation.
- Action—https://yoursharepointserver/_trust/.
- EncodedPrivateKey—The PEM-encoded PKCS8 file you generated with your private key.
- Certificate—The PEM-encoded certificate you generated.
- Modulus—The base64-encoded modulus.
- Exponent—The base64-encoded exponent.
By default, the code expects that you have set up Federation IDs, populating a user’s ID with the user’s email address.
Configure SharePoint for WS-Federation
- In SharePoint, log in as an administrator, and run these commands on the SharePoint
command line.
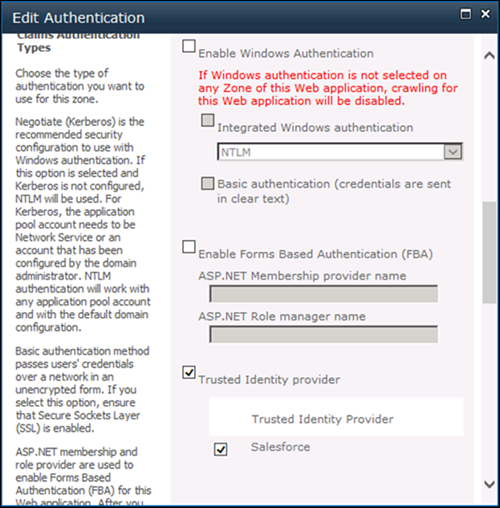
Set-ExecutionPolicy Unrestricted powershell -version 2 Add-PSSnapin microsoft.sharepoint.powershell $cert = New-Object System.Security.Cryptography.X509Certificates.X509Certificate2("c:\path_to_your_cert") New-SPTrustedRootAuthority -Name "Salesforce Certificate" -Certificate $cert $map1 = New-SPClaimTypeMapping "http://schemas.xmlsoap.org/ws/2005/05/identity/claims/emailaddress" -IncomingClaimTypeDisplayName "EmailAddress" -SameAsIncoming $map2=New-SPClaimTypeMapping -IncomingClaimType "http://schemas.microsoft.com/ws/2008/06/identity/claims/role" -IncomingClaimTypeDisplayName "Role" –SameAsIncoming $realm = "urn:sharepoint:salesforce" $signinurl = "https://MyDomainName.my.salesforce.com/apex/WSFederation" $ap = New-SPTrustedIdentityTokenIssuer -Name "Salesforce" -Description "Salesforce" -Realm $realm -ImportTrustCertificate $cert -ClaimsMappings $map1,$map2 -SignInUrl $signinurl -IdentifierClaim "http://schemas.xmlsoap.org/ws/2005/05/identity/claims/emailaddress" - In the SharePoint administrative interface, to edit authentication settings, click Authentication Providers.
- Under Claims Authentication Types, select Trusted Identity
provider, and select Salesforce as the provider. Save
the settings.
- To establish authorization rules for claims-based users, select Manage web applications from the SharePoint administration page, and select User Policy.
Commands for Later Use
To update your certificate or sign-in URL later, use these PowerShell commands.
-
Set-SPTrustedRootAuthority -Name "Salesforce Cert" -Certificate $cert -
Set-SPTrustedIdentityTokenIssuer "Salesforce" -SignInUrl
            $signinurl