
Integrate a SAML SSO Service Provider as an External Client App
To use Salesforce as a SAML single sign-on (SSO) identity provider for a third-party service provider, integrate your service provider by using the external client apps framework. Create a SAML-enabled external client app and specify configuration information from your service provider. You can configure a SAML-enabled external client app via Metadata API only. External client apps with SAML configurations can’t be packaged or distributed.
Required Editions
| Available in: Developer, Performance, and Unlimited Editions |
| User Permissions Needed | |
|---|---|
| To create and edit external client apps: | Create, edit, and delete External Client Apps |
| To edit external client app policies: | View all External Client Apps, view their settings, and edit their policies |
Before you start, complete these steps.
- Enable Salesforce as an identity provider.
- Complete prerequisites for integrating service providers with SAML.
- Enable external client apps in Setup.
- Configure a Salesforce DX project.
A SAML-enabled external client app consists of three main metadata components.
- A parent ExternalClientApplication component
- An ExtlClntAppConfigurablePolicies component. This component is where you enable the SAML plugin for the app.
- An ExtlClntAppSamlConfigurablePolicies component. This component contains SAML configuration information. Depending on your use case, it can also include an ExtlClntAppSamlConfigurablePoliciesAttribute subtype.
You can use any metadata deployment method that you prefer. These steps show you how to create and deploy these components by using Salesforce CLI.
Create the Parent External Client App
To complete this step, see Create a Local External Client App with Metadata API.
Because you can’t package an external client app with a SAML configuration,
the distributionState must be set to Local. Here’s an example <external client app
name>.eca-meta.xml
file.
<?xml version="1.0" encoding="UTF-8"?>
<ExternalClientApplication xmlns="http://soap.sforce.com/2006/04/metadata">
    <contactEmail>johndoe@example.com</contactEmail>
    <description>SAML external client app to integrate third-party service provider</description>
    <distributionState>Local</distributionState>
    <isProtected>false</isProtected>
    <label>mysamleca</label>
</ExternalClientApplication>
Create the External Client App Policies Configuration
- In your <project directory>/force-app/main/default/ directory, create a directory called extlClntAppPolicies.
- In the extlClntAppPolicies, create a file called <ECA policy name>.ecaPlcy-meta.xml.
- Configure the <ECA policy name>.ecaPlcy-meta.xml file with
these fields.
Field Description externalClientApplication The name of the parent external client app as specified in its label field. isEnabled Defines whether the external client app can use plugins. Set this field to true.isOauthPluginEnabled Defines whether the external client app can use the OAuth plugin. Because the isEnabled plugin automatically turns on all plugins and this app is only for SAML, set this field to false.isSamlPluginEnabled Determines whether the external client app can use the SAML plugin. Set this field to true.label The name for the configurable policies. Here’s an example <ECA policy name>.ecaPlcy-meta.xml file.<?xml version="1.0" encoding="UTF-8"?> <ExtlClntAppConfigurablePolicies xmlns="http://soap.sforce.com/2006/04/metadata"> <externalClientApplication>mysamleca</externalClientApplication> <isEnabled>true</isEnabled> <isSamlPluginEnabled>true</isSamlPluginEnabled> <isOauthPluginEnabled>false</isOauthPluginEnabled> <label>myecapolicy</label> </ExtlClntAppConfigurablePolicies>
Create the External Client App SAML Policies Configuration
- In your <project directory>/force-app/main/default/ directory, create a directory called extlClntAppSamlConfigurablePolicies.
- In the extlClntAppSamlConfigurablePolicies, create a file called <ECA SAML policy name>.ecaSamlPlcy-meta.xml.
- Configure the fields for the <ECA SAML policy
name>.ecaSamlPlcy-meta.xml file.For detailed information about what fields to include, see the ExtlClntAppSamlConfigurablePolicies metadata type in the Metadata API Reference Guide.Here’s an example <ECA SAML policy name>.ecaSamlPlcy-meta.xml file. This definition includes custom attributes, which are specified in the ExtlClntAppSamlConfigurablePoliciesAttribute subtypes.
<?xml version="1.0" encoding="UTF-8"?>
<ExtlClntAppSamlConfigurablePolicies xmlns="http://soap.sforce.com/2006/04/metadata">
    <acsUrl>https://www.<serviceprovideracsurl>.com</acsUrl>
    <entityUrl>https://www.<serviceproviderentityid>.com</entityUrl>
    <externalClientApplication>mysamleca</externalClientApplication>
    <issuer>https://mydomainname.my.salesforce.com</issuer>
    <label>myeca_samlpolicies</label>
    <nameIdFormat>Unspecified</nameIdFormat>
    <singleLogoutUrl>https://www.<serviceprovidersinglelogouturl>.com</singleLogoutUrl>
    <singleLogoutBindingType>RedirectBinding</singleLogoutBindingType>
    <subjectType>CustomAttribute</subjectType>
    <subjectCustomAttribute>MyCustomField</subjectCustomAttribute>
    <certificate>MIIDzDCCArQCCQCFaZKGsGqZ...</certificate>
    <encryptionCertificate>MIIDzDCCArQCCQCFaZKGsGqZ...</encryptionCertificate>
    <encryptionType>AES_128</encryptionType>
    <signingAlgorithmType>SHA1</signingAlgorithmType>
    <customAttributes>
        <key>User Firstname</key>
        <formula>$User.FirstName</formula>
    </customAttributes>
    <customAttributes>
        <key>User Country</key>
        <formula>$User.Country</formula>
    </customAttributes>
</ExtlClntAppSamlConfigurablePolicies>
Create the Package.xml File
Before you deploy the metadata components, bundle them together in a package.xml file.
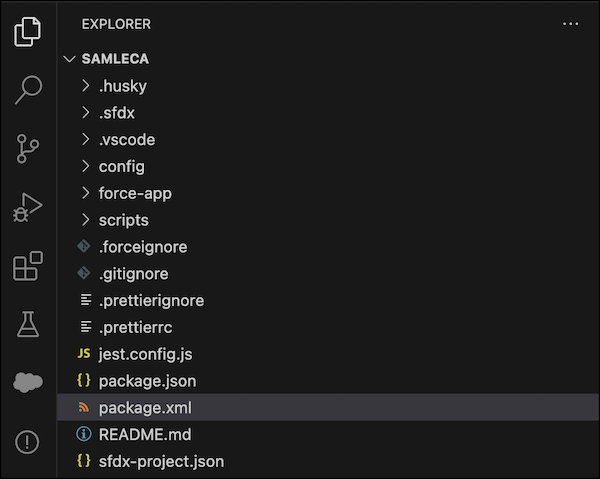
- In your <project directory>, create a file called
package.xml. Don’t create a subfolder for this file. Here’s how
the file structure looks.
- Add references to the ExternalClientApplication, ExtlClntAppConfigurablePolicies, and
ExtlClntAppSamlConfigurablePolicies metadata types to the
package.xml file.Here’s an example package.xml file.
<?xml version="1.0" encoding="UTF-8"?>
<Package xmlns="http://soap.sforce.com/2006/04/metadata">
    <types>
        <members>*</members>
        <name>ExternalClientApplication</name>
    </types>
    <types>
        <members>*</members>
        <name>ExtlClntAppConfigurablePolicies</name>
    </types>
    <types>
        <members>*</members>
        <name>ExtlClntAppSamlConfigurablePolicies</name>
    </types>
    <version>63.0</version>
</Package>
Deploy the SAML-Enabled External Client App
Push the changes from your local project directory to Salesforce.
- Open a new Terminal window.
- Go to the <project directory>.
- To deploy the package.xml file, run this command.
sf project deploy start --manifest package.xml -o <username@targetorg.com> - To verify that the metadata was deployed correctly, run this command.
sf project retrieve start --source-dir force-app -o <username@targetorg.com>After the external client app is deployed, you can see it in the External Client App Manager in Setup. But you can’t view or edit its SAML configuration information from Setup.
To troubleshoot errors with deploying and retrieving metadata, see Debug Errors When Deploying or Retrieving Source in the Salesforce CLI Setup Guide.
After you deploy the SAML-enabled app and verify its information, complete your SSO setup with a final step: Map Salesforce Users to the SAML Service Provider.
Edit the SAML-Enabled External Client App
If necessary, make edits to your external client app SAML configuration.
- Update the corresponding metadata component files in your <project
directory>/force-app/main/default/ directory.
- To update general information about the external client app, such as its description or contact email, edit the <external client app name>.eca-meta.xml file.
- To update the external client app policies, such as the label for the policies component, edit the <ECA policy name>.ecaPlcy-meta.xml file.
- To update the SAML configuration information, edit the <ECA SAML policy name>.ecaSamlPlcy-meta.xml file.
- To push the changes to Salesforce, deploy the package.xml file
again by running this command.
Complete this step even if you edit only one of the components. You can't deploy a single component.sf project deploy start --manifest package.xml -o <username@targetorg.com> - To verify that the metadata was deployed correctly, run this command.
sf project retrieve start --source-dir force-app -o <username@targetorg.com>