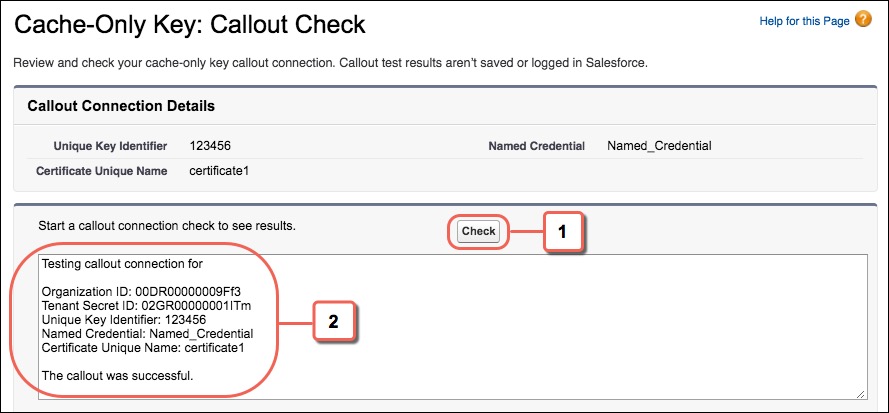
Optimize Security Using Named Credentials and Cache-Only Keys
You can use an externally managed key as your cache-only key. External credentials create a secure connection between Salesforce and your external-key repository. For optimal security, set up an external credential that uses a named principal to authenticate into your external service on behalf of all users authorized to manage key material. Salesforce recommends you use this method instead of a legacy named credential if you use an external key management service along with cache-only keys.
Required Editions
| Available in both Salesforce Classic (not available in all orgs) and Lightning Experience. |
| Available in: Enterprise, Performance, Unlimited, and Developer Editions. Requires purchasing Salesforce Shield or Shield Platform Encryption, and the External Key Management Service. |
| User Permissions Needed | |
|---|---|
| To create, edit, and delete named credentials: | Customize Application |
| To allow cache-only keys with BYOK: | Customize Application AND Manage Encryption Keys |
| To generate, destroy, export, import, upload, and configure tenant secrets and customer-supplied key material: | Manage Encryption Keys |
Before you begin, make sure to check the Prerequisites and Terminology for Cache-Only Keys. When you use a credential based on a named principal with your cache-only key, you provide both the location and the unique identifier for your key, so have those values ready before you begin.
To complete this process you will need the location URL and the unique ID of the external key. Please create your key material in your external KMS, and obtain the URL and ID before proceeding.
See Named Credentials.
1. Configure an External Credential
The external credential provides the external KMS the authentication to supply a key to your org.
- In Setup, in the Quick Find box, enter Named Credentials, and then select Named Credentials.
- Click External Credentials.
- Enter a label and name for the external credential.
-
From the Authentication Protocol dropdown list, select a protocol type. See Authentication
Protocols for Named Credentials.
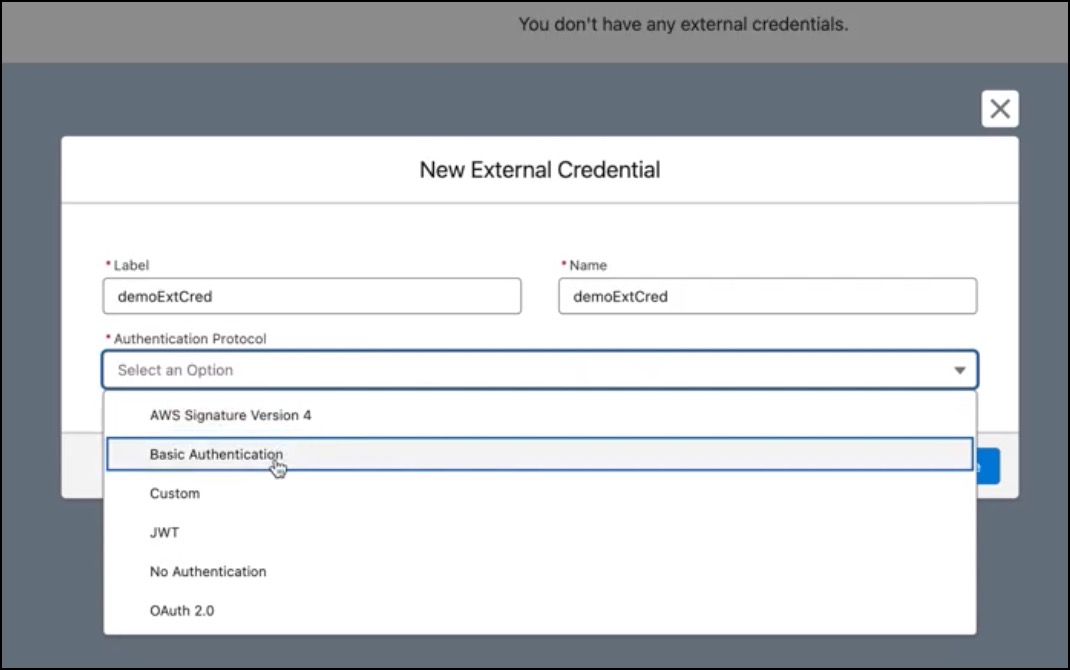
- Save the new external named credential. Salesforce shows the properties page for your new named credential.
Leave the properties page open and then go on to configure an external named principal.
2. Configure an External Named Principal
The external named principal links an external credential to a permission set, so your org can make callouts by using the named credential.
- If you aren’t there already, open the properties page for the external credential for which you want to create a named principal.
- In the Principals box, click New.
-
Enter a parameter name and leave the rest of the values as is.
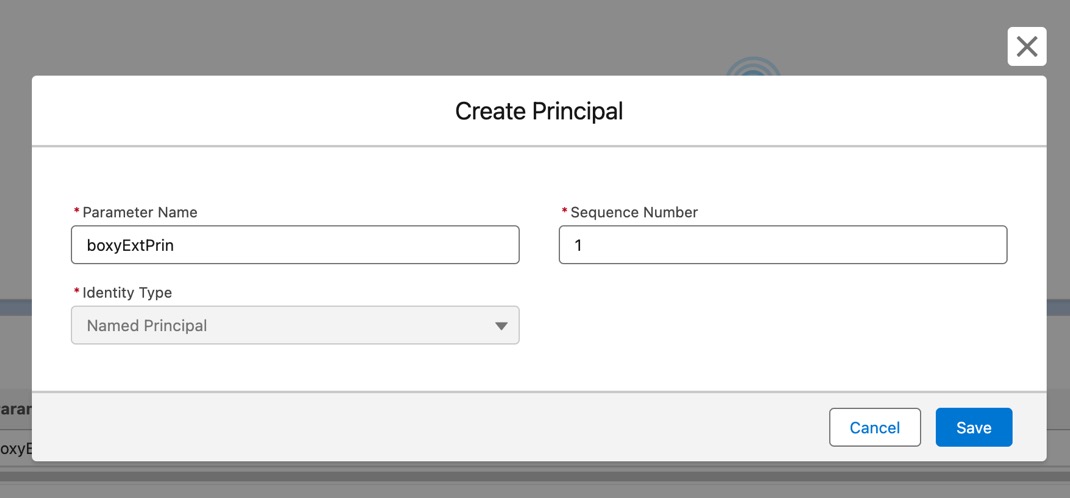
- Save the new external named principal.
Next, create the linking permission set.
3. Create a Permission Set for the Named Principal
The members of the permission set can access the named principal.
Review Enable External Credential Principals for details on creating a permission set for a named principal.
- In Setup, in the Quick Find box, enter Permission Sets, and then select Permission Sets.
- Select New.
- Enter a label and an API name for the permission set.
-
Save the permission set.
Salesforce shows the properties page for your new permission set.
-
While you're here, get the ID of the permission set from the browser address bar. You
need the permission set ID later when you assign users.
The permission set ID is everything to the right of
%2Fin the URL:
- To show the principal access properties, select External Credential Principal Access.
-
In the External Credential Principal Access section, click
Edit.
Salesforce shows the external principal chooser.
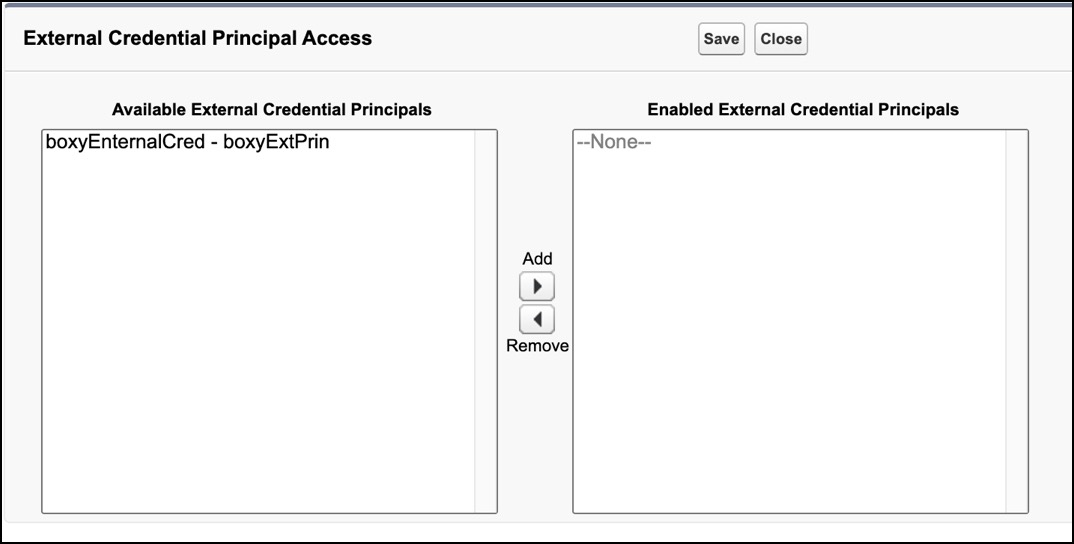
- Select the principal that you want to use, click Add, and then save your changes.
Next, assign the Automated Process user (autoproc) to the
permission set.
4. Assign the autoproc User to the Permission Set
To assign the Automated Process user (autoproc) to the permission
set, run a query on your org. You can use your preferred development environment. Always run a
query to make this assignment, because you can’t assign the autoproc user via
the UI.
- Open your preferred development environment that has access to your Salesforce org.
-
Prepare the query as shown in this example. In place of
permission_set_id, enter the permission set ID that you got when you created the permission set.insert new PermissionSetAssignment( AssigneeId = [SELECT id FROM User where alias = 'autoproc'].Id, PermissionSetId = 'permission_set_id' ); -
Execute the query.
If your dev environment is set up properly, the result is
Success. -
To verify the assignment, return to your permission set property page, and then click
Manage Assignments.
The Automated Process user is the only account assigned to the permission set.
Next, create the named credential.
5. Create a Named Credential for the Cache-Only Key
The named credential specifies the URL of a callout endpoint and its required authentication parameters in one definition.
- In Setup, in the Quick Find box, enter Named Credentials and then select Named Credentials.
- Click New.
- Enter values for the credential label and name.
- In the URL field, enter the URL value that you saved earlier that locates the external key.
-
In the External Credentials field, enter the name of the external credential you
created previously.
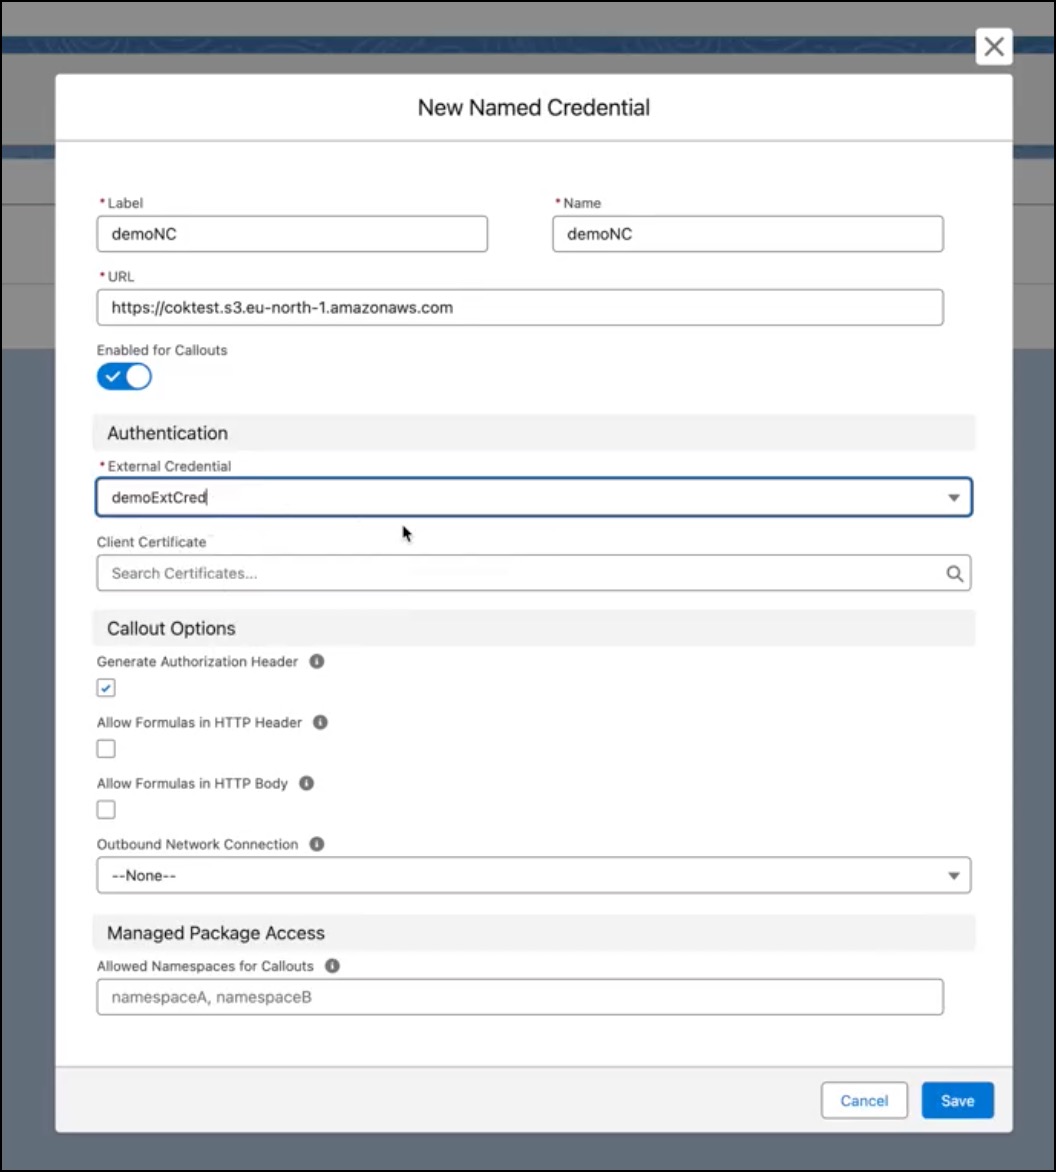 For guidance on the other New Named Credentials parameters, see Create or Edit an External Credential.
 -
Save the new credential.
In the Named Credentials list, your new credential has a type which isn’t Legacy. (Named credentials with no named principal are Legacy named credentials.)
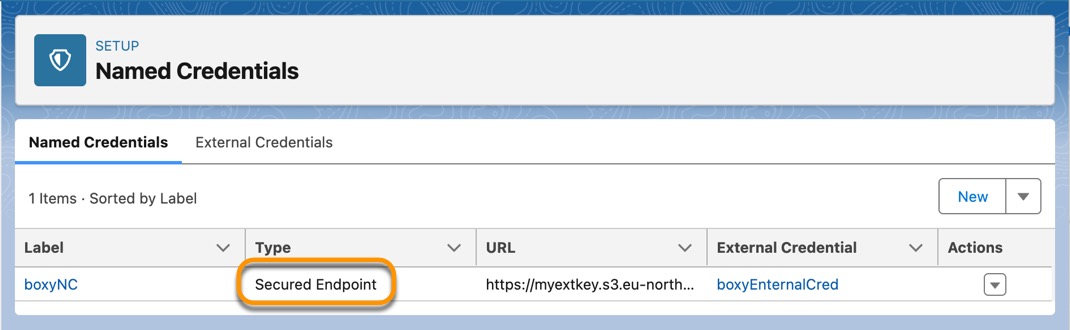
Next, finish this process and create the cache-only key.
6. Use the Named Credential with a New Cache-Only Key
Define the cache-only key object that represents the external key.
- In Setup, in the Quick Find box, enter Key Management, and then select Key Management.
-
Click BYOK.
Salesforce shows the Bring Your Own Key page.
 Note If you're asked for a certificate, create or select a self-signed or CA-signed certificate. See Generate a BYOK-Compatible Certificate.
 - From the Choose Certificate dropdown list, select a BYOK-compatible certificate.
- Select Use a Cache-Only Key.
- Enter the unique identifier for the external key as provided by the KMS that you created previously.
-
From the Named Credential dropdown list, select the named credential that you created
earlier.
Salesforce checks the connection to the endpoint specified by the named credential. If Salesforce can reach the endpoint, the key specified for the unique key identifier becomes the active key. All data marked for encryption by your encryption policy is encrypted with your cache-only key.
If Salesforce can’t reach the specified endpoint, it displays an error to help you troubleshoot the connection.
- When Salesforce can reach the endpoint, save your work.