
Configure Call Routing and Call Escalation for the Agent
Configure an Omni-Channel flow to transfer inbound calls to the voice-enabled agent. Create an escalation Omni-Channel flow to disconnect the agent and, if supported by your telephony or CCaaS system, transfer the call to a rep. Add the activated escalation flow to the agent.
Required Editions
| Available in: Lightning Experience |
| Available in: Enterprise, Unlimited, and Developer Editions with Foundations or Agentforce 1 Editions, and Salesforce Voice add-ons. |
| User Permissions Needed | |
|---|---|
| To open, edit, or create a flow in Flow Builder: | Manage Flow |
| To grant the Omni-Channel flow access to update the voice call records: | Contact Center Admin permission set OR Contact Center Admin (Partner Telephony) permission set |
| To view and edit a connection in Agentforce Builder: | Manage Agentforce Service Agents AND Manage AI Agents OR Customize Application |
Configure Inbound Call Transfers to the Voice-Enabled Agent
Create an Omni-Channel flow in Salesforce to transfer incoming calls to the agent. If needed, you can transfer calls to different agents.
-
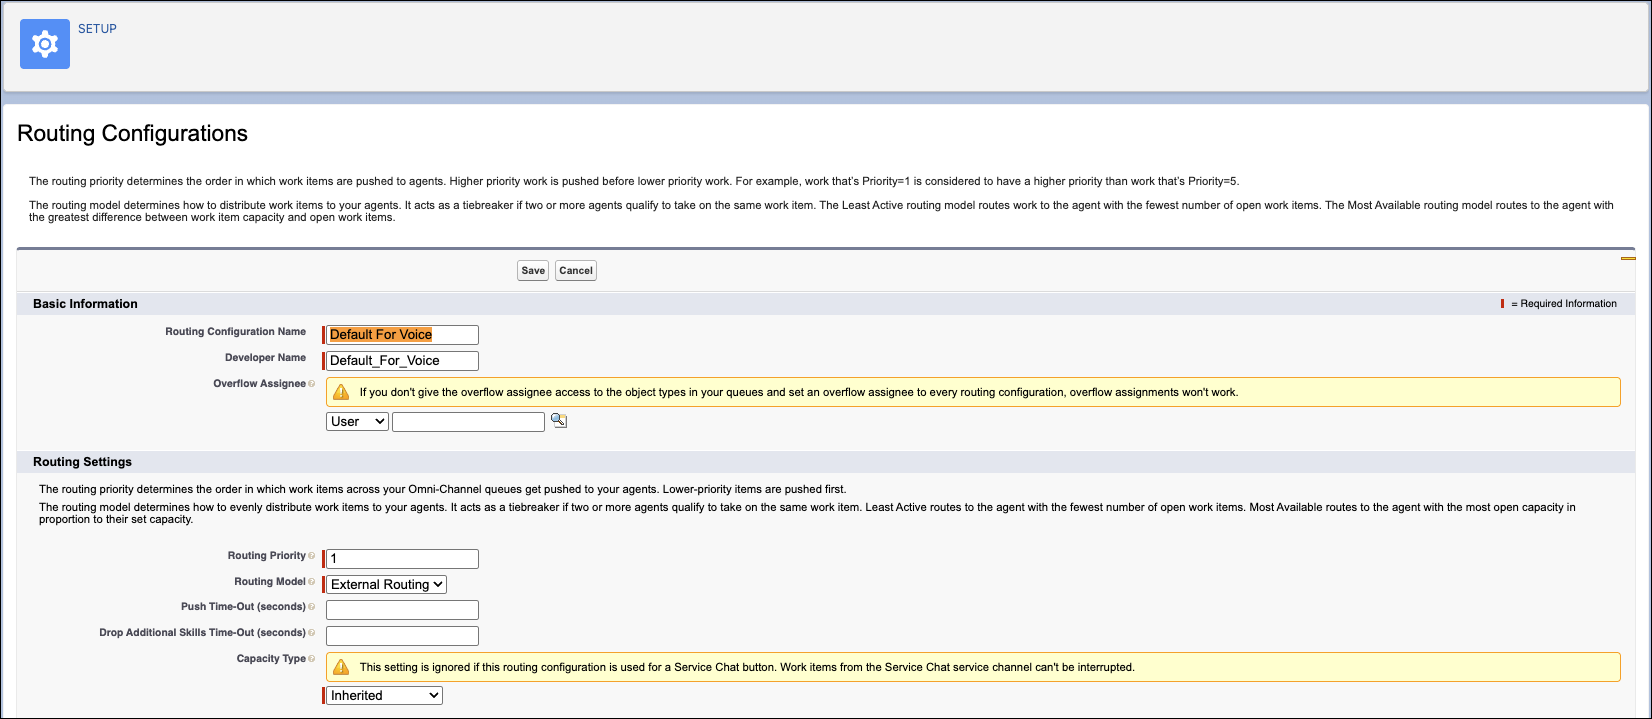
Create a routing configuration. Routing configuration
determines how the calls are routed to the Agentforce Service agent. In the Routing
Configuration window, enter these values. Use default values for all other settings.
- Routing Priority: 1
- Routing Model: External Routing
- Capacity Type: Inherited
- Percentage of Capacity: 100%
-
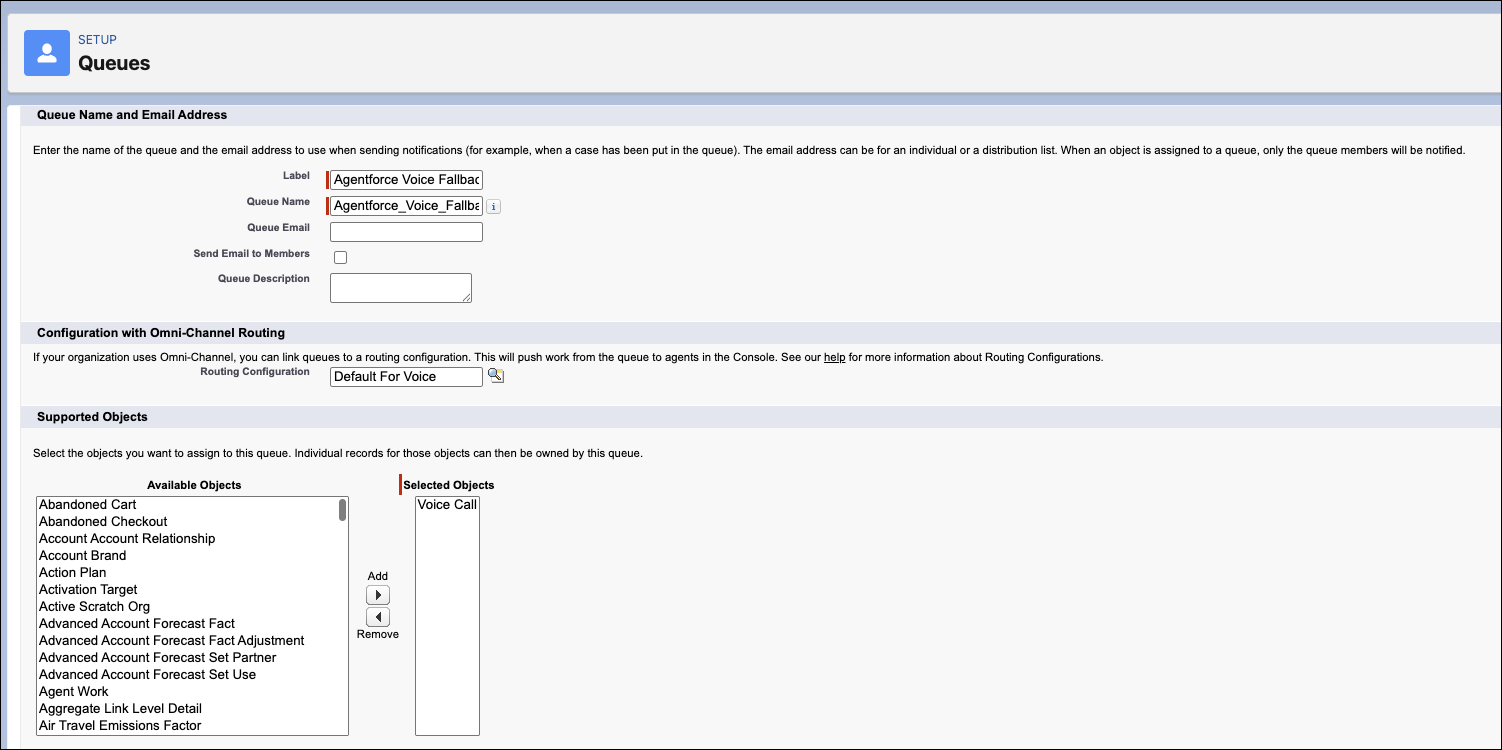
Create a queue. This queue is used as the fallback
queue for the inbound call transfers. Enter these values in the Queues Setup window. Use
default values for all other settings.
- Routing Configuration: Select the routing configuration that you created in Step 1.
- Supported Objects: Voice Call
- Queue Members: None
-
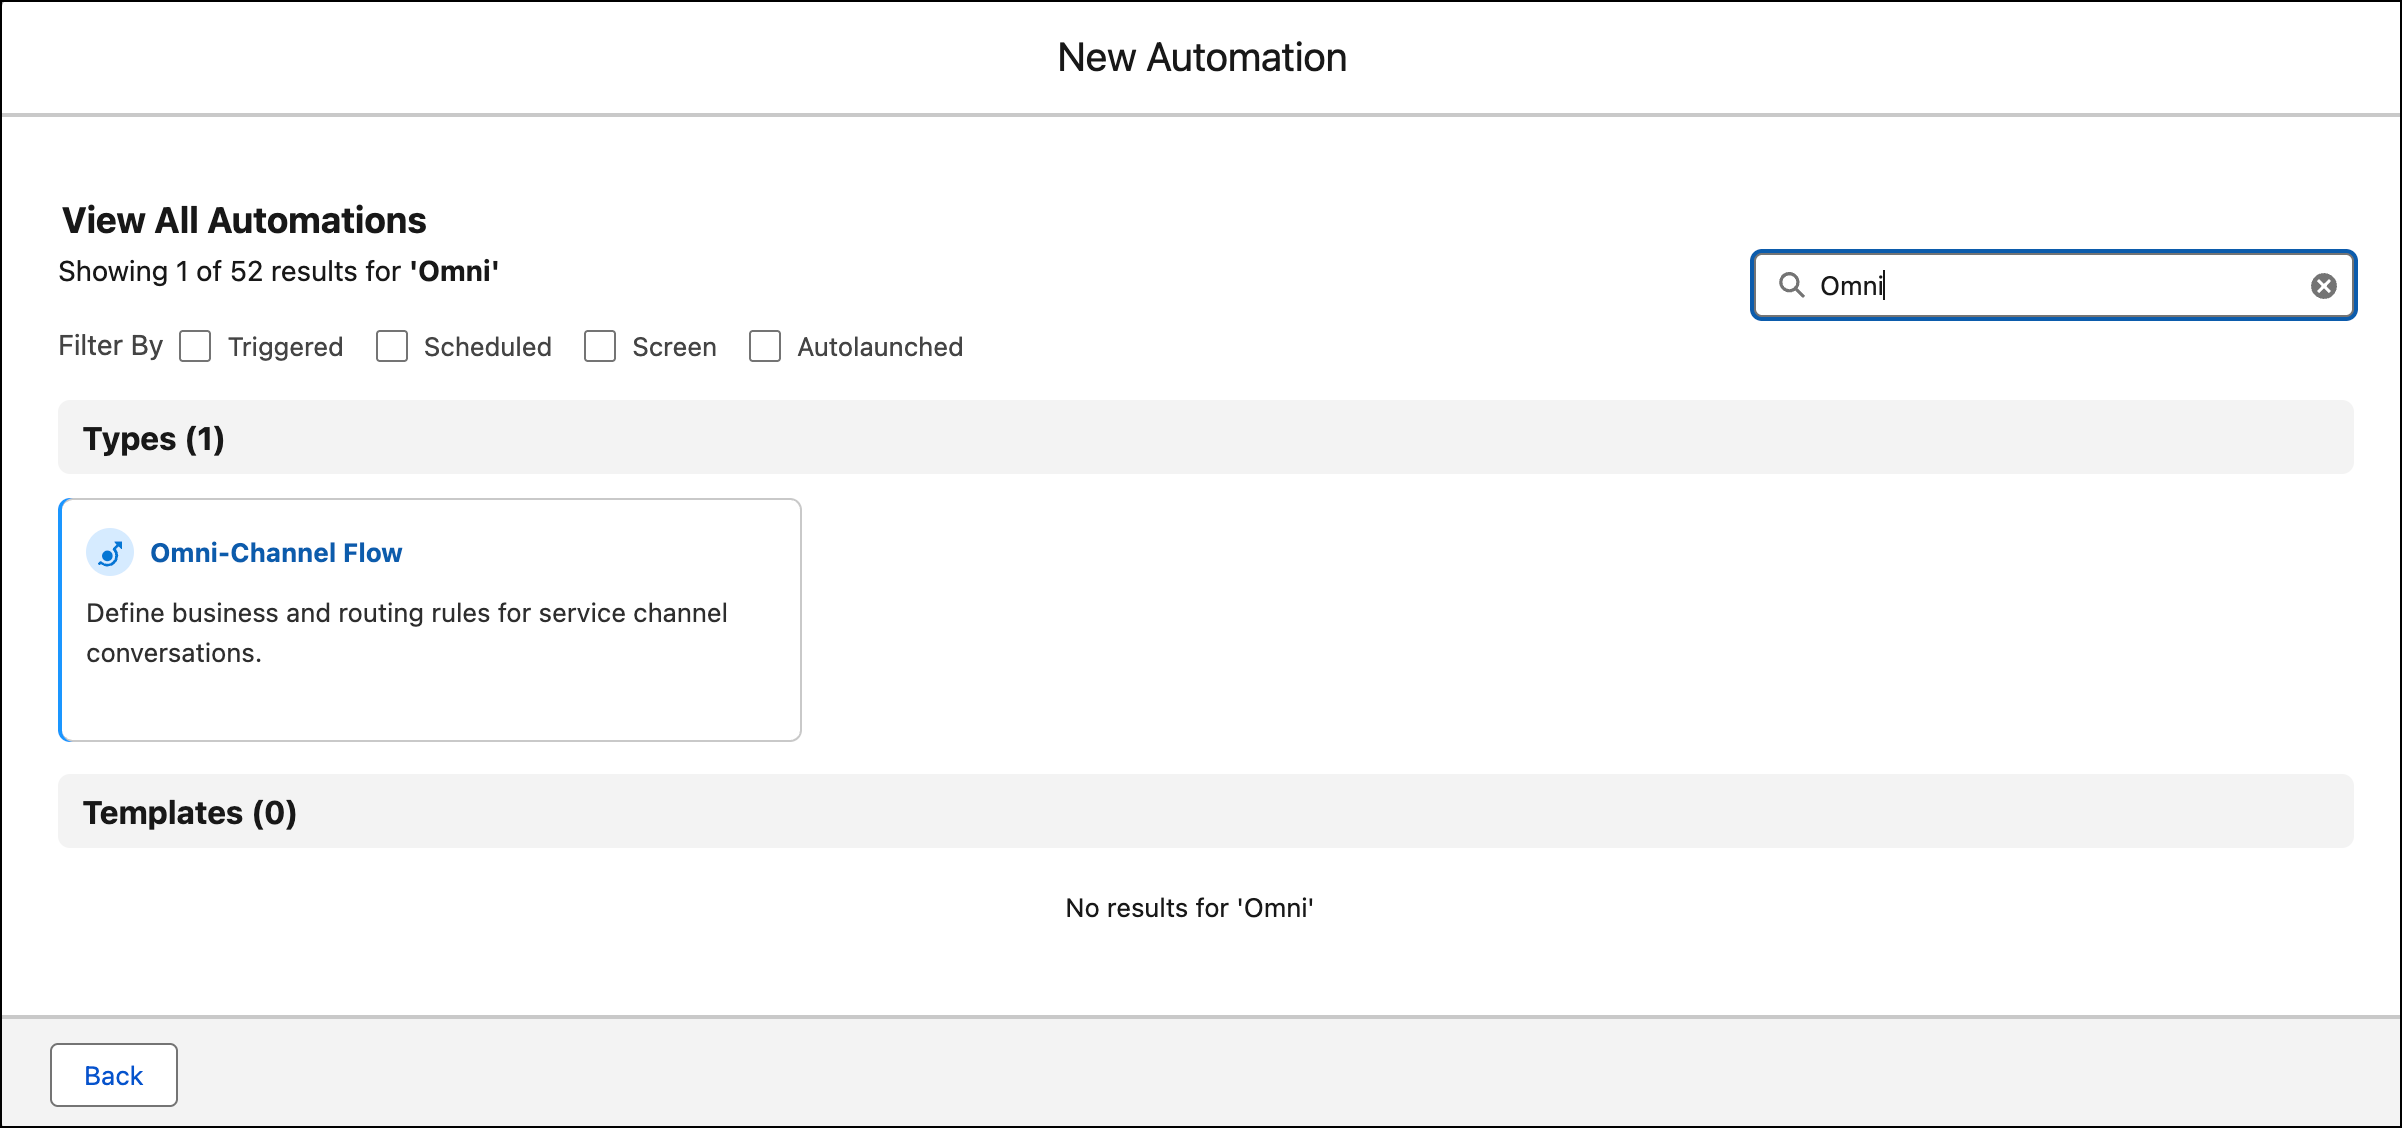
In Flow Builder, click New Flow and create an Omni-Channel flow.
-
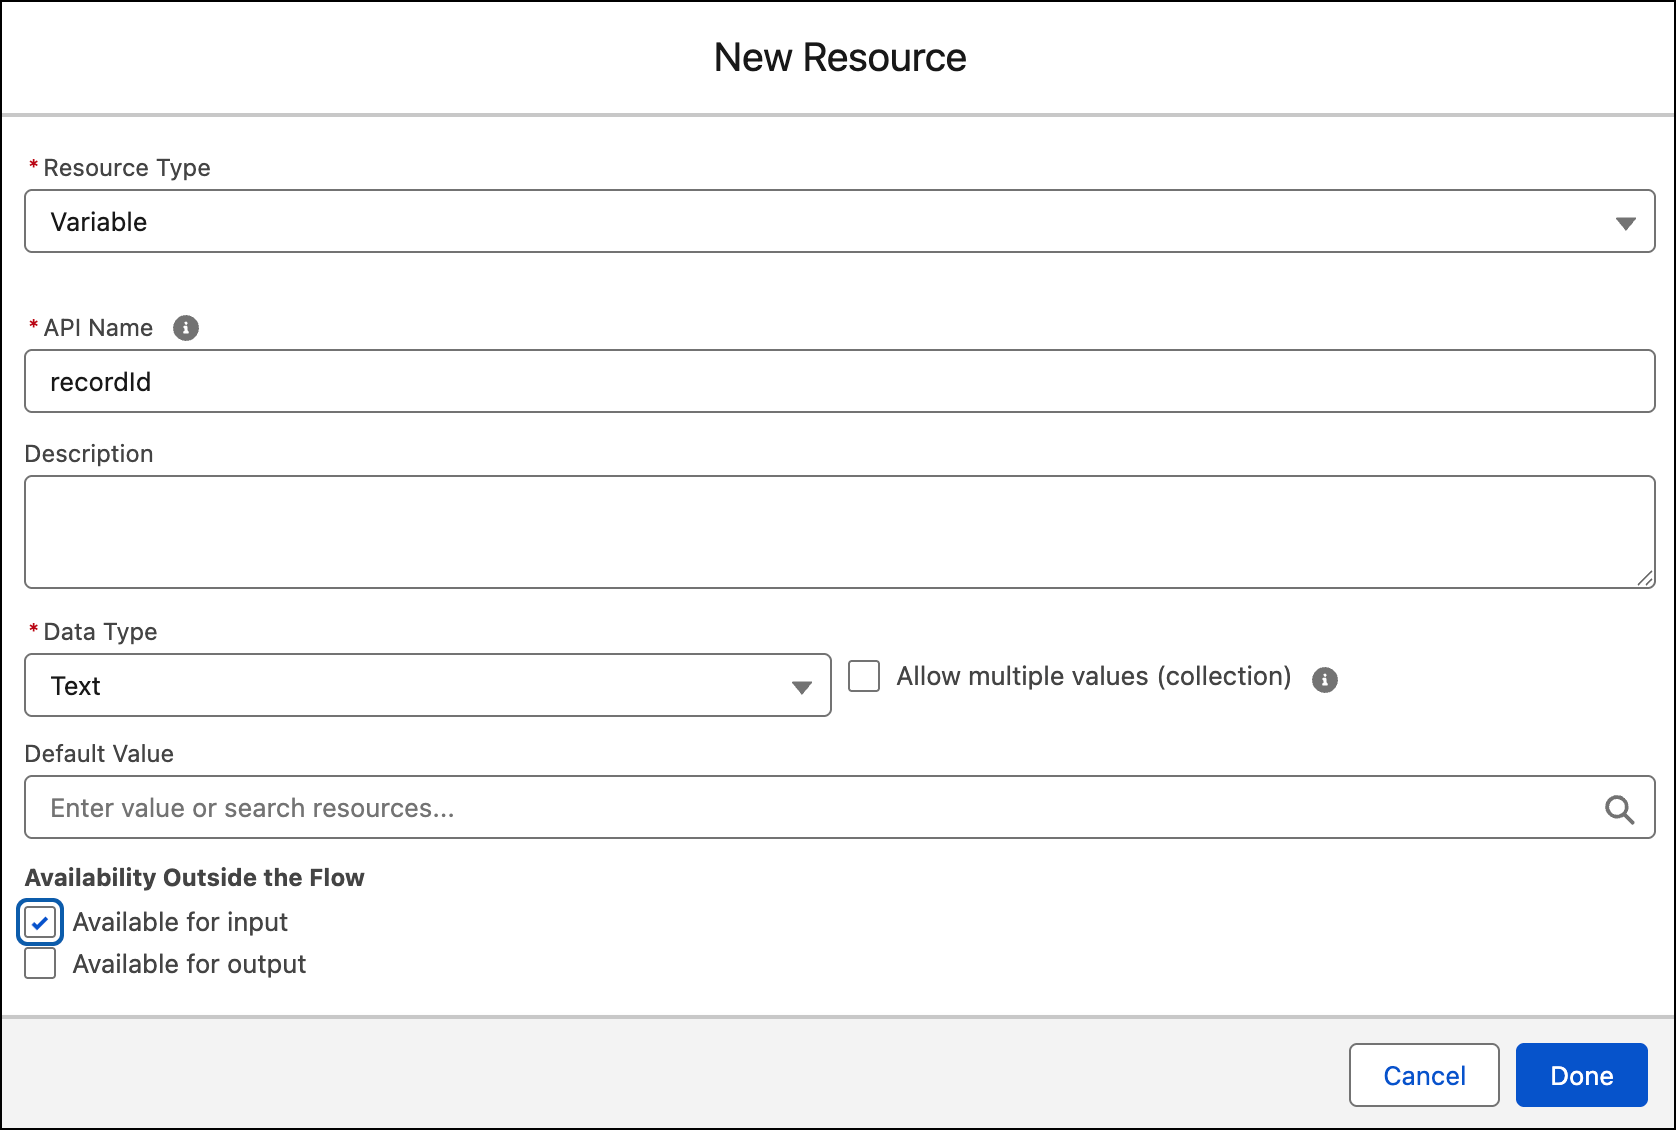
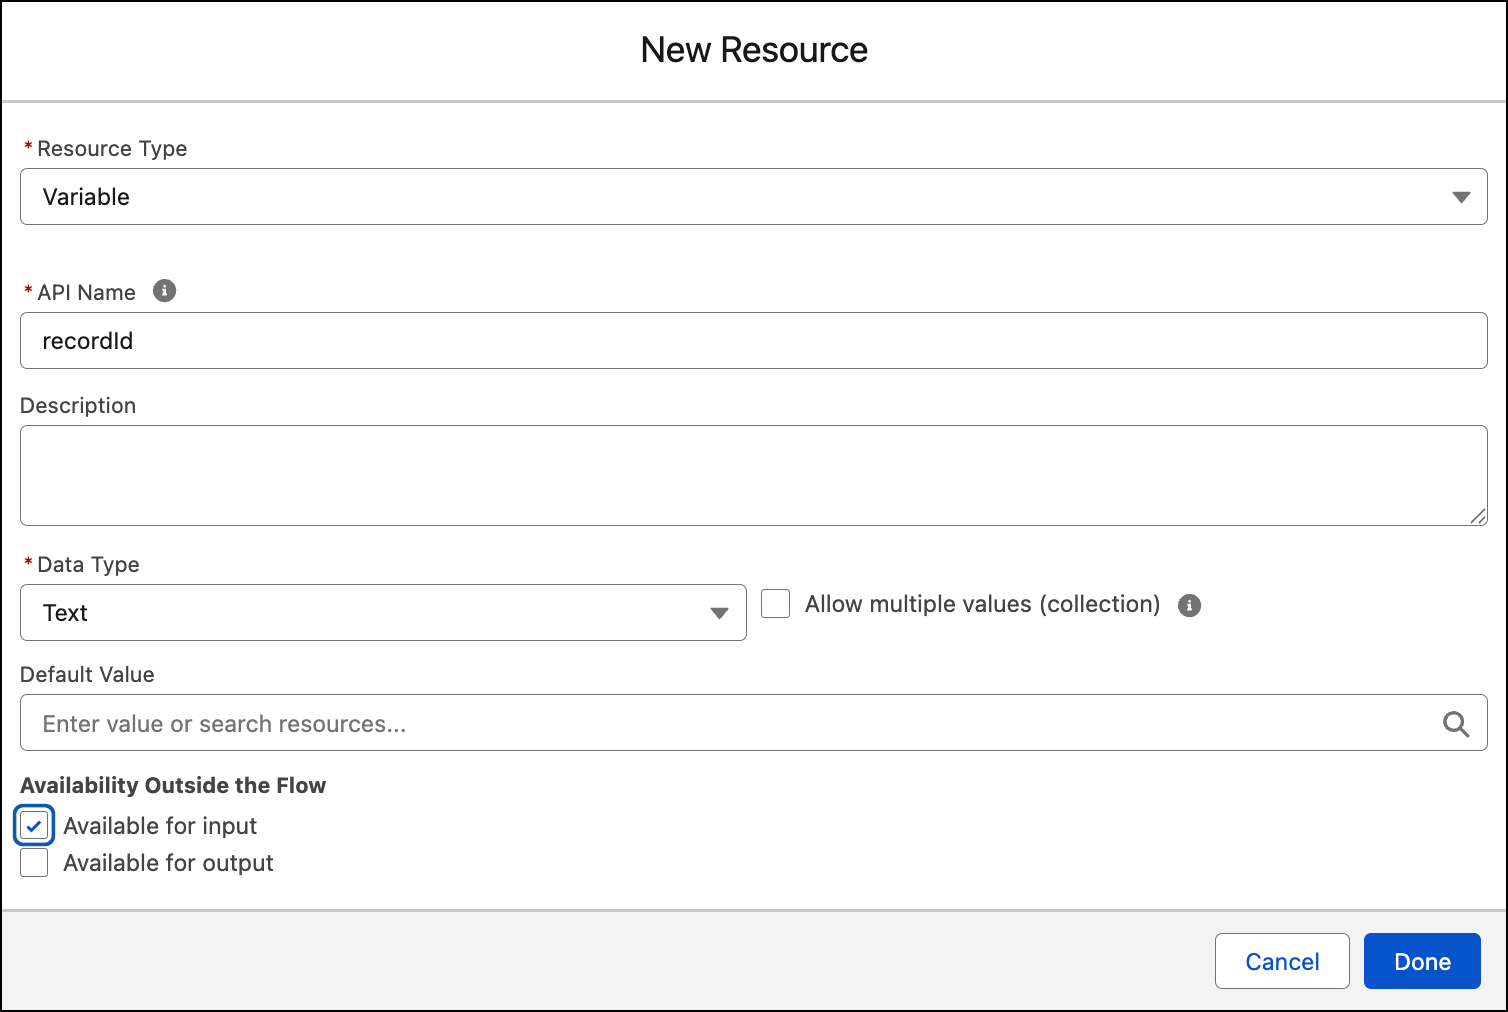
Create an input variable that stores the Voice call record ID. Name the variable
recordId, set the data type to Text, select
Available for input, and then click Done.
The telephony system provides the Voice call record ID as input to this Omni-Channel flow. For details, see Create the recordId.
-
Drag the Route Work action onto the canvas.
 Tip You can add multiple Route Work actions to transfer work items to different Agentforce agents.
 - Give the action a label and API name and, optionally, a description.
- Under Set Input Values, in the How Many Work Records to Route field, select Single.
- In the Record ID Variable field, select the recordId variable.
- In the Service Channel field, select Phone.
- In the Route To field, select Agentforce Service Agent.
-
In the Agentforce Service Agent field, select the name of the voice-enabled agent.
If you agent doesn't appear in the list, make sure your agent is activated. See Activate or Deactivate Your Agent.
-
In the Fallback Queue field, choose Select Queue, and then select
the queue you created earlier that supports the VoiceCall object.
 Note If the queue doesn’t support the VoiceCall object, the routing fails. Although the Fallback Queue field is required, it isn’t used to transfer the call.
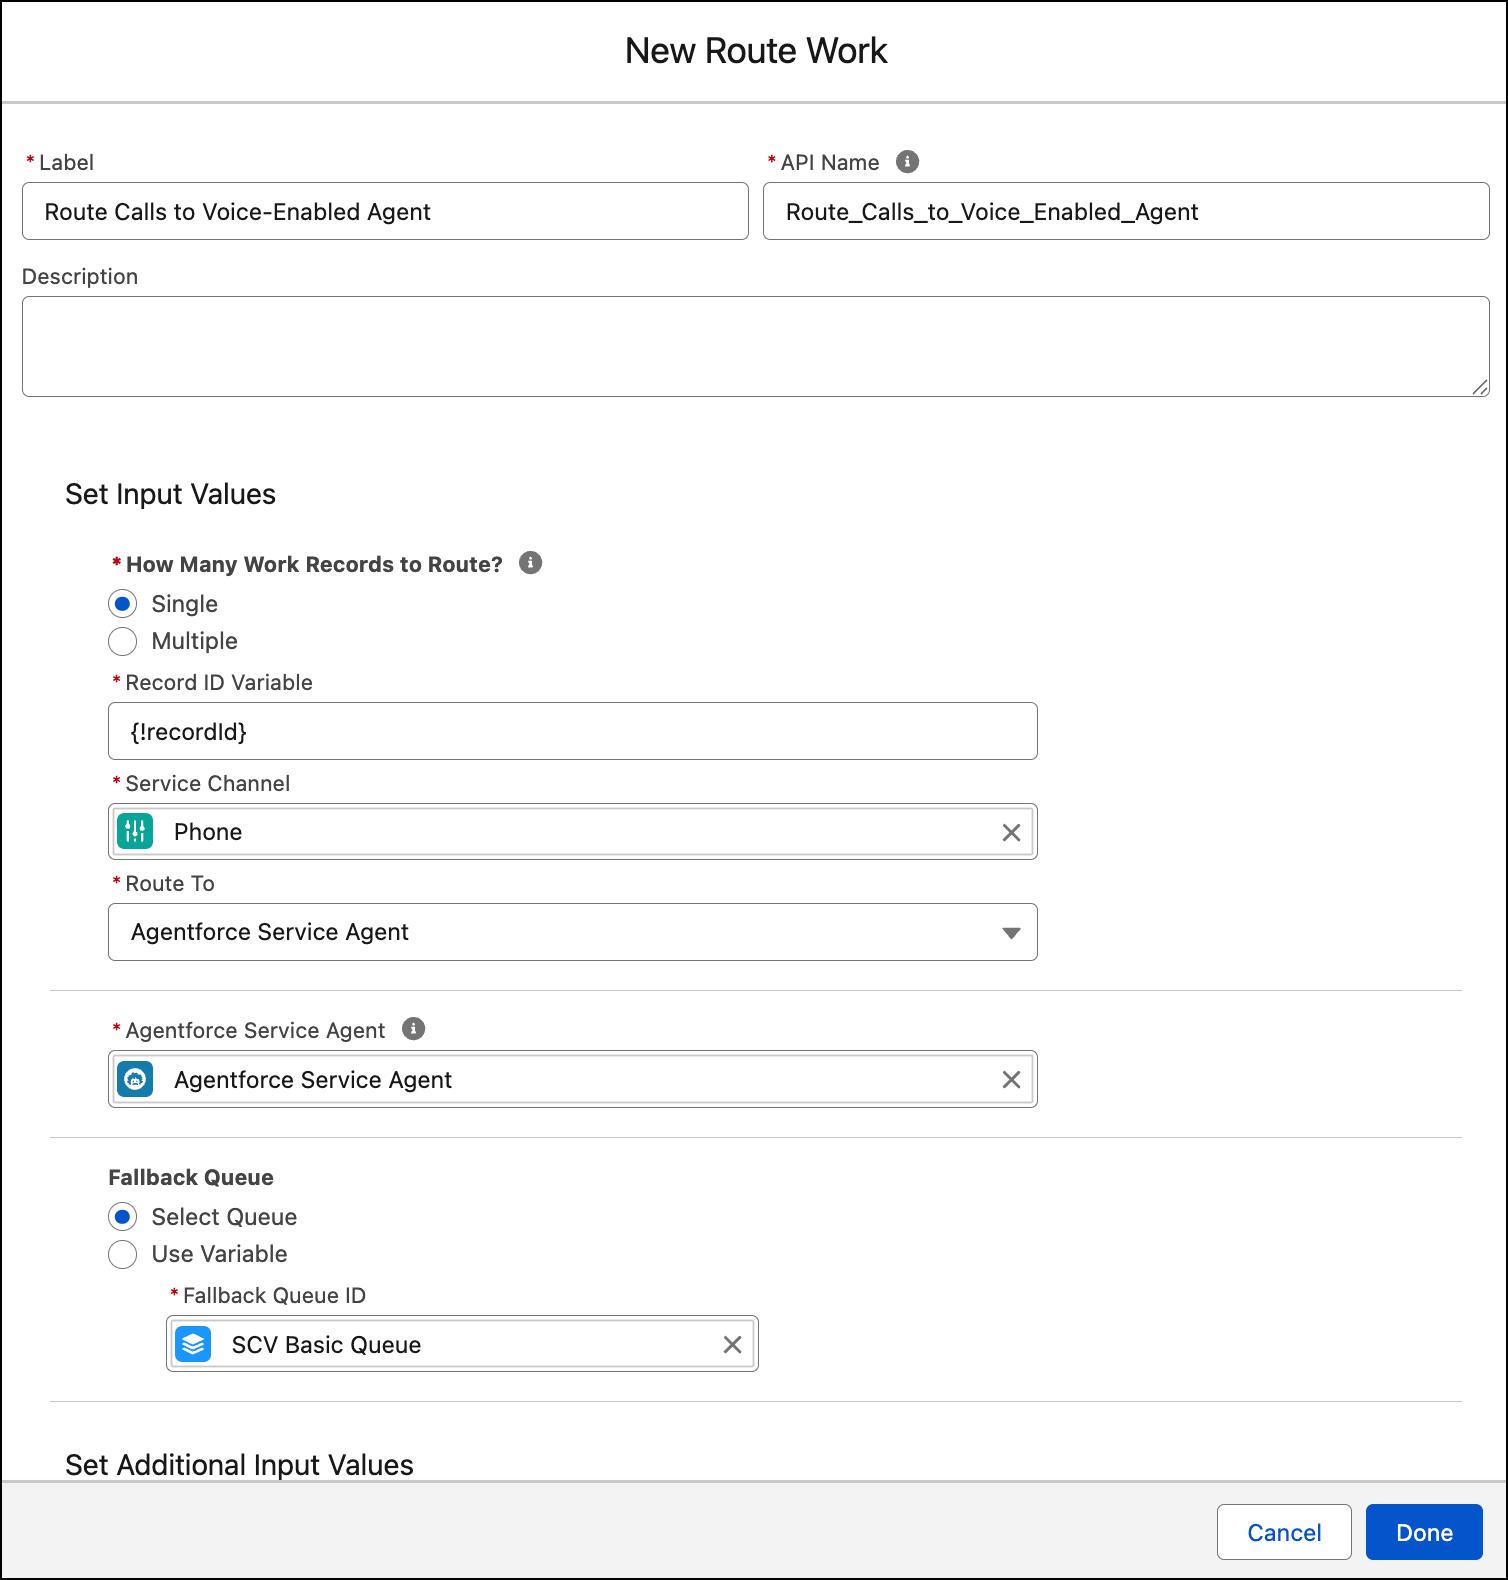
- Click Done.
- Verify that all actions in the flow are connected.
-
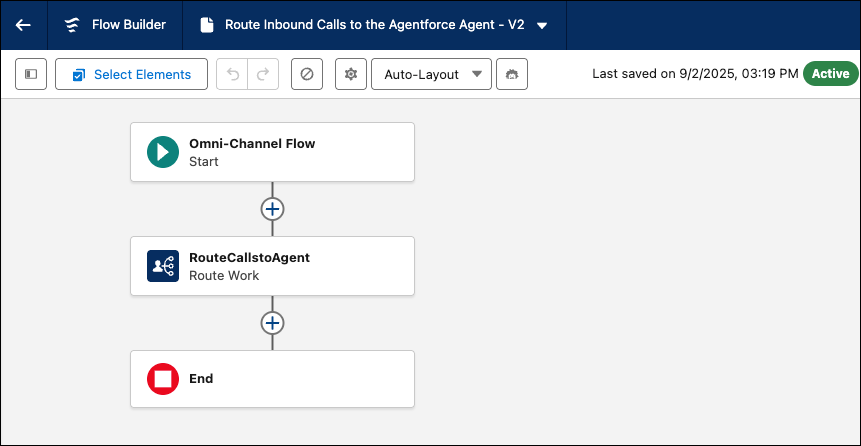
Save and activate the Omni-Channel flow.
Here’s a sample flow that transfers the inbound call to an agent.
- To verify that the inbound flow is added in the Agentforce Builder, from the Agentfore Studio app, open expand the telephony connection for the agent. On the Routing tab, verify that the inbound flow is added.
- To verify that the inbound flow is added in the legacy builder, from the Agentforce Agents Setup page, lauch your agent. On the connections tab, open the connection for the agent verify that the inbound flow is added.
Create the Escalation Omni-Channel Flow
If an agent needs help assisting the customer, Agentforce triggers an escalation flow. Create the escalation flow to disconnect the agent and transfer the call to a rep. After Salesforce disconnects from the call, call control returns to the telephony system.
- In Flow Builder, click New Flow and create an Omni-Channel flow.
-
Create an input variable that stores the Voice call record ID. Name the variable
recordId, set the data type to Text, select
Available for input, and then click Done.
The telephony system provides the Voice call record ID as input to this Omni-Channel flow.
-
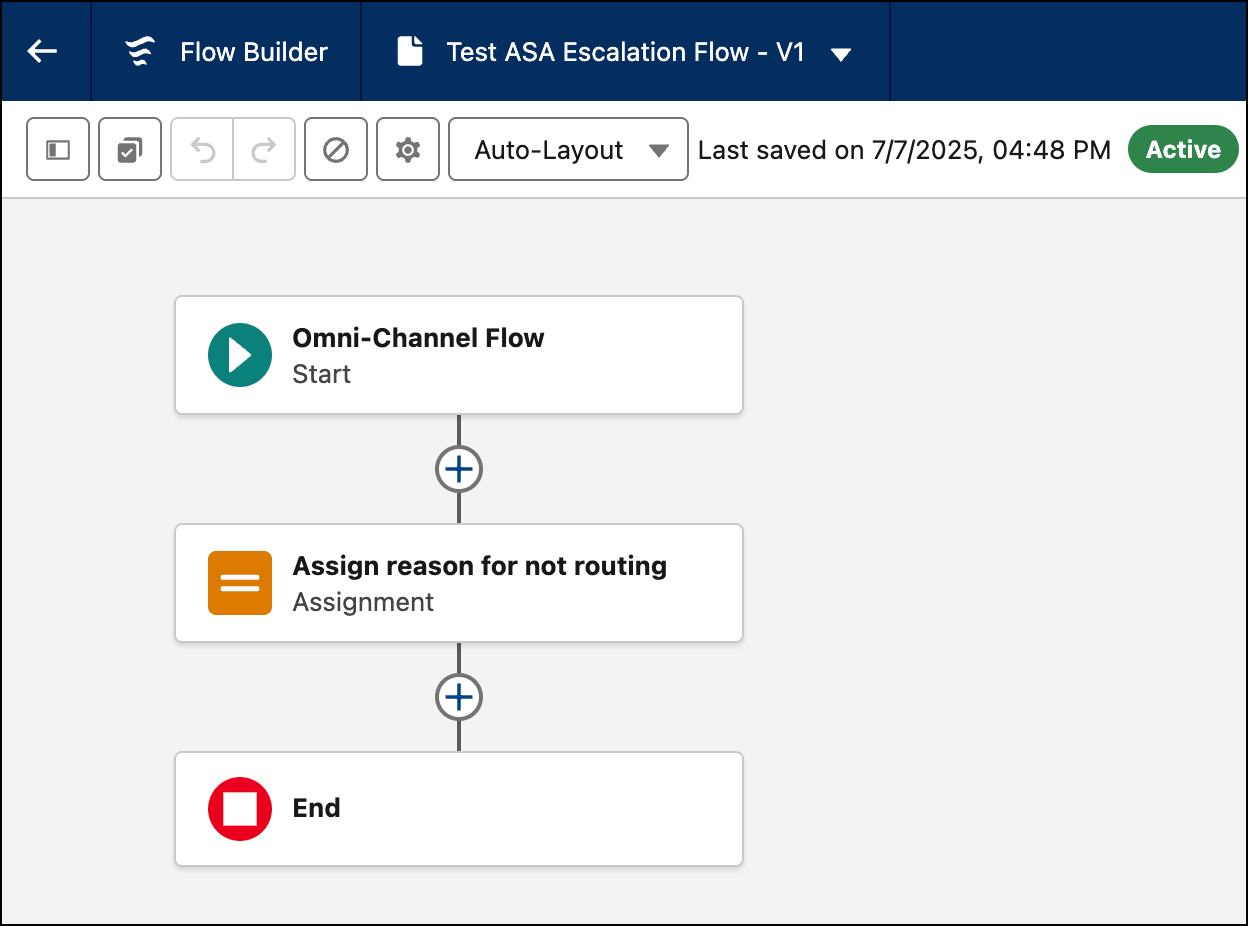
Add at least one action to the flow.
You can’t save an empty flow.
- Click Done.
- Verify that all actions in the flow are connected.
-
Save and activate the Omni-Channel flow.
Agents can use an outbound Omni-Channel flow to transfer the conversation to a queue, rep, or another destination you specify. For details, see Transfer Conversations from an Agent with an Omni-Channel Flow.
Add the Escalation Flow to the Agent in the Agentforce Builder
To know which flow to run during an escalation, add the activated escalation flow to the agent.
- From the Agents list in the Agentforce Studio app, open the agent you want to add the escalation flow to.
- In the Explorer panel, In the Explorer panel, under Agent Definition Settings, expand Connections.
- Open the Telephony connection that you created in Add a Telephony Connection.
-
Click Routing. In the Escalation Flow field in the Escalations section, select the escalation flow that you just created.
If you can’t select a flow, ensure that the agent is deactivated. Click New Version if you are using a committed version. If your flow doesn’t appear in the list, refresh the page, activate the flow, and then try again.
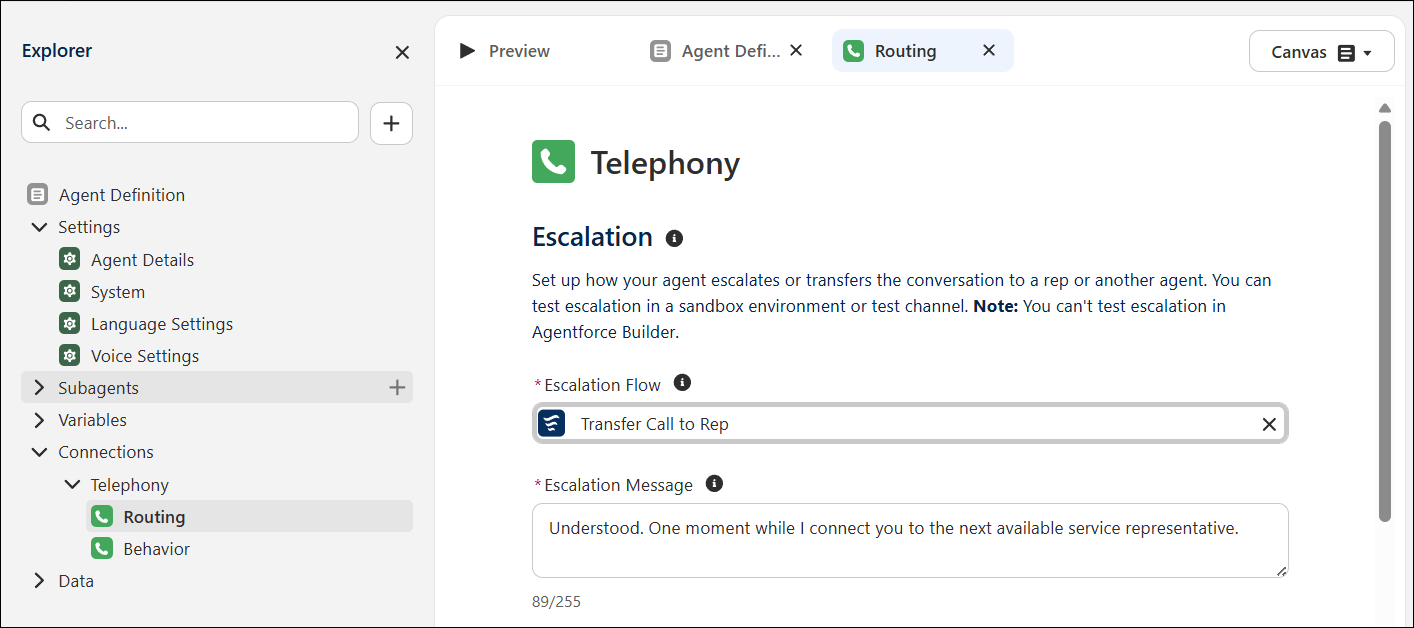
- In the Escalation Message field, if needed, modify the message that the agent says to the customer when the call is transferred to a rep.
- Save the connection and activate the agent.
Add the Escalation Flow to the Agent in the Legacy Builder
To know which flow to run during an escalation, add the activated escalation flow to the agent.
- From Setup, in the Quick Find box, enter Agentforce Agents, then select Agentforce Agents.
- To edit the agent, click the dropdown to the right of the agent name, and select Open in Builder.
- In Agentforce Builder, click the Connections tab.
- Open the Telephony connection that you created in Add a Telephony Connection.
-
In the Escalation Flow field in the Escalations section, select the escalation flow that
you just created.
If you can’t select a flow, ensure that the agent is deactivated. If your flow doesn’t appear in the list, refresh the page, activate the flow, and then try again.
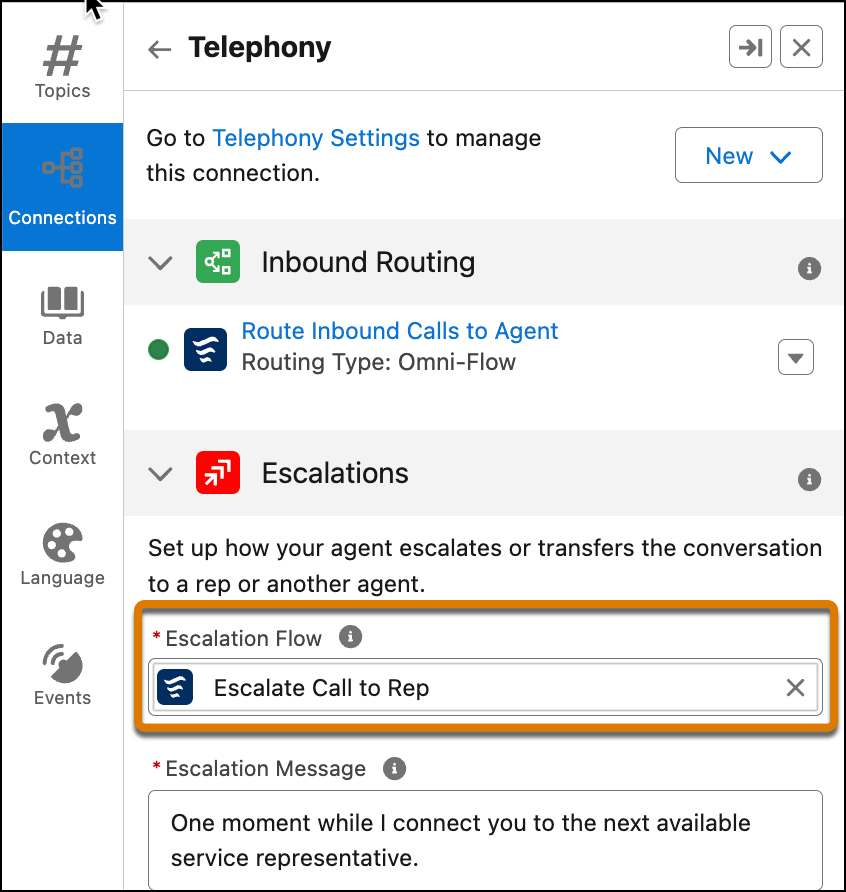
- In the Escalation Message field, if needed, modify the message that the agent says to the customer when the call is transferred to a rep.
- Save the connection.
- Click Activate.