
Example: Agentic RAG with Advanced Data 360 Setup
This example walks you through the end-to-end steps to implement an agent that's grounded with knowledge using Retrieval Augmented Generation (RAG) in Data 360.
Required Editions
| Available in: Enterprise, Performance, and Unlimited Editions with an Einstein for Sales, Einstein for Platform, Einstein for Service, Einstein 1 Service, or Einstein GPT Service add-on. To purchase add-ons, contact your Salesforce account executive. |
You don’t need any prior knowledge of Data 360, AI Models (formerly Einstein Studio), or Agentforce. For a high-level overview, see About Retrieval Augmented Generation and Retrieval Augmented Generation: Quick Look in Trailhead.
Approaches to Building RAG-Powered Agents
There are two main approaches to setting up a RAG-powered agent.
- Quick Start. The benefit of this approach is that you’re up and running with a working solution for your agent without needing to configure all the individual components under the hood. The quick-start approach is to create a data library using Agentforce Data Library. When you create a data library, you select a data source (HTML, PDFs, Knowledge object, uploaded files, web search, or custom retrievers) to search, and assign it to an agent. Agentforce Data Library generates all the underlying RAG solution components automatically. To learn more, see Agentforce Data Library in Salesforce Help and Agentforce Data Library Basics in Trailhead.
- Advanced. The benefit of this approach is that you work directly with the builder tools and gain exposure to the full range of settings and options you can use to customize a RAG solution for a given use case.
This example walks through the advanced approach. By setting up each component individually, you gain an end-to-end, visceral understanding of its configuration options and how it fits into the RAG solution stack. You’re welcome to follow along with the instructions in a Salesforce Developer org. Note that your results may vary.
Scenario in this Example
RAG is expert at extracting relevant information from unstructured data, which includes documents, web sites, and free-form text fields in structured data. This scenario uses free-form text (subject and description) that you add to a Salesforce Case object. An agent can use this information to inform user questions about product issues. Other data source options are described elsewhere in Salesforce Help and Trailhead.
Step 1: Set Up a Salesforce Developer Edition Org
This step walks you through instructions to get and prepare a Salesforce Developer Edition org, which is required to complete the remaining steps in this example.
To sign up, click https://www.salesforce.com/form/developer-signup/?d=pb.
- If you’d prefer to use a different Salesforce org, verify that it offers comparable functionality: Data 360 is enabled and provisioned, Einstein is enabled, Agentforce is enabled, Prompt Builder is available, and it’s OK for you to add cases. Note that your user permissions and other org settings can affect your ability to complete all the steps in this example.
- If you're following along with the instructions and your org runs into unexpected issues, try refreshing your browser window. You can also try going back and repeating previous instructions.
- Log into the Salesforce Developer Edition org.
-
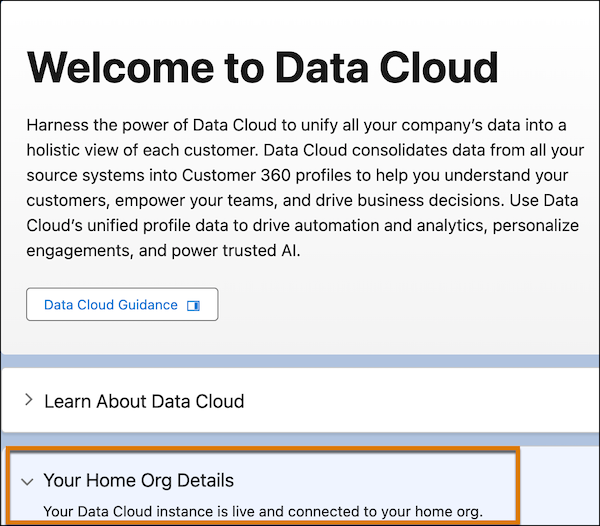
Check your Data Cloud setup. From Setup, in the Quick Find box, enter Data
Cloud Setup. If you see Your Data Cloud instance is
live under Your Home Org Details, then Data Cloud is already
enabled.
Data Cloud turned on and running
-
If Data Cloud isn’t already enabled, to enable it, follow the instructions in-app or
in Turn On Data Cloud in Data Cloud Help). Click
Get Started to initiate the setup process.
Get Started with Data Cloud Setup
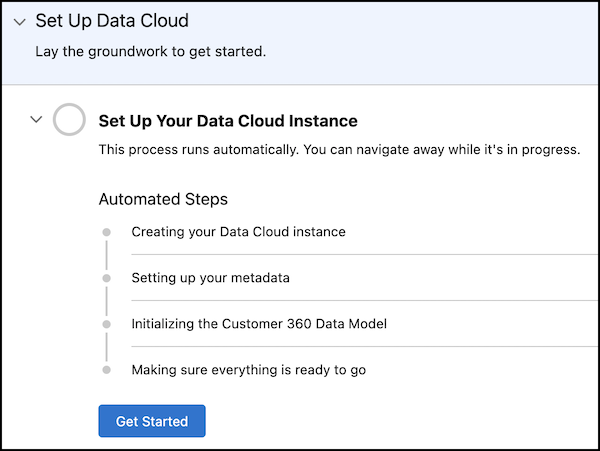
 Note A Data Cloud initial setup can take around 30 minutes or more.
 - When finished, verify that Data Cloud is enabled. Confirm that Your Data Cloud instance is live appears under Your Home Org Details.
-
Check your Einstein Generative AI Setup. From Setup, in the Quick Find box, enter
Einstein Setup. Make sure that Einstein,
Global Language Support for Prompt Builder, and
Deploy Prompt Templates are all turned on.
Turn On Einstein Options
 Note When turned on, it can take a few minutes for Einstein enablement to take effect.
 -
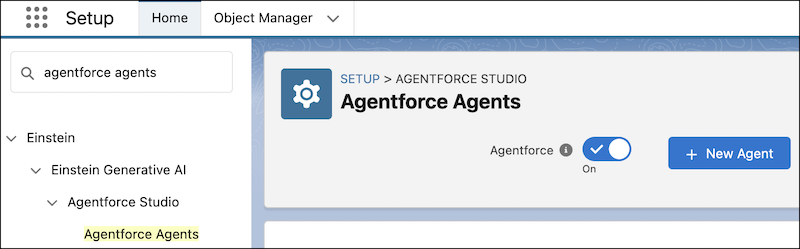
From Setup, in the Quick Find box, enter Agent, and then
select Agentforce Agents. To enable Agentforce, turn on
Agentforce.
If you can't find Agentforce Agents, refresh your browser window or wait a little longer while Einstein enablement takes effect.
Turn On Agentforce
Step 2: Add Case Data
Create at least five Case records that name a product and describe a problem that a customer is having.
- In App Launcher, enter Service and open Service Cloud.
-
Select Cases -> New and add your cases. For each case, specify
a subject, a description that details a customer problem, and select a case origin. Skip
other fields and accept the defaults. Here’s some example data to enter.
Example Subject Example Description Power cord caught fire The power cord caught fire the first time I tried to use my toaster oven to cook a pizza. Toaster oven won’t start The toaster oven is plugged in but when I push the power button, nothing happens. Nothing lights up. There’s no power. Toaster temperature not heating up enough I turned the toaster oven to the broil setting but the temperature doesn’t go above lukewarm even after 10 minutes. Toast burns on lowest temperature setting The toaster oven always burns my toast, even when I select the Light setting. Crumbs caught fire Crumbs from my bagel dropped to the bottom of the toaster oven and caught fire. Toaster turns off suddenly for no reason If I’m cooking anything for more than 15 minutes, the toaster oven shuts off automatically. Toaster oven arrived broken The glass window was broken when I opened the package. Package arrived crushed The toaster oven was visibly damaged when I opened the crushed delivery package.
Step 3: Ingest Case Data into Data Cloud
RAG-powered solutions use search indexes that are created in Data Cloud. To ingest your free-form case data into Data Cloud, create a data stream.
- In App Launcher, enter and select Data Cloud.
- Select the Data Streams tab, click New, select Salesforce CRM, and click Next.
-
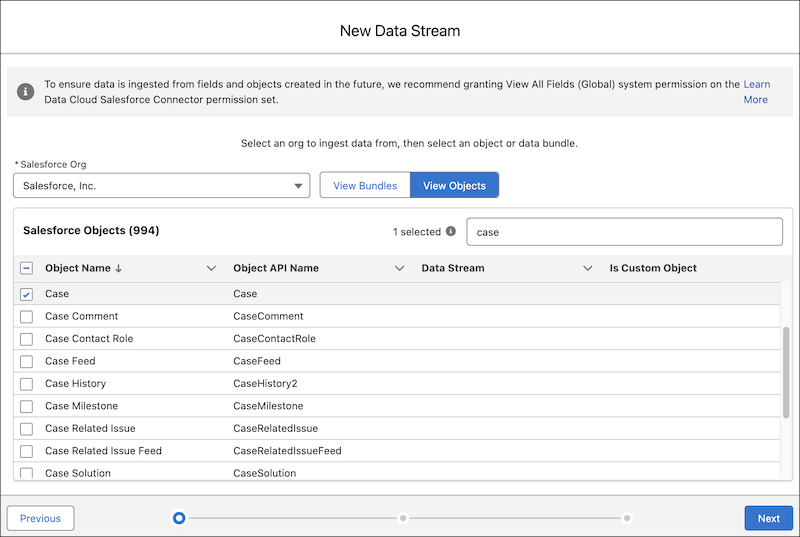
Click View Objects, search for and select
Case, and click Next.
Select the Case Object
- For the Object Category, select Profile.
-
All fields are selected by default. In the Standard Fields
tab, select only these fields (deselect the others).
Field Description System Modstamp Required Subject A summary of the customer’s issue that can be used to answer the customer’s question. Description Additional details that can be used to answer the customer’s question. Case ID Required but not needed for this simple use case. For more advanced use cases, you can use the Case ID to get additional related information, such as from an Account. Note The Case Comment field can also provide useful data for RAG searches, but it’s not needed for this simple example. - Accept the selections in the Custom Fields tab. Then click Next.
-
Click Deploy.
Note Ingesting data can take time.
- To check status, in the Data Streams menu, click the down arrow next to your new data stream, and select Update Status.
When Last Run Status is Success and Total Records has a number, your data is in Data Cloud.
Data Ingested into Data Cloud

Step 4: Inspect Your Data Lake Object (DLO)
The data stream creates a Data Lake Object (DLO) called
Case_Home__dll. It’s useful to inspect the ingested data, which can help
you debug and optimize your RAG solution.
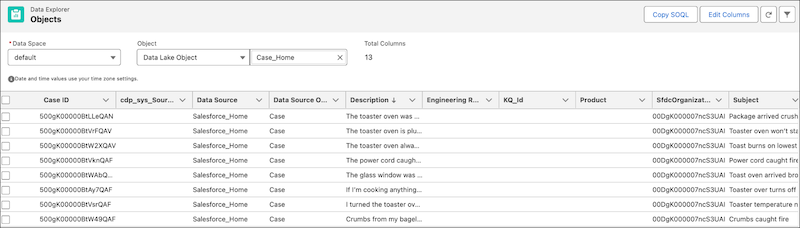
- Go to the Data Explorer tab in Data Cloud, select Data Lake Object as the Object Type, and select Case_Home. Don’t change the data space.
-
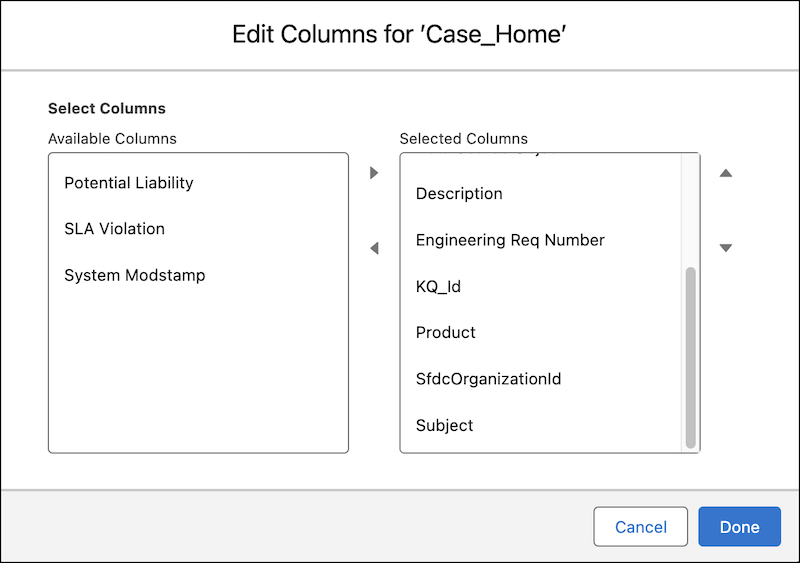
Click Edit Columns. Move Potential
Liability to Available Columns if it’s not already
there. Move Subject to Selected Columns if
it’s not already there. Leave all other columns where they are, and click
Done.
Edit Columns for Case_Home DLO
-
Click the Description column twice to sort and show your case
data at the top.
Case Data in Case_Home DLO
Step 5: Map Your Case DLO to a Case DMO
Map a DLO to a Data Model Object (DMO) to add an additional layer of structure to your data and make it easier to query and interact with. Map the Case_Home DLO to the Case DMO.
- In the Data Lake Objects tab, open Case_Home.
- In the Data Mapping panel, click Start.
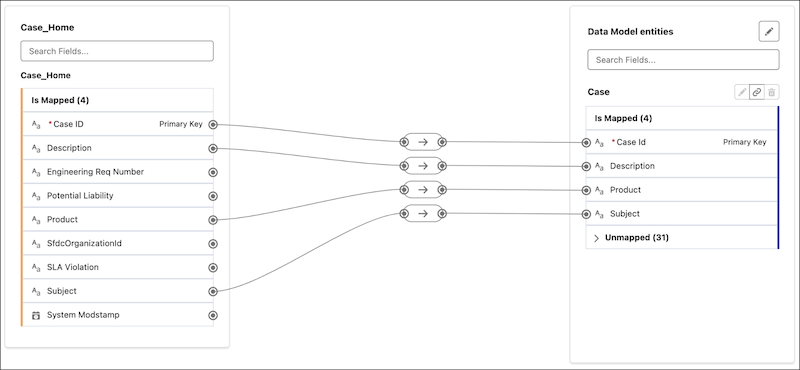
-
Under Data Model Entities, click Select Objects, search for
Case in the All Objects panel, click the
+ sign next to it, and click Done. DLO and DMO fields are
automatically mapped.
DLO-to-DMO Mapping
- Save your work.
Step 6: Inspect Your Data Model Object (DMO)
The mapping performed in the previous step created a DMO called
ssot__Case__dlm.
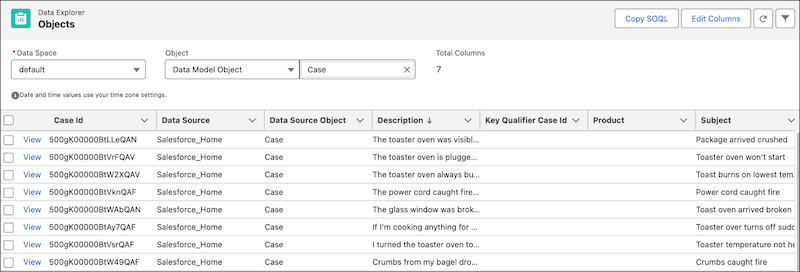
- In Data Explorer, for Object, select Data Model Object, then search for and select Case.
-
Click the Description column twice to sort and show your case
data at the top.
Data in the DMO
Step 7: Build Your Search Index
A search index makes your text searchable so that your RAG solution can find and retrieve chunks of text that are relevant to the user’s input. In this example, you create a hybrid search index to find relevant content based on both semantic similarity and keywords.
- In Data Cloud, select the Search Index tab, and click New.
- Select Advanced Setup and click Next.
- Select Hybrid Search as the Search Type and Case as the Source Object, then click Next.
- Click Manage Fields and select Description and Subject, then click Save.
- Click Next repeatedly to accept the remaining default values, and then click Save to create your search index.
- Click the Search Index tab to refresh it. Your Case search index is ready when the Search Index Last Run Status is Ready (about 10 minutes).
-
Click the Data Model tab to see the created search index files:
Search Index Files
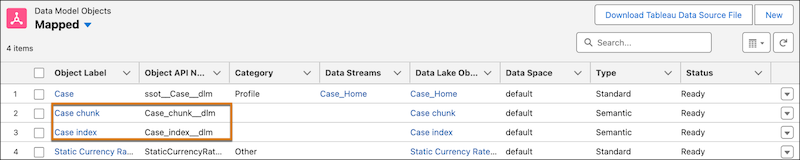
- text chunks (
Case_chunk_dlm) - a hybrid index (
Case_index_dlm)
- text chunks (
It’s helpful to know how to inspect text chunks for debugging purposes or feature optimization. For example, chunks might reveal why an LLM is responding in unexpected ways. In Prompt Builder, you’re able to view the retrieved chunks, as you’ll see later in this example.
- To inspect the data chunks in the search index you created, or to ask natural language query questions, you can use the query API in Apex or the queryDataV2 endpoint in the Data Cloud Connect REST API.
- To see the configurations for all search indexes in an org, use /ssot/search-index.
- Searching with APIs helps you build a proof of concept solution and debug. You can also try different types of search, such as prefiltering or using a vector search, without building a retriever each time.
Step 8: Build a Retriever
A retriever is a wrapper for Einstein Search operations. You create a custom retriever in AI Models to refine the search so that the retrieved content is more relevant to your use case.
- In Data Cloud, select AI Models , select Retrievers, and click New Retriever.
- Select Individual Retriever and click Next.
- Select Data Cloud and accept the default data space.
- Select the DMO (Case) and search index configuration (Case Hybrid Search), then click Next.
- For filters, accept the default (All Documents) and click Next.
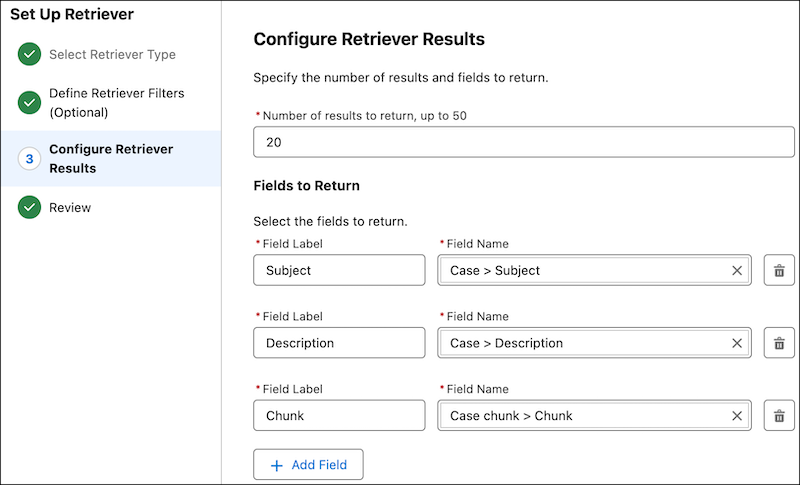
-
For Fields to Return, add these three fields:
- Case object’s Subject field (DirectAttribute > Case > Subject)
- Case object’s Description field (DirectAttribute > Case > Description)
- Chunk field (RelatedAttributes > Case chunk > Chunk)
 Tip Select the field name first. The associated field label is selected automatically.
Fields to Return in the Retriever
- Click Next, then click Save. Name this retriever and create it.
- On the Retrieval Datails page, copy the API Name, which you'll use in the next step.
- Click Activate.
Step 9 - Create a Prompt Template and Add Your Retriever
A prompt template defines the structure of the prompt that is sent to the LLM. You can add text instructions and resources, such as retrievers, Flows, customer input, or other resources. A prompt template inherits characteristics from a prompt template type, which contains hidden pre- and post-processing instructions that affect how the resolved prompt is used at runtime. In this example, you create a new prompt template based on the Answer Questions with Knowledge prompt template.
- From Setup, in the Quick Find box, enter Prompt Builder, and then select Prompt Builder.
- Click New Prompt Template.
- For Prompt Template Type, select Knowledge Answers.
- Name your prompt template (for example, Answer Questions With Case Data) and click Next.
-
Enter instructions into the prompt. Copy and paste from the following example, which
comes from the Answer Questions With Knowledge prompt template.
### INSTRUCTIONS 1. Analyze the query: Carefully read and understand the user's question or issue from the QUESTION section. 2. Search CASE: Review the provided company CASE to find relevant information. 3. Evaluate information: Determine if the available information in the CASE section is sufficient to answer the QUESTION. 4. Formulate response: To generate a reply <generated_response> to the user, you must follow these rules a. Find the article-chunk(s) that is most relevant to answer the user query and VERBATIM extract the ID of the article to set <source_id> field in the response JSON. If you are unable to find the relevant article, set <source_id> to NONE. b. Use the relevant article-chunk to generate the response that exactly answers the user's question and set the <generated response> field. c. If the user request cannot be answered by the case information provided, set the <source_id> to NONE and <generated_response> to "Sorry, I can't find an answer based on the available articles." 5. Refine and deliver: Ensure your response is polite, professional, and concise. 6. Review response: Make sure that have followed all of the above instructions, respond in the desired output format and you only strictly stick to the provided CASE only to formulate your answer. Sample_Case_Retriever_1Cx_cS3a95815db ### CASE: [Insert Retriever Here] ### QUESTION: {!$Input:Query} ### Response: -
Delete
[Insert Retriever Here]and leave your cursor at that spot. - Click Insert Resource, select Einstein Search > Case, and add your retriever.
-
In the retriever settings panel:
- For Search Text, select Free Text, then Query.
- For Output Fields, select Chunk.
- For this example, set Number of Results to 5.
-
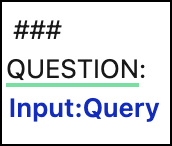
In the prompt template, delete the
InputQueryunder QUESTION and leave your cursor in that spot. -
In the settings panel on the left, under Search Parameters,
click Search Text, select Free Text,
Query, and copy the query input (
Input:Query). Under QUESTION:, pasteInput:Query.Input:Query
- Save your work and then click Activate.
Step 10: Test Your Prompt Template
Test the prompt template you just created.
- Click Preview.
- In Preview Settings, expand Inputs if needed.
- Enter a question into the Query, such as What are some common issues with the toaster oven product?
- For Retriever ID, add your retriever ID. (In AI Models, select Retrievers, select your retriever and, on the retriever details page, copy your retrievers’s API name, then paste it in the Retriever ID field).
-
Click Preview to see the LLM’s response.
Preview Shows the Prompt Request and the LLM Response
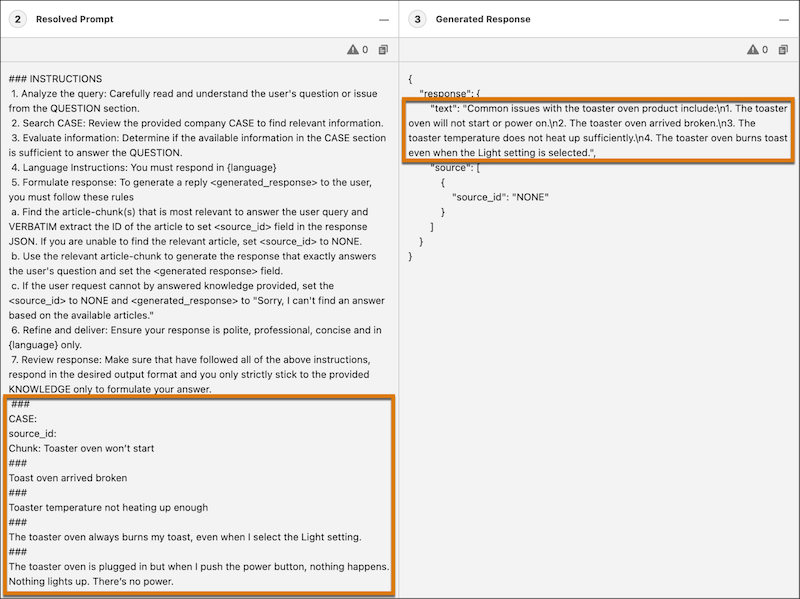
- Resolved Prompt shows the resolved prompt that was sent to the LLM. The resolved prompt contains the chunks of data that your retriever fetched. That’s RAG in action!
- Generated Response shows the prompt template’s output that you can surface to customers.
Step 11: Build an Agent that Answers Questions Using Case Knowledge
Finally, create an agent that uses your prompt template to answer questions using your case data.
-
Create an Agent Action
- From Setup, in the Quick Find box, enter Agentforce Assets, and then select Agentforce Assets.
- Click the Actions tab.
- Click New Agent Action.
- For the Reference Action Type, select Prompt Template.
- For the Reference Action, select your prompt template. If you don’t see your prompt template, make sure it’s active.
- (Optional) Name your action something like Answer Questions With Case Data, then click Next.
-
Add Agent Action Instructions. For example:
Answer questions that customers have about product issues. Use the provided customer cases, where the description and subject tell you what is going wrong, or how the customer is struggling. For example: “What are some common issues with the toaster oven?” -
For Inputs, fill in the required fields.
Examples:
Loading Text: Getting an answer…
Inputs instructions: Use the retriever that is hard coded in the prompt template.
Query Instructions Required. A string created by generative AI to be used in the Case search.
Collect data from user: (make sure it's selected under Query Instructions)
Citation Mode Instructions: Do not generate citations.
Accept all other defaults. - For Outputs, for the Prompt Response, enable Show in Conversation.
- Accept all other defaults and click Finish.
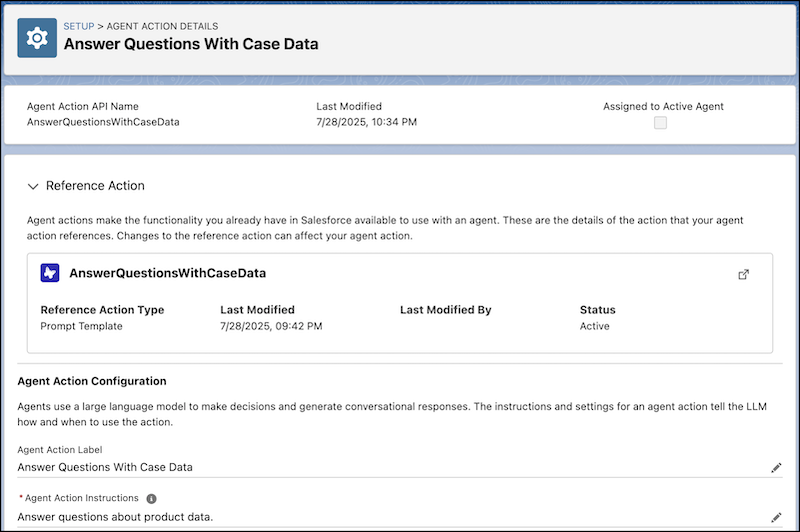
-
Select the created agent action to view its details.
Agent Action Details
-
Create an Agent
- From Setup, in the Quick Find box, enter Agentforce Agents, and then select Agentforce Agents.
- Click New Agent, select Agentforce Service Agent, and click Next.
- Deselect everything except General FAQ, then click Next.
- For company, add A company that sells toaster ovens, accept the other defaults, and click Next.
-
Skip the data library and click Create.
Note If you see an error, wait a minute or two and check whether the agent was created. If not, try refreshing the browser window or repeating the instructions in this step.
-
Add a New Subagent to Your Agent
Create a new subagent to consume the action from the previous step.
- In your agent, select New -> + New Subagent.
- For what you want this subagent to do, enter Answer questions with Case information, and click Next.
- For Classification Description, replace the default value with something like : This subagent addresses user inquiries related to toaster oven cases and provides relevant details.
- For Scope, accept the default instructions.
- For Instructions, replace the first instruction with: Gather as much information as possible from the user by answering clarifying questions.
- Delete all the other default instructions and click Next.
- Select the action you created earlier (Answer Questions with Case Data), then click Finish.
- Click Activate to activate your agent.
-
If you see the Agent Readiness Checklist, click
Ignore & Activate.
The best practice is to review and resolve any issues. However, that's not needed for our example.
-
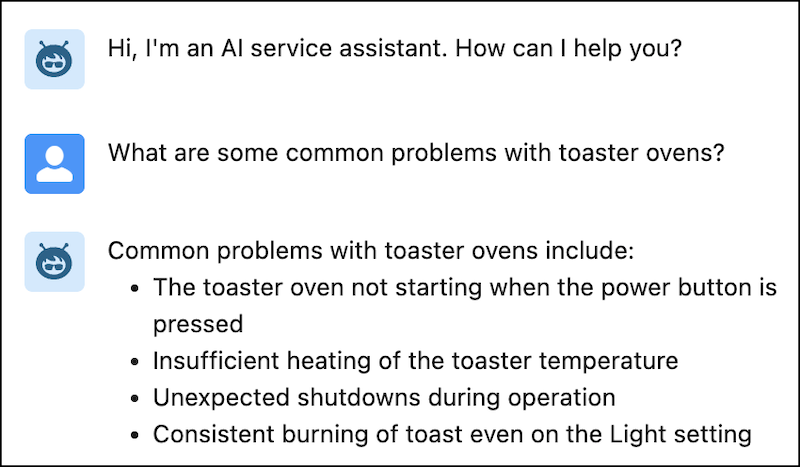
Test your agent. In the Conversation Preview window, ask a question such as
What are some common problems with toaster ovens?
Note that the answer is not a generic answer about all toaster ovens. Instead, it reflects the information you entered as case subjects and descriptions. It’s easy to see how the LLM response is grounded in the very data source you populated.
Test Your Agent
Possible Next Steps
This example walked you through the advanced steps for setting up RAG in Data 360. From here, you can continue to explore how RAG can help you implement different use cases in your org. Consider these possibilities.
- Use the Salesforce Developer Edition org to experiment with different settings and
approaches. For example, build hybrid and vector indexes and compare the results, or use
experiment with different chunking strategies. To learn about all the available settings:
Task Learning Resources Ingest Data into Data 360 Salesforce Help (Data 360): Search for AI, Automation, and Analytics Build a Search Index Salesforce Help (Data 360): Manage Search Indexes Create a custom retriever Salesforce Help (Data 360): Retrieve Data Create a prompt template that uses the retriever Ground with Knowledge Using Retrieval Augmented Generation Create an agent Ground Agentforce in Your Data - Expand the use case. For example, try ingesting the Case's status field, then filtering for resolved cases only. Or add case comments to the case records, then add that field in subsequent tasks so that the agent can use it to answer questions. Or ingest in case-related data from different sources and experiment with
- Try different use cases that, in your orgnization, are candidate projects for RAG implementations.
- Learn more about RAG. Consider these Trailhead modules: