
You are here:
Forecasting and Quotas Data in Sales Analytics
Sales Analytics gives you a choice for how to include your team’s quotas depending on whether you use the Salesforce Forecasting feature to store quotas data.
Required Editions
| User Permissions Needed | |
|---|---|
| To create and manage CRM Analytics apps: | Manage CRM Analytics Templated Apps |
| Edit CRM Analytics Dataflows | |
Note Sales Cloud Einstein customers who use Sales Analytics must use Salesforce Forecasting
to see quota data. They can't edit the quota dataset.
You have the following options for including quotas data in Sales Analytics.
| Option | Sales Cloud Settings | Configuration Wizard Settings | Additional Setup Requirements |
|---|---|---|---|
| 1 |
|
Select Collaborative Forecasting in first wizard screen that lets you add objects. | None. Sales Analytics automatically adds quota data from the Forecasts object. |
| 2 |
|
Select Collaborative Forecasting in first wizard screen that lets you add objects. | Create .CSV file with quotas data, upload to CRM Analytics, rerun dataflow. See next instructions. |
| 3 | Forecasting is not enabled | No setting available. Wizard does not give you the option of adding forecast data. | Create .CSV file with quotas data, upload to CRM Analytics, rerun dataflow. See next instructions. |
Note Selecting both Opportunity Splits and Collaborative Forecasting pulls in quota data for
the split type you've selected in your org.
Wizard settings are optional, depending on whether you want to include forecasting data in your app.
With Option 1, Sales Analytics automatically adds quotas data to your app and its dashboards. With Options 2 and 3, add quotas data to your app by following these instructions.
Note When you work with .CSV files you want to import to Sales Analytics, create and open
them using only a UTF-8-compliant text editor. Opening them in Microsoft Excel or other
spreadsheet software reformats .CSV files and makes them unusable in Sales Analytics
Important When you create the .CSV file, be sure it contains these fields, in
this order, with exactly these names. Field names are case-sensitive.
- StartDate (in yyyy-mm-dd format)
- QuotaAmount
- OwnerName
- Username
- Create a .CSV file to include the fields just described, that is StartDate (in yyyy-mm-dd format), QuotaAmount, OwnerName, Username. For an example, see Sales Analytics Example .CSV File.
- Save the file to a location that you can easily remember.
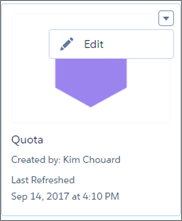
- In Salesforce, go to the CRM Analytics home page and find the Quota dataset.
- Click the arrow at the upper right corner of the dataset panel and select Edit.
- Salesforce displays the dataset editing screen for the Quota dataset. Look for
Replace Data in the upper right corner and click it.

- In the dialog box that opens, navigate to the .CSV file you created in Step 1, and double-click it.
- Click Next to open the Replace Dataset Data page.
- If your fiscal period is different than the calendar period, that is if it starts on a
date other than January 1, update the Quota Metadata file. If your fiscal period starts on
January 1, skip to the next step.
- Copy the JSON from Sales Analytics Quota Dataset JSON File and paste it into a text editor of your choice.
- Change the value of
"fiscalMonthOffset"from 4 to a number that represents the month your fiscal period starts. In Sales Analytics metadata, the numeral “0” stands for January, “1” stands for February, and so on up to “11,” which stands for December. Save the file to your desktop. - In CRM Analytics Studio, go to the Replace Dataset Data page and locate the Data Schema File area of the page. Click the arrow next to Quota .JSON file, select Replace File, find the file you saved and upload it to CRM Analytics.
- On the Replace Dataset Data page, click Next to open the Edit
Field Attributes page. The first column —QuotaAmount— must be selected. If
not, select it. In the Field Attributes panel on the right, make
sure Field Type is set to Measure.

- Click Upload. You’re asked to confirm that you want to replace the file. Click Replace to upload the file.
- After uploading your quota data, rerun the dataflow to update the dashboards.
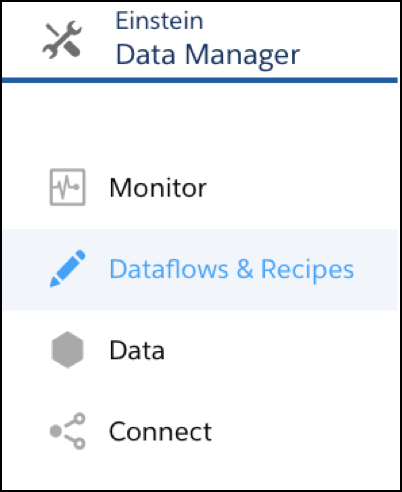
- Click the Gear menu at the upper right of the Sales Analytics screen and select Data Manager.
- Select Dataflow view from the menu at the top left of the Data Manager
screen.
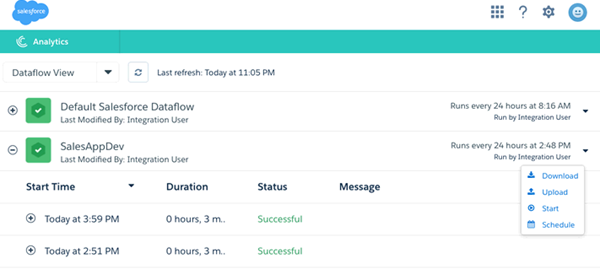
- Find your app; which can mean scrolling down the page. Open the menu on the far
right of the screen next to the app icon and name, and click Start.
 That’s it. The dataflow assures that Sales Analytics has your company’s latest sales
data. You can learn more about dataflows from Schedule the Sales App Daily
Dataflow.
That’s it. The dataflow assures that Sales Analytics has your company’s latest sales
data. You can learn more about dataflows from Schedule the Sales App Daily
Dataflow.
- Edit the Forecast Dashboard Data Source Connection Make Sure Quotas Data Is Accurate
If Sales Analyticsquotas numbers look higher than expected in the Forecast dashboard, it can be because the app counts some quotas twice. To make sure that the dashboard accurately reflects your team’s quotas, specify the dataset field the dashboard uses as its data source - Sales Analytics Example .CSV File
Here’s an example of the .CSV file you create to update the Sales Analytics Quota (Target) dataset. - Sales Analytics Quota Dataset JSON File
Use this file to update the Sales Analytics Quota dataset with your fiscal year start date if it’s not January 1.
Did this article solve your issue?
Let us know so we can improve!