
You are here:
Configure a Start a Flow Action
You can configure Start a Flow interactions for custom autolaunched or screen flows.
- To edit the dashboard, click Edit.
- Select a text widget, and in the right panel, click Interaction.
- Click Create Interaction, and select the interaction.
- For Event, select Click, and then click Add Action.
-
For Action, select Start a Flow.
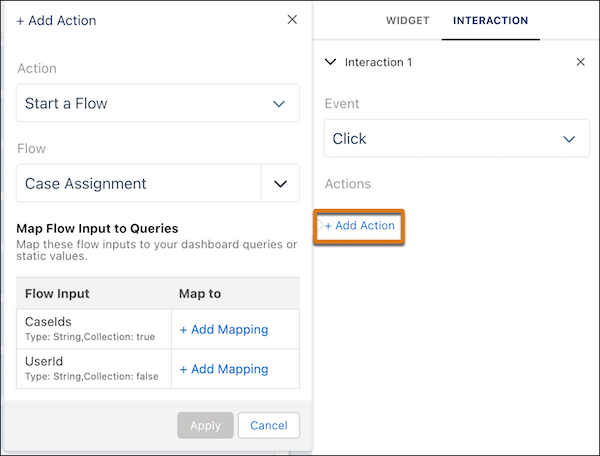
-
For Flow, select a flow.
Dashboard interactions support custom autolaunched and screen flows. Only active flows are visible. If you don’t see your flow, make sure that you’ve activated it. If you have no custom flows, go to the Flow Builder to create a flow. See Flow Builder.
-
If the selected flow requires inputs to run, they’re listed with Add Mapping actions.
For each flow input, click Add Mapping.
-
Select the value type.
Type Description Static Enter the input value. Dynamic Field - For Data Source, click Choose Query and select a query from a dataset.
- For New Value, click Select field and select a query field for the input.
- Select the interaction type.
- Click Update.
-
Select the value type.
- Click Apply.
- To test the interaction, preview the dashboard, and then save.
Did this article solve your issue?
Let us know so we can improve!