
You are here:
Design Complex Datasets with Dataflow Editor
Use Dataflow Editor, a point-and-click interface, to build your dataflow logic from scratch. Add transformations to determine what source data to use, how to transform that data, and which datasets to load the results into.
Required Editions
| Available in Salesforce Classic and Lightning Experience. |
| Available with CRM Analytics, which is available for an extra cost in Enterprise, Performance, and Unlimited Editions. Also available in Developer Edition. |
| User Permissions Needed | |
|---|---|
| To edit the dataflow: | Edit CRM Analytics Dataflows |
Dataflow Editor displays the dataflow you’re editing.
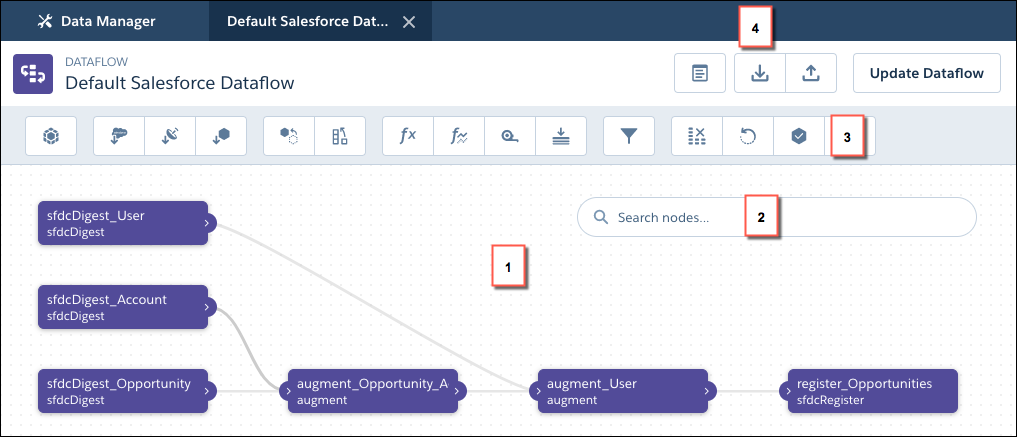
The canvas (1) shows the individual nodes in your dataflow and the links between them. If you can’t find a node, enter the node name in the search box (2). The node palette (3) has buttons for each type of node. Click one to add it to the canvas. Use the buttons at the top of the editor (4) to work with the dataflow JSON. Preview and download the underlying JSON or upload an existing JSON file to work with it in the editor.
The dataflow in this example extracts data from the Salesforce Opportunity, Account, and User objects, augments it together, and creates a registered dataset. If you also want to extract cases in this dataflow, augment them with case data, and register the result as a new dataset. Let’s look at how you can use the editor to modify the dataflow.
- In CRM Analytics, click the gear icon (
 ) and
then click Data Manager.
) and
then click Data Manager. - Click Manage Dataflows.
- Click the Dataflows & Recipes tab.
- To create a dataflow from scratch, click Create Dataflow.
- To edit an existing dataflow, click the actions button to the right of the dataflow
that you want to edit, and select Edit.
 Dataflow Editor opens, displaying the nodes in the dataflow.
 - In the node palette, click the node that you want to add. For example, to extract data from a Salesforce object, click the sfdcDigest node (
 ).
). - Enter a name for the node.
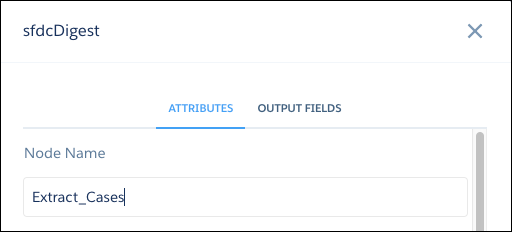
 Note Node names must be unique within the dataflow and not contain spaces.
 - Enter the node attributes. In this example, you select Case as the source object, and
the fields you need. You don’t need an incremental update or filters.
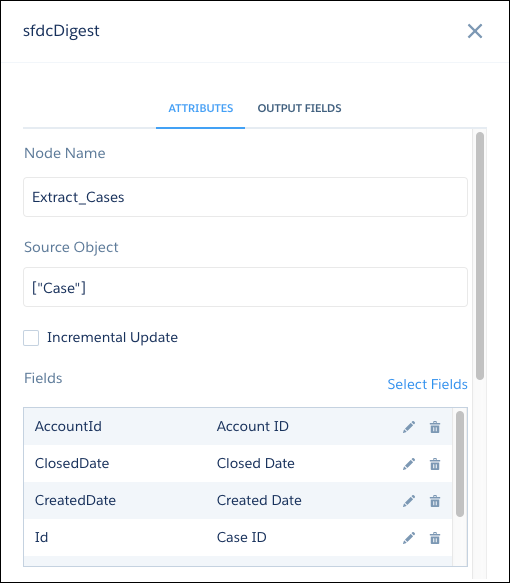 Note When you enter attributes that reference objects, fields, or other nodes, click inside the attribute field to see a list that you can search. Then select from. To see the field list in sfdcDigest nodes, click Select Fields.
 - Click Create.The new node appears on the canvas.
 Tip To edit a node on the canvas, click it. To delete a node, hover over it and click the trash can.
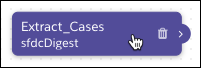
- In the node palette, click the next node you want to add. In this example, you want to
augment the case data with user data, so click the augment node (
 ).
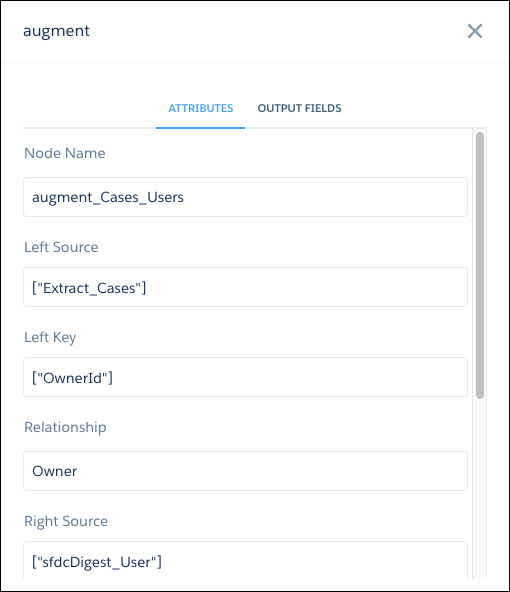
). - Enter the node name and attributes. In this example, you select the Extract
Cases node as the left source. This node is the one you want to add the user
columns to. The Extract Users node contains the columns you want to
add, so select it as the right source. The left and right keys are the fields from each
node that are used to match records. In this case, select the
OwnerId field on cases and the Id field on
users.
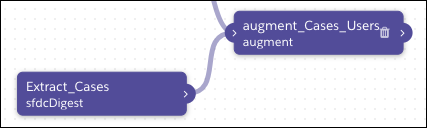
- Click Create.The new node appears on the canvas, with lines showing the input of data from the source nodes.
 Tip If a node isn’t where you want it, drag it to wherever you want on the canvas. If it gets crowded, use your scroll wheel to zoom in and out if your browser supports it, or drag the canvas to move nodes into view.
 - In the node palette, click the next node you want to add. In this example, you want to
make the augmented case and user data available to use in a dataset, so click the
sfdcRegister node (
 ).
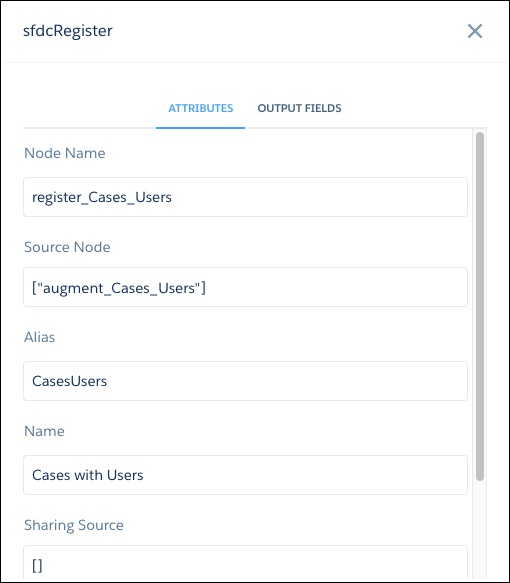
). - Enter the node name and attributes. In this example, you select the
augment_Cases_Users node as the source. The Alias is the API name
of the registered dataset, and the Name is its display name.
- Click Create.The new node appears on the canvas, with a line showing the input of data from the source node.
 Tip You can drag the output arrow of a source node to draw a link to another node on the canvas.
 - When you finish editing, click Update Dataflow to update the definition file with your changes.
- In the Update dataflow dialog, enter a description in the Version History field.
- Click Update Dataflow.CRM Analytics validates your dataflow to ensure that you provided all the required attribute values. If there are errors, CRM Analytics ensures that you can’t continue. Correct the errors it finds before trying again. After CRM Analytics validates the dataflow, it saves the new version of the dataflow.
- Click Run Dataflow to run the dataflow right away and create newly defined datasets. Alternatively, you can run the dataflow later from the Dataflows & Recipes tab of Data Manager.
- Plan the Dataflow
Before you start creating the dataflow, think about the dataflow design. Consider what data to make available for queries, where to extract the data from, and whether you must transform the extracted data to get the data you want. - Transformations for CRM Analytics Dataflows
A transformation refers to the manipulation of data. You can add transformations to a dataflow to extract data from Salesforce objects or datasets, transform datasets that contain Salesforce or external data, and register datasets. - Edit Nodes in the Dataflow
When you edit a dataflow node, for example to change its name, or add or remove fields, consider that these changes can impact downstream nodes. If you're manually editing nodes in the JSON dataflow definition file, make sure that your changes are reflected in downstream nodes. If you're working in the dataflow editor, CRM Analytics propagates many of your changes to downstream nodes for you. - Configure the Dataflow Through the Definition File
You can configure the dataflow by adding transformations directly to the dataflow definition file.