
You are here:
Create the Customer Insights App
Guided setup walks you through creating an app from the Customer Insights template. You then schedule the app’s data sync and recipes.
Required Editions
| Available with CRM Analytics, which is available for an extra cost in Enterprise, Performance, and Unlimited Editions. Also available in Developer Edition. Requires a CRM Analytics Growth or CRM Analytics Plus license. |
| Permission Sets Needed | |
|---|---|
| To create and manage the app: | Manage CRM Analytics Templated Apps |
| To use CRM Analytics templated apps: | Use CRM Analytics Templated Apps |
The Customer Insights app is created by default when you enabled CRM Analytics. If the app is missing, you can install it using these instructions or, in Setup, enable auto-installation of apps in the Analytics Settings menu.
To see the status of your auto-installed app, in Setup, find and select Auto-Installed Apps. This app auto-upgrades when the template is updated. See Auto-Installed Apps.
Before you create an app, make sure that:
- Your org has at least one record of each of these objects: User, Account, and Opportunity.
- The Analytics Integration User has the appropriate Salesforce field-level security to view the fields that you want to analyze.
Create the App
- In the Analytics tab or Analytics Studio, click Create and select App.
- Find and open the Customer Insights template to start the guided flow.
- Choose whether to create an app or use the settings from an existing app, and click Continue.
-
If your org meets the minimum requirements, click Looks good,
next.
If the requirements aren’t met, check the feedback.
- Choose how you want to control data visibility and the field that contains the total amount of the opportunity, and then click Looks good, next.
- Give your app a name, and click Create.
CRM Analytics takes a few minutes to create your app. You can track its progress on the page that displays. When you see the Application Complete! message, refresh the page. You see your app page with the datasets, recipes, and dashboards showing team performance and activity intelligence.
Schedule the Data Sync
- In Analytics Studio, click the gear icon in the upper right and select Data Manager.
- In Data Manager, click Connections.
-
On the right of SFDC_LOCAL, click
 and select
Schedule.
and select
Schedule.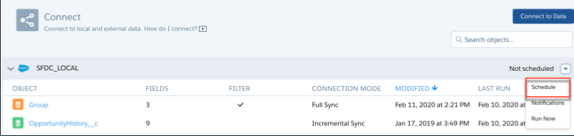
-
Set a time to run the data sync.
To not interrupt business activities, select a time outside normal working hours.
- Save your changes.
Schedule When to Run the Recipes
The app creates several recipes that you must schedule. Make sure that the data is synced before you run the recipes.
- In Analytics Studio, click the gear icon in the upper right and select Data Manager.
- Click Recipes.
- Schedule the Customer Insights recipes to run on a cadence that’s appropriate for your organization.