
You are here:
Analytics for Energy and Utilities
With the CRM Analytics for Energy and Utilities App, it’s easy to know which opportunities are most likely to generate a sale. You can track how many quotes you’ve created and know whether customers have responded to them. The three embedded dashboards (Home, Quotes, and Account) provide details about opportunities, quotes, and accounts.
Required Editions
| Permission Sets Needed | |
|---|---|
| To create and manage the app: | CRM Analytics Plus Admin, Insights.userCanCreateTCRMforEandU license |
| To use the app: | CRM Analytics Plus User, Insights.userCanViewTCRMforEandU license |
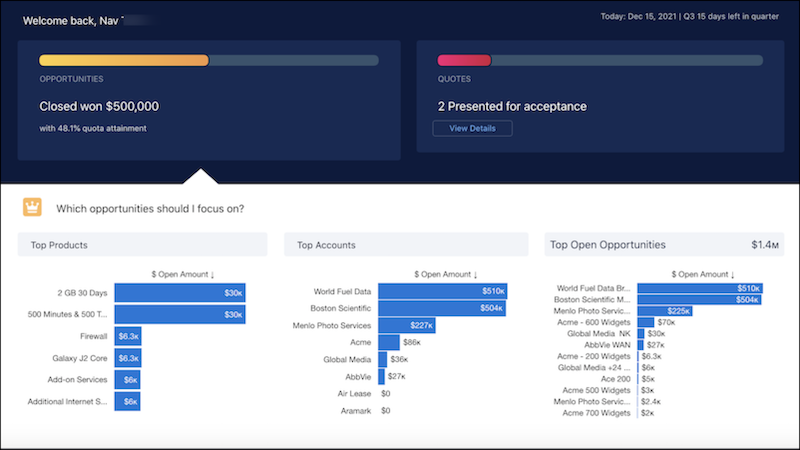
The template creates datasets, recipes, and dashboards to help you understand your Energy and Utilities deals.

Salesforce Org Requirements
Note these requirements to create an app from the template:
- Your org must have at least one of each of these record types: Account, Opportunity, Quote.
- Set Salesforce field-level security to enable the Analytics Integration User to see all fields used in the app. See Set Field Level Security to Enable Creation of an CRM Analytics Template.
- This template uses recipes. Recipes require that your org is set up for data sync. For a better understanding of working with recipes, see Run a Recipe.
- For security purposes, you likely want to configure compliant data sharing. For details, see Enable Compliant Data Sharing for Objects.
Create the App
- In CRM Analytics Studio, click Create in the upper right corner
- To open the template picker, select App, then Create App from Template.
- Locate the Analytics for Energy and Utilities tile, select it, and click Continue.
- Review the app preview page, and click Continue to open the configuration wizard.
- If you’re offered a choice of basing your app on an existing app or creating a one, select Create a brand new app and click Continue. Analytics for Energy and Utilities runs a compatibility check against your org to ensure it includes the data to successfully create the app’s datasets, recipes, and dashboards. If it doesn’t, follow the instructions in the error message to add the required data and start the app creation process again.
- When the org compatibility check succeeds, click Looks good, next.
- Name your app, and click Create.
Give CRM Analytics a few minutes to create your app. You can track its progress on the page that appears. When you see the Application Complete! message, refresh the page. You see your app page with the datasets, recipes, and dashboards showing team performance and activity intelligence. Click it to have a look.
Schedule the App Refresh
The app creates a recipe. Schedule the app refresh to sync data and to run recipe. To schedule your app, see Schedule Data Refresh for a CRM Analytics App. Select a time outside normal work hours so the data refresh doesn’t interrupt business activities.
Embed Analytics for Energy and Utilities
The Analytics for Energy and Utilities app includes dashboards that you can embed and access in Lightning Experience pages and Salesforce Classic experiences.
For general instructions on embedding dashboards, see Embed Dashboards Everywhere in Salesforce Help.
For instructions on filtering embedded dashboards, see Filter and Selection Syntax for Embedded Dashboards in Salesforce Help.
Assign Analytics for Energy and Utilities for Admins
Enable administration of the Analytics for Energy and Utilities app by assigning the relevant permissions.
Available in: Developer, Enterprise, Performance, and Unlimited editions.
- From Setup, in the Quick Find box, enter Users, and then select Users.
- Click the name of the user.
- Click Permission Set Assignments, and then click Edit Assignments.
- Select both the CRM Analytics Plus Admin permission set.
- Click Add, then save your changes.
- Repeat Steps 2–5 for all users who administrate the Analytics for Energy and Utilities app
Assign Analytics for Energy and Utilities for Users
Enable administration of the Analytics for Energy and Utilities app by assigning the relevant permissions.
Available in: Developer, Enterprise, Performance, and Unlimited editions.
- From Setup, in the Quick Find box, enter Users, and then select Users.
- Click the name of the user.
- Click Permission Set Assignments, and then click Edit Assignments.
- Select the CRM Analytics Plus User permission set.
- Click Add, then save your changes.
- Repeat Steps 2–5 for all users who view the Analytics for Energy and Utilities app.
Datasets
| Dataset Name | Contents | Special Requirements |
|---|---|---|
| Account | Data about accounts. Includes accounts without opportunities. | None. |
| Opportunity | Data about accounts, opportunities, and users. | None. |
| Oppty Products | Data about products with opportunities and accounts. | None. |
| OrchestrationItem | Data created for the Analytics for Energy and Utilities app. | None. |
| Quota | Quotas data. | None. |
| Quote | Details about quotes. | None. |
| QuoteMember | Details about quote members. | None. |
| User | Provides details about all users in an org. | None. |
Upload the plain_quota Dataset (Optional)
Optionally, you can upload quota data by overriding the plain_quota dataset in your app by following these instructions. The plain_quota dataset is used to provide you with quota attainment metrics in the Opportunities section of the Home dashboard. If you don’t want to see this metric, you can skip this section.

- StartDate (in yyyy-mm-dd format)
- QuotaAmount
- OwnerName
- Username
- Create a .CSV file to include the fields described, that is StartDate (in yyyy-mm-dd format), QuotaAmount, OwnerName, Username. For an example, see Sales Analytics Example .CSV File.
- Save the file to a location that you can easily remember.
- In Salesforce, go to the CRM Analytics home page and find the plain_quota dataset.
- Click the arrow at the upper right corner of the dataset panel and select
Edit.
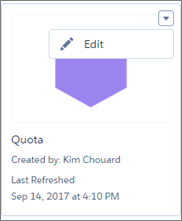
- Salesforce displays the dataset editing screen for the plain_quota dataset. Look for
Replace Data in the upper right corner and click it.
- In the dialog box that opens, navigate to the .CSV file you created in Step 1, and double-click it.
- To open the Replace Dataset Data page, click Next.
- If your fiscal period is different than calendar period, that is if it starts on a date
other than January 1, update the plain_quota Metadata file. If your fiscal period starts
on January 1, skip to the next step.
- Copy the JSON from Sales Analytics Quota Dataset JSON File and paste it into a text editor of your choice.
- Change the value of
"fiscalMonthOffset"from 4 to a number that represents the month your fiscal period starts. In metadata, the numeral “0” stands for January, “1” stands for February, and so on, up to “11,” which stands for December. Save the file to your desktop. - In CRM Analytics Studio, go to the Replace Dataset Data page and locate the Data Schema File area of the page. Click the arrow next to Quota .JSON file, select Replace File, find the file you saved and upload it to CRM Analytics.
- On the Replace Dataset Data page, click Next to open the Edit
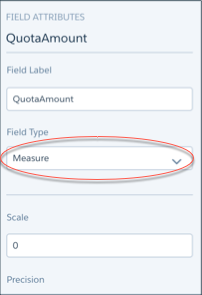
Field Attributes page. The first column —QuotaAmount— is selected. If not,
select it. In the Field Attributes panel on the right, make sure
Field Type is set to Measure.
- After uploading your quota data, rerun the recipe to update the dashboards.
- Click the Gear menu at the upper right of CRM Analytics Studio and select Data Manager.
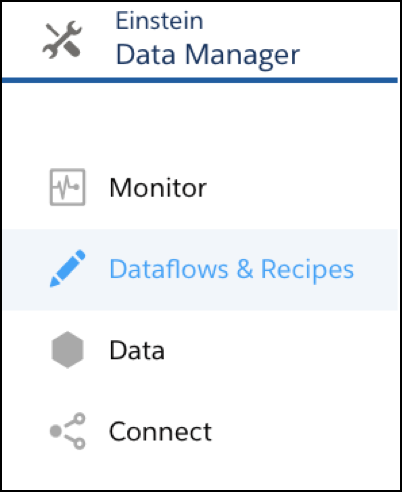
- Select the Dataflow & Recipes view from the menu at the top left of the Data
Manager screen and click the Recipes tab in the main pane.
- Find your app’s recipe. Open the menu on the far right of the screen next to the app icon and name, and click Run now.
