
You are here:
Generate an API Client ID for Tableau Connector
To access the Tableau connector, set up an API Client ID in B2C Commerce.
- Log in to Account Manager.
-
Click API Client.
The API Clients page lists the ID, display name, and state for each client.
- Click Add API Client.
-
Complete the API Client information.
- In the Display Name field, enter the client display name.
- Optionally, enter a description for the API client.
- Enter a secure password.
- In the Confirm Password field, reenter the password.
- Under Organizations, select your organization.
-
Under Roles, select Salesforce Commerce API and add your
production instance as a filter.
 Note Data extraction is allowed only for production instances.
 -
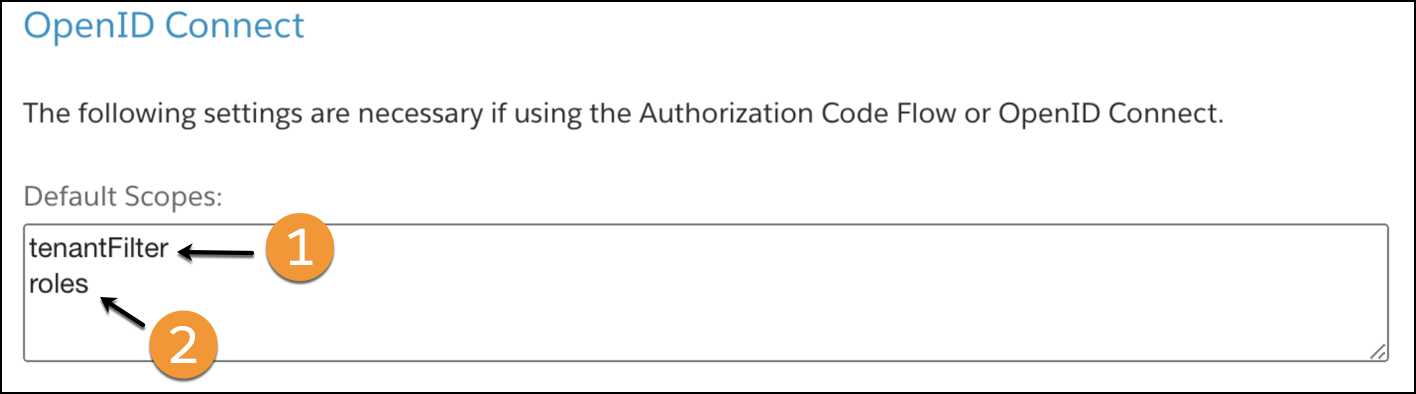
Under OpenID Connect, in the Default Scopes field, enter the
tenantFilter (1) and roles (2) literal strings
on separate lines. The tenantFilter and roles
entries are necessary when using the Authorization Code Flow or OpenID Connect. The Default
Scopes field defines the baseline permissions that are granted if the client app makes an
authorization request without explicitly specifying any scopes. For more information, see
Roles and Permissions in B2C Commerce.
- From Token Endpoint Auth Method, select client_secret_post.
-
Click Save.
The new API Client appears in the API client list for your organization.
-
To view the API Client ID, click the API Client.
To log in to the Tableau Data Connector, use the new Client ID and password.
See Also
Did this article solve your issue?
Let us know so we can improve!
