Loading
Salesforce Payments
Table of Contents
Select Filters

          No results
          No results
          Here are some search tips

          Check the spelling of your keywords.
          Use more general search terms.
          Select fewer filters to broaden your search.

          Search all of Salesforce Help
          Let Customers Save and Manage Their Payment Methods

          Let Customers Save and Manage Their Payment Methods

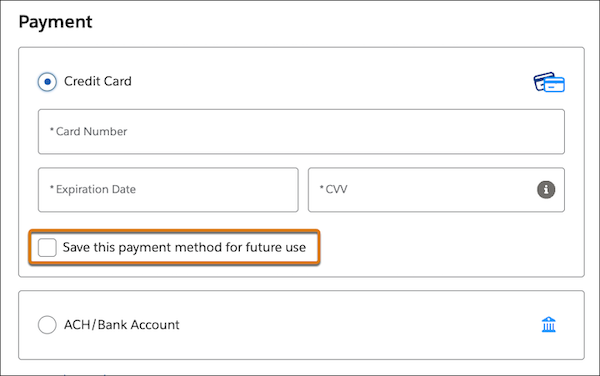
          Give registered customers the option to save their payment information for future transactions. Saving payment methods reduces a customer's checkout time because previously entered information is filled in. For B2B and D2C stores that use custom checkout, you must enable this feature manually. For D2C stores that use managed checkout and Pay Now stores, this feature is enabled by default. The option to save payment methods isnʼt supported for guest customers.

          Required Editions

          Important
          Important These steps apply to the refreshed Commerce app introduced in Summer ’24. We encourage you to use the refreshed app. If you’re still using the previous app, now called the Commerce Storefront Console, see B2B and D2C Commerce Using the Commerce Storefront Console. To switch to the refreshed app, see Enable the Refreshed Commerce App.
          View supported editions.

          Before you begin, make sure you created a payment method set. For instructions, see Set Up Salesforce Payments for Custom Checkout.

          1. From the store home page, select the B2B or D2C store from the dropdown menu.
          2. Click Experience Builder.
          3. From the Pages dropdown list, select Checkout, and then select the Salesforce Payments component on the page to reveal the properties.
          4. Select Enable saved payments.
          5. For stores created before Summer ‘24, update the Saved Payment Methods component.
            1. From the Pages dropdown menu, select Saved Payment Methods.
            2. Remove the Saved Payment Method header, component, and Add button from the page layout.
            3. From the components list, select the Saved Payment Method component and place it on the page layout.
            4. Click the component to open the properties.
            5. Expand the header and select Display header.
            6. If it's not selected, select Enabled saved payments.
          6. Publish the site.

          When a registered customer checks out, the checkbox to save the payment method is now available.

          Checkbox to save a payment method

          From My Account, a registered customer can view, add, and delete their saved payment methods.

          Saved payments list in the account profile
           
          Loading
          Salesforce Help | Article