
You are here:
Configure Elavon Terminal for Payments
Set up Elavon Terminals to use with the Point of Sale (POS) app. The Elavon card reader terminals can process payments using Ingenico Move 5000, Lane 7000, and Link 2500 Elavon card reader terminals.
Prerequisites
- Modern POS App Build: 5.9.1 and later
- Platform Support: iPhone & iPad
- Offline Support: no
Set up Point of Sale CMS for Elavon Terminal Use
Configure the Point of Sale CMS settings so you can use Evalon Terminals with the Retail Cloud Point of Sale (POS) app.
Set App Config Settings
Turn on Elavon as a supported payment reader in your app configs.
- Go to and edit the app config.
- Go to .
- Under , check "".
- Under , select "".
- Save your changes.
Set Payment Gateway Settings
Create a payment gateway for Elavon.
- Go to .
- Select in the upper right corner.
- Under, select "".
- Configure the rest of the fields by referring to the table:
| Setting | Description |
|---|---|
| General Settings | |
| Environment* | Select the type of account for this configuration |
| Fulfillment Type* | Select "Default" if you want to create this configuration for a POS app to perform transactions |
| Store ID* | Select "Default" for all stores or a specific store |
| Payment Method* | Select the payment method for this configuration |
| Merchant Configuration | |
| Default Device ID* | Enter your Elavon Terminal ID. Note that this setting can be overridden with the (optional) register-level settings in by editing a particular register entry:
|
| URL Base* | Enter your Elavon's Gateway URL |
| Merchant Organization ID* | Enter your Elavon's Location Name |
| Services | Select the services supported for this configuration |
| Terminal Configuration | |
| Terminal Gateway ID* | Enter your Elavon Chain Code |
| Terminal Request Timeout Interval In Seconds | Time interval determines how long the POS will wait for a response from the terminal for payment. The recommended time is 150 seconds. |
| Payment Status | |
| Payment Status Check API Timeout In Seconds | The payment status check API timeout. The minimum interval is five seconds, and it can be adjusted up to 150 seconds based on the store's network quality. Setting the interval too short won’t give the terminal sufficient time to process and respond. |
| Other Settings | |
| Has Cart Summary On Payment Terminal | Turn on to show the cart summary on the payment terminal |
| Manual Payment Settings | |
| Manual Credit Card Entry On Terminal | Turn on to permit manual credit card entry on the payment terminal |
*An asterisk (*) indicates a required field
Configure Order Number Range Settings
- Go to .
- Select and select "".
- Configure the rest of the fields by referring to the table:
| Setting | Description |
|---|---|
| General Information | |
| Operating Mode* | Noneditable field. Verify this is set to "" |
| Entity Type* | Noneditable field. Verify this is set to "" |
| Number Configuration | |
| Prefix | Verify this field is left empty |
| Starting Order Number* | The starting number for Elavon transactions. We recommend setting the starting value as . |
| Store and Device-Specific Configuration | |
| Store ID* | Set this to "" |
| Payment Device ID* | Set this to "". If there are multiple device IDs available for the merchant, create for each device ID |
*An asterisk (*) indicates a required field
View POS App Flow with Elavon Terminals
Understand how the Elavon Terminal functions together with the Point of Sale (POS) app.
Connect to Elavon Terminal on POS Device Manager Screen
Elavon Terminals can be connected using Wi-Fi (Move 5000, Link 2500) as well as wired Ethernet (Lane 7000). It's necessary for the terminal and the iPad (POS register) to be on the same network to establish communication.
Add and Connect to a Terminal
The terminal is added to the device manager screen by selecting "" under the Terminal section.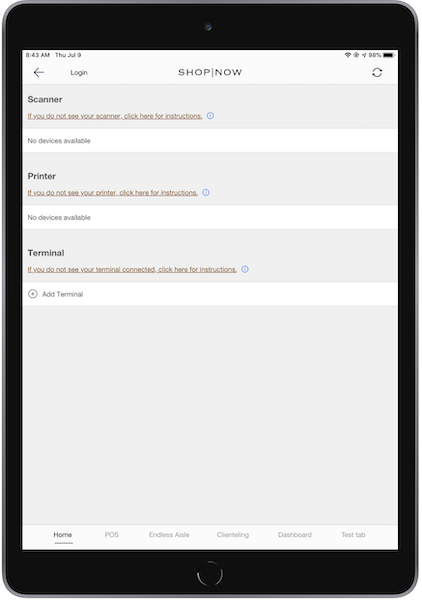
To do this, enter the IP address of the terminal. You can find the IP address by first
selecting and then pressing the on the Elavon pin pad and entering the admin password.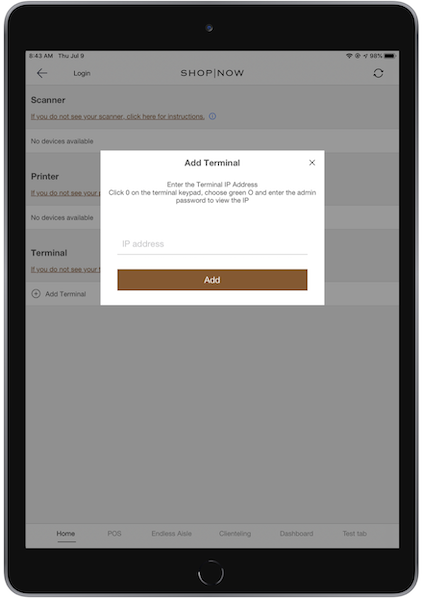
After you select "," the terminal is added, and a connection is established instantly.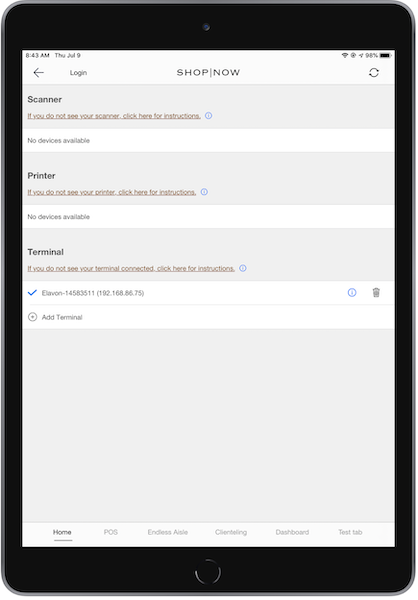
Verify Connectivity
The info icon next to the terminal can be used to view the IP address of the terminal and to
run diagnostics to check the connectivity between the terminal and the PS POS App. If you select "", the app establishes a connection and confirms it. If the connection fails, the
app shows a connection failure message along with the reason for the failure.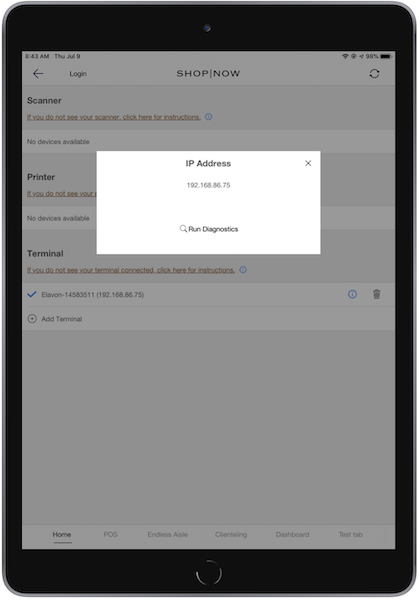
Next is a screenshot depicting a successful connection:
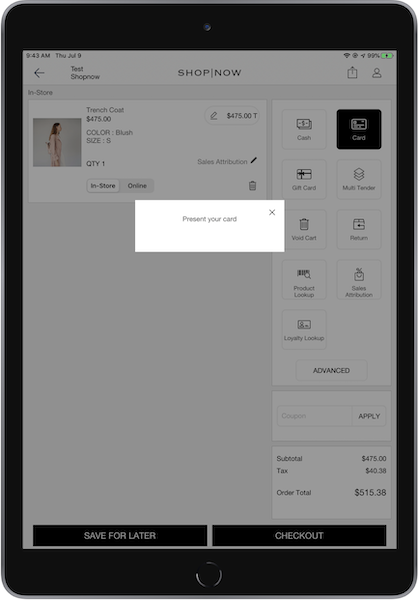
Payment Using Card Option on Cart Screen
The option on the screen allows you to start a payment for the order using the connected Elavon terminal. If there's no Elavon terminal connected for payment, the POS app permits you to go to Device Manager to add a new terminal. If there's no Elavon terminal connected for payment, the POS app permits you to go to the device manager screen to add a new terminal. If there's no Elavon terminal connected for payment, the POS app permits you to go to the device manager screen to add a new terminal.
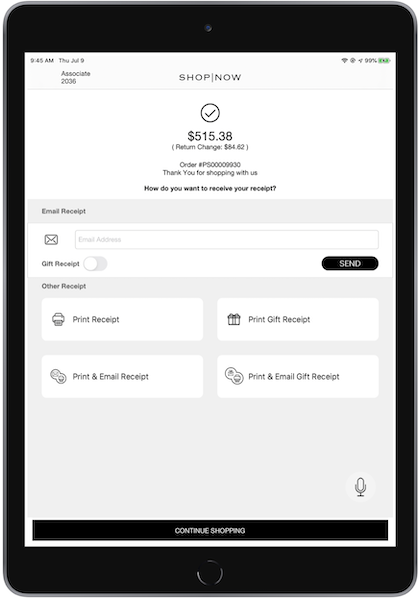
The terminal prompts for card insertion or swiping, processes the payment, and provides messages based on the success of the transaction. An approved payment in the Elavon terminal shows the screen on the app, while a declined payment is followed by the app showing the details of the issue in a popup.
Next are some screenshots for the same:
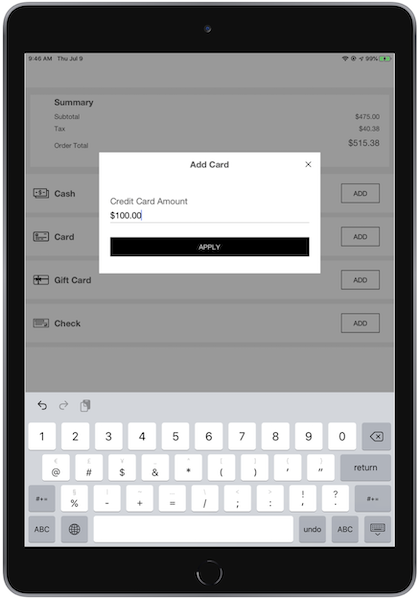
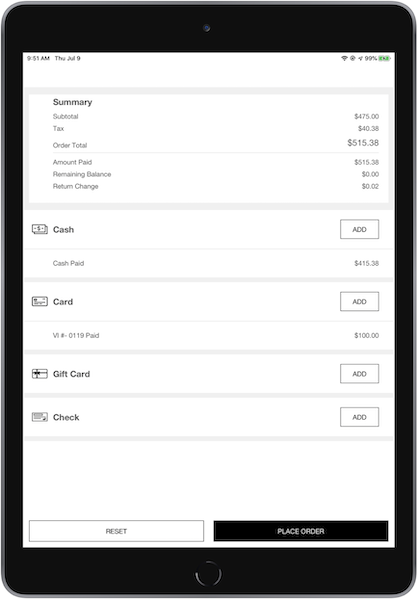
Card Payment in Multitender screen
Cards are one of the payment options available on the screen. Users can use multiple payment cards for their transactions and also have the option to combine card payments with other tender options.
Next are some screenshots demonstrating this process:
Elavon/Fusebox Dashboard Terminal Configuration
The , , and are the key parameters to set up the payment gateway configuration for Elavon in CMS. This will be created and provided by the Elavon support team during the initial setup.
Elavon/Fusebox Dashboard Transaction History
You can view the transaction history by using the option in the Elavon portal. To find a specific order's payment, you can use the search option in transaction management and enter the order number in the user-defined field 1. Additionally, you can view the transactions from the last 24 hours by using the "" dashboard on the home screen.
Transaction Management Left Hamburger Menu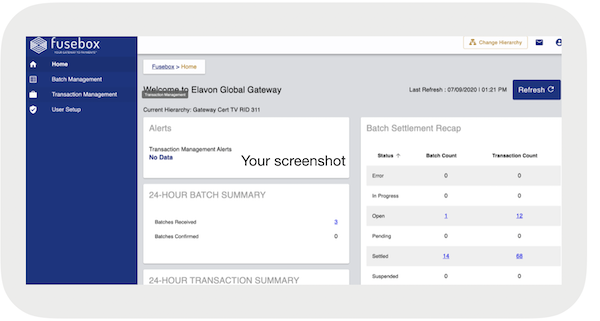
Transaction Search Option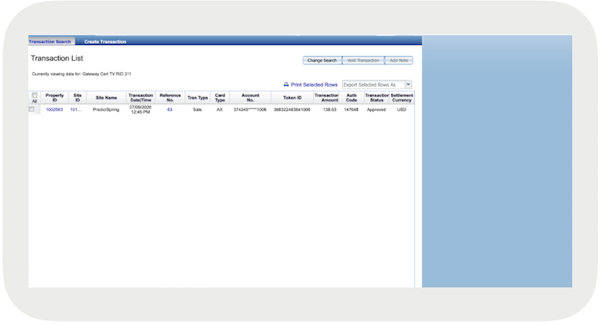
Transaction Search By Order ID in User-Defined Field 1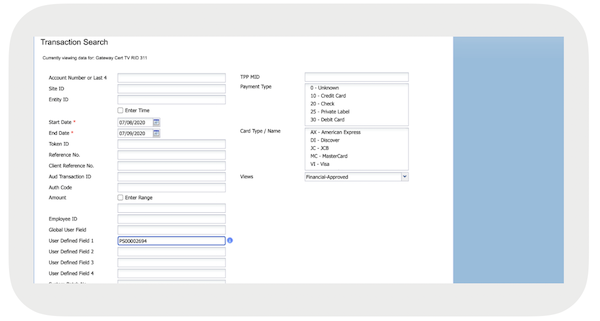
24-Hour Transaction Summary in Home Screen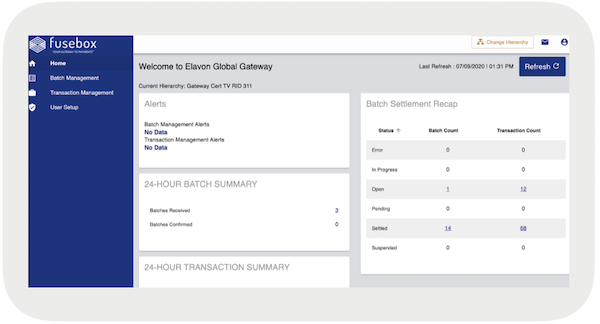
View Known Issues and Limitations
Understand common issues that you sometimes encounter if configuring or using Elavon Terminals with Point of Sale.
Simultaneous Payment Attempts from Multiple Registers to the Same Terminal
If many registers try to process payments through the same terminal at the same time, the transactions fail. Users are notified with one of these errors.
- "Transaction Declined. Reason: *SLR Busy"
- "Connection terminated by the host. If there is an ongoing transaction on the terminal, cancel it by pressing the red X button."
To resolve the issue, close the error message by tapping "" on each register.
Connectivity Issues Locking Terminal in 'Processing' State
Offline mode and the "Store and Forward" (SAF) feature supported by Elavon aren't available in Modern POS. Due to this limitation, if network connectivity is lost, the terminal can remain in a "processing" state. To recover, cancel the transaction and retry.
Sale Can't Be Initiated After 5-Minute Delay
In Simplify Version 2.02.x or earlier, waiting more than 5 minutes can prevent initiating a sale on the terminal. To resolve this, update to the latest version by using the steps under "Update Simplify Version" in the Elavon - Onboarding & Troubleshooting.
To check your current Simplify version, press "" on the terminal.
Getting "Transaction declined Reason: CALL AUTH CENTER" error during payment
Check with Elavon team, if the gateway is in "backup" mode and declining the dollar amount.