
You are here:
Managing Inventory with Blind Receiving
Allow stores to receive products without requiring an Advance Shipping Notice (ASN) in Point of Sale.
The Blind Receivings feature can be useful for local sourcing, shipments without ASN generation, or smaller shops that don’t have an ASN system in place.
Prerequisites
- Modern POS App Build: 5.8.1 and later
- Supported POS Device
- Offline Support: no
Configure Blind Receiving Settings in Point of Sale CMS
Configure deep links, Not on File products, and serialized product settings so store associates can use Blind Receiving on the Point of Sale (POS) app.
Configure a Deep Link
To access Blind Receivings on the POS app, configure a deep link.
- Create a new layout or hamburger menu or use an existing one.
- Access the deep link picker.
- Go to .
- Select .
- Set and save your changes.
Turn On Not on File Products
Products marked as Not on File (NOF) can be configured to be received during Blind Receivings.
- In CMS, go to .
- Turn on .
- Save your changes.
Create New Blind Receiving
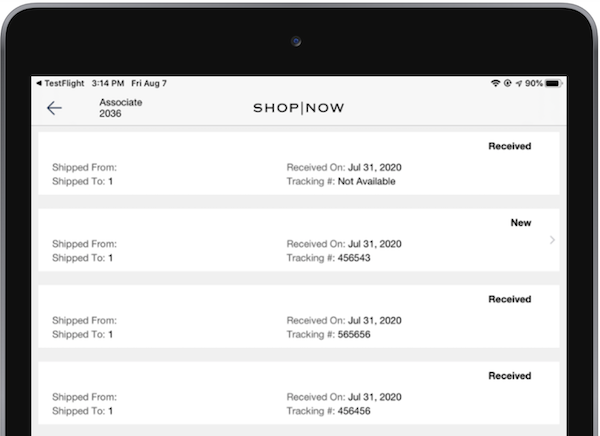
Display a list of current receipts that can be filtered by date or status in the Retail Cloud Point of Sale (POS) app.
Tap on the Blind Receiving deep link to show a list of receivings. This list can be filtered by date or status. To create receiving, tap at the bottom of the screen.
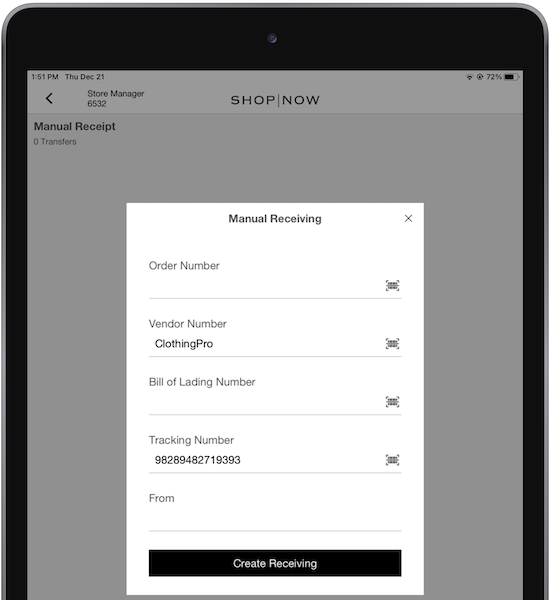
Input or scan relevant receiving details, such as the order number, vendor number, bill of lading number, tracking number, and the originating entity.
Scanning and Finding Items to Be Received in Point of Sale
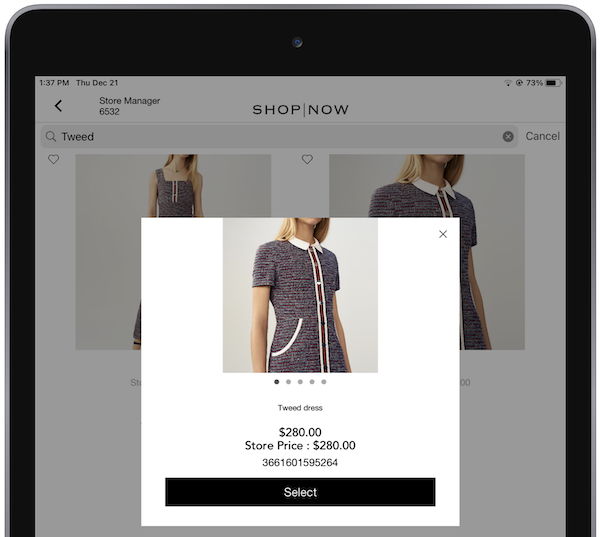
Search for items in the Point of Sale (POS) app by entering text or using an external scanner.
On the next screen, scan products to be received by using an external scanner or the device's camera by tapping the scan icon at the top right. Alternatively, you can search for items using the search icon. You can also use an external scanner to populate the search field with the product's barcode value.
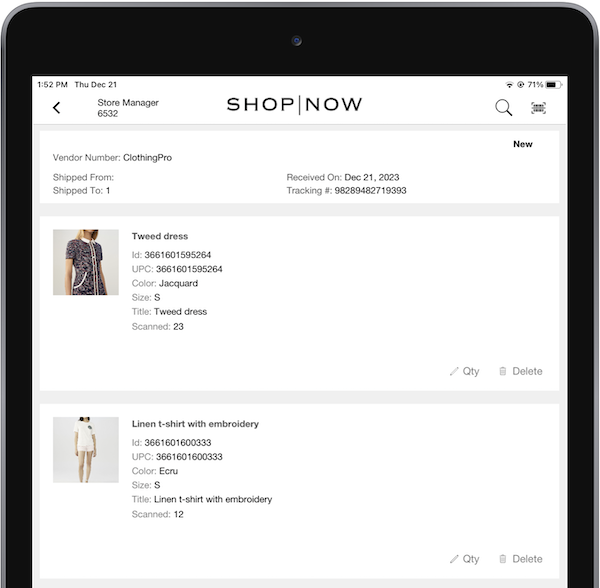
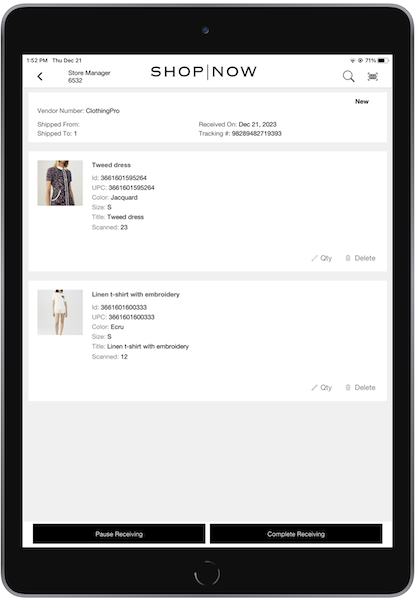
After items and their quantities are added, they appear on the receiving details screen. You can edit the quantity or delete the item from this screen.
Add Not on File Products to the Inventory
Enter products that aren't on file manually in the POS app.
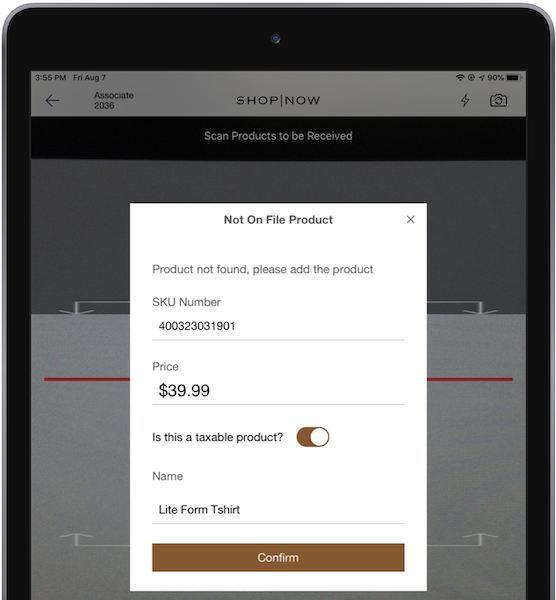
If Not on File is configured, the app will display a window where you can add the product by entering its details as shown.
Manage Serialized Products
Scan serialized product serial numbers to identify products and export the details after the receiving process is complete.
Ifserialized inventory is enabled, scanning a serialized product will trigger a prompt to scan its serial number. Serialized products are identified by the 'SerialNumberRequired' attribute, which can be configured via Product Feed. If this attribute is set to True and the flag is enabled, the prompt will appear. However, if the flag is enabled but the product attribute is set to False, no prompt will be triggered. If using the device’s camera, this prompt appears at the top of the screen as shown in the screenshot. Scan again to add the product for the transfer.
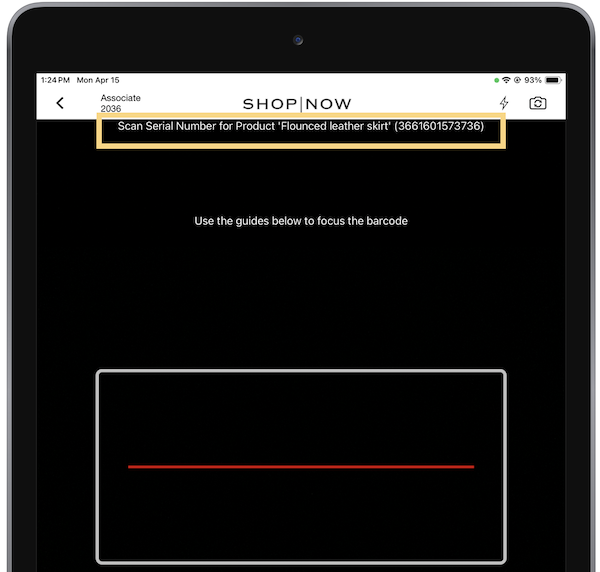
However, if you're using an external scanner or manually adding a product through the
product catalog, a serial number entry window appears instead.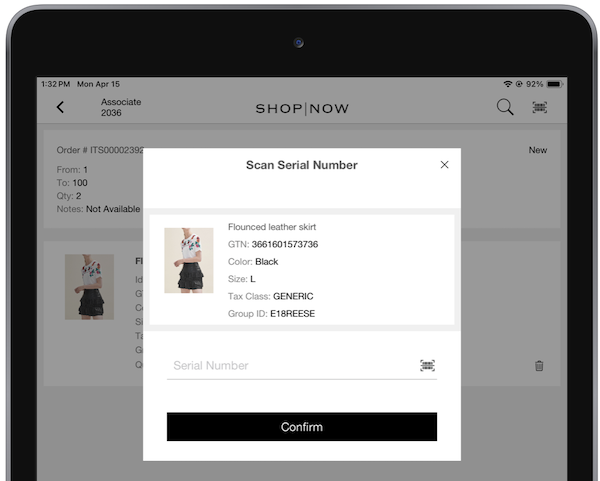
Entering multiple serial numbers will append them to the list. Each serialized product can be individually removed using the delete option. If all serialized products are deleted, the product itself is also removed.
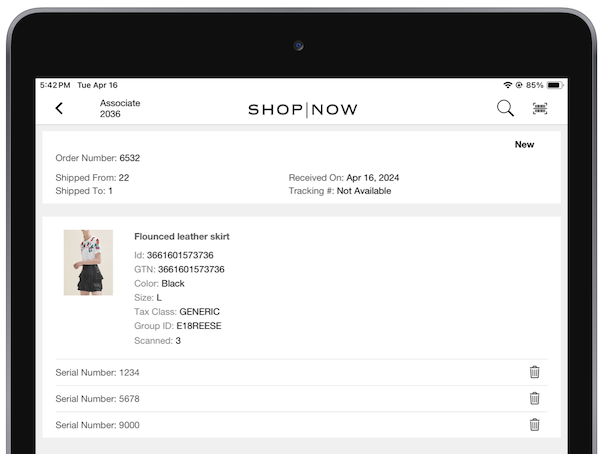
After the receiving process is complete, details can be exported through event exports by mapping the field . Serial numbers for each product are listed using a pipe delimiter.
Pause and Resume Receiving the the POS App
Paused the receiving process, save all scanned items, and resume receiving at a later time.
View Completed Receivings
See details of inventory that you've received after scanning them.
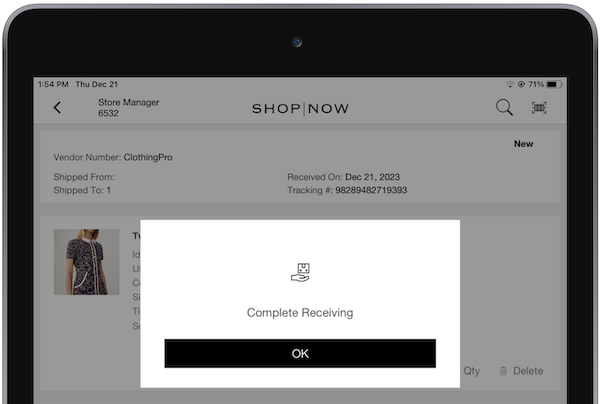
After all items are scanned, complete the receiving by tapping Complete Receiving. The received products have their On-Hand and Available inventory buckets increased.
Viewing Completed Receivings
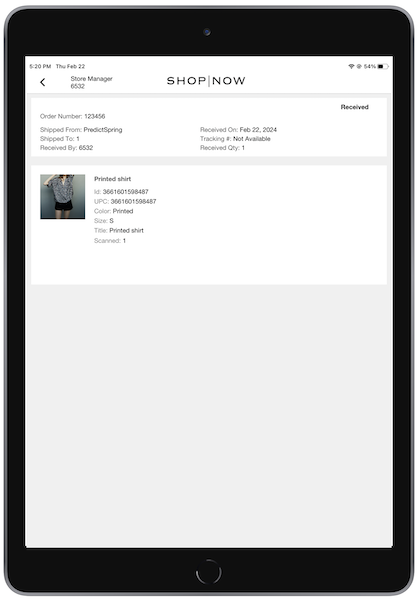
For app builds 9.8.1 and later, details of completed receivings can be viewed by using the search filters on the screen. Check as one of the filters and tap . Completed receivings are view only and can't be edited.
View Known Issues with Blind Receivings
Understand issues and restrictions of Blind Receivings and how it functions in Retail Cloud.
For app versions less than 9.8.1, while receiving, failure to save your progress can result in the loss of all work, including scanned items, if you tap the merchant logo in the POS app. However, for versions 9.8.1 and later, users are provided with the option to save before exiting.
