You are here:
Create a Data Share Target to Connect with Snowflake
Create a data share target in Data 360 to establish connectivity with a Snowflake account.
Required Editions
| Available in: All Editions supported by Data 360. See Data 360 edition availability. |
| User Permissions Needed | |
|---|---|
| To create a data share target: | Data Cloud Architect permission set |
Private Connect for Data 360 only supports AWS PrivateLink with Snowflake service within the same cloud service provider geographical region. This means that cross-region connectivity is not supported. For example, if your Data 360 instance is in the US West region, then the Private Connect for Data 360 service will only be available for use with Snowflake within the US West region.
- In Data Cloud, on the Data Shares Target tab, click New.
- For the connection type, select Snowflake, and click Next.
-
Enter these details.
- Label - The display name of the data share target. There’s no character limit.
- API Name - This field is auto-populated to match the label name, but you can use a different name.
- Account Url - Enter the value of OAUTH_AUTHORIZATION_ENDPOINT and convert any
underscores to hyphens and ignore the subdirectory and subsequent parts. For example,
if your OAuth Authorization Endpoint URL is
https://nto_america_dev_instance.example.computing.com/oauth/authorize, you can usehttps://nto-america-dev-instance.example.computing.comfor the Account Url. Note If PrivateLink is enabled on Snowflake account and IP allowlisting is used for data sharing capability, then use the Public URL of the OAuth Authorization Endpoint for the Account Url.
-
To connect without authenticating, select the Skip
authentication checkbox or enter the Client ID and Client Secret that are
generated in Snowflake.
Refer to Get User Credentials from Snowflake.
- Enter a description for the data share target and click Save.
-
On the Snowflake login page, enter the username and password from the previous step and
authenticate to Snowflake with a Data Cloud architect permission set. You route back to
Data Cloud and the data share target turns to active status.
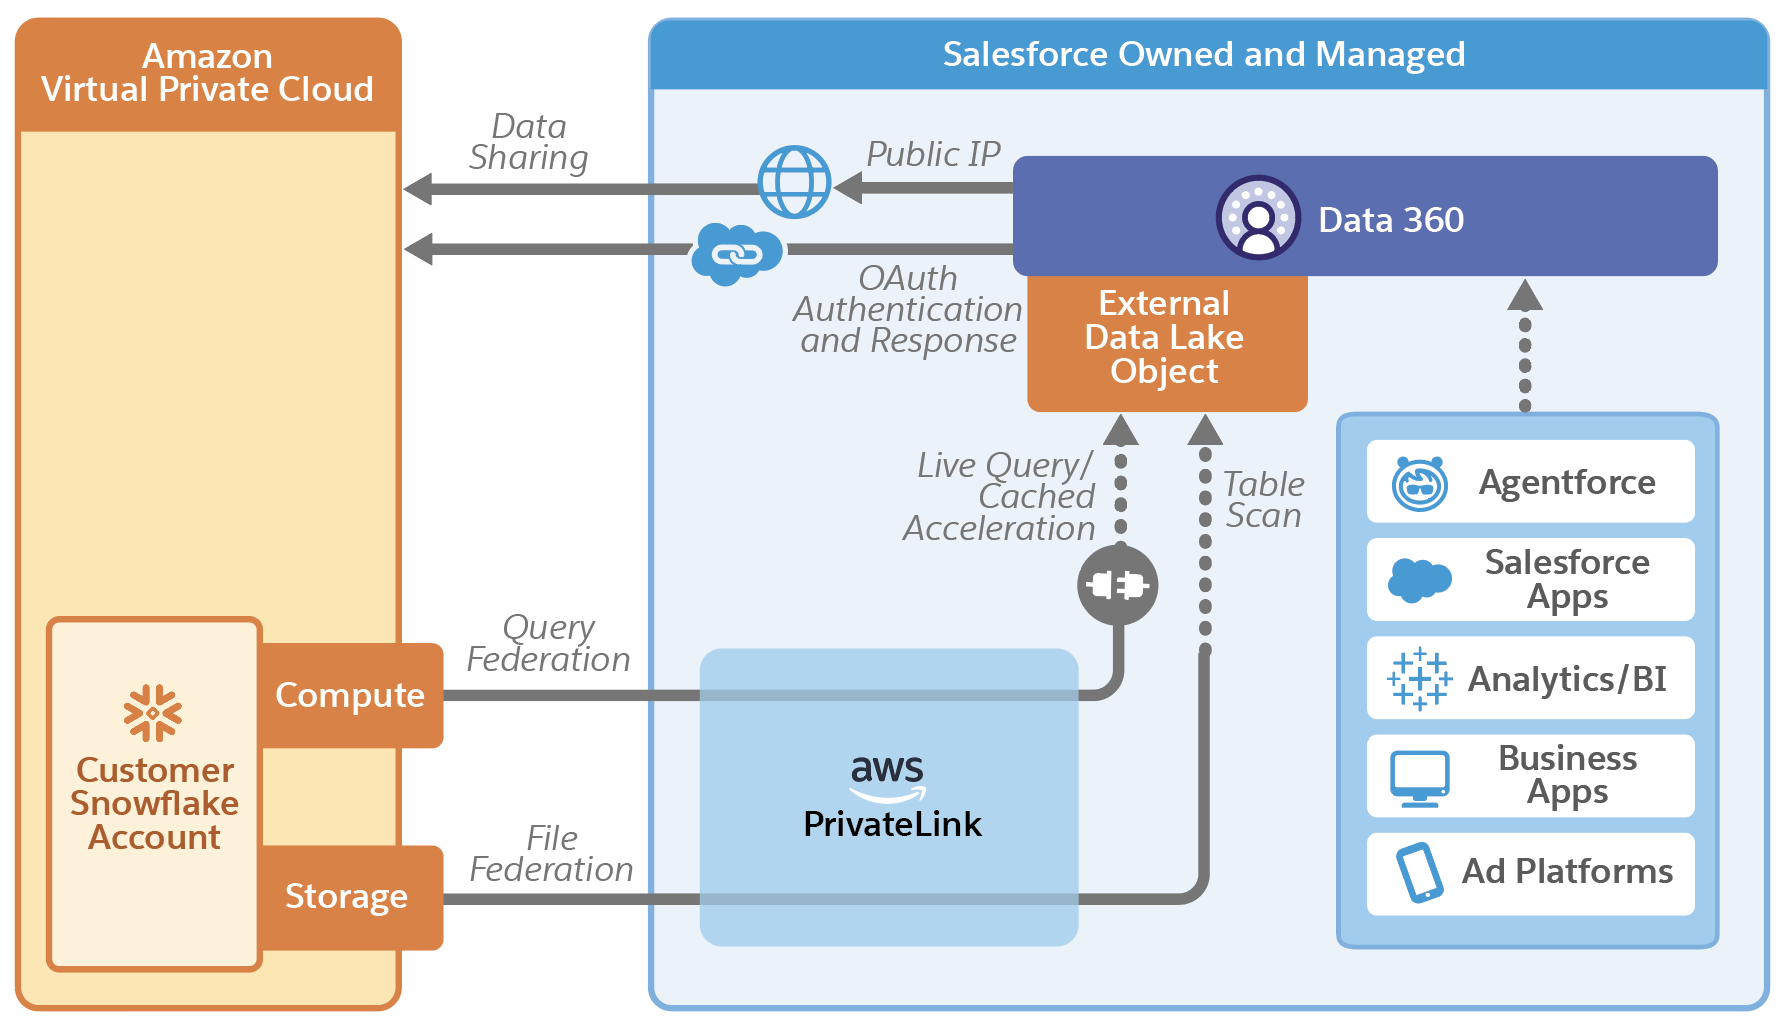
When sharing data with Snowflake via a custodian account, OAuth authentication uses Private Connect for Data 360 to securely authenticate the customer's Snowflake account. After the data share is linked to a data share target, data sharing from Salesforce happens through a secure public IP that follows Hyperforce security and privacy guidelines. Salesforce leverages Snowflake's built-in secure data sharing feature to share data between the Salesforce custodian account and Snowflake customer account. The OAuth authentication process happens only once, hence the security integration object created in Snowflake is no longer necessary for Salesforce Data 360.