
You are here:
Enable Notebook AI For Data Spaces and Users
Grant Data 360 Notebook AI access to data in data spaces and give enterprise users access to Notebook AI with custom permission sets. In a multi-org architecture, enable Notebook AI in both the home org and companion org.
Required Editions
| Available in: All Editions supported by Data 360. See Data 360 edition availability. |
| User Permissions Needed | |
|---|---|
| To access Setup | System admin profile |
In Setup, select and turn on Einstein Setup. For more information, see Set Up Einstein Generative AI.
In Setup, select Agentforce Agents, and turn on Agentforce. For more information, see Enable Agentforce.
Grant Notebook AI Data Space Access
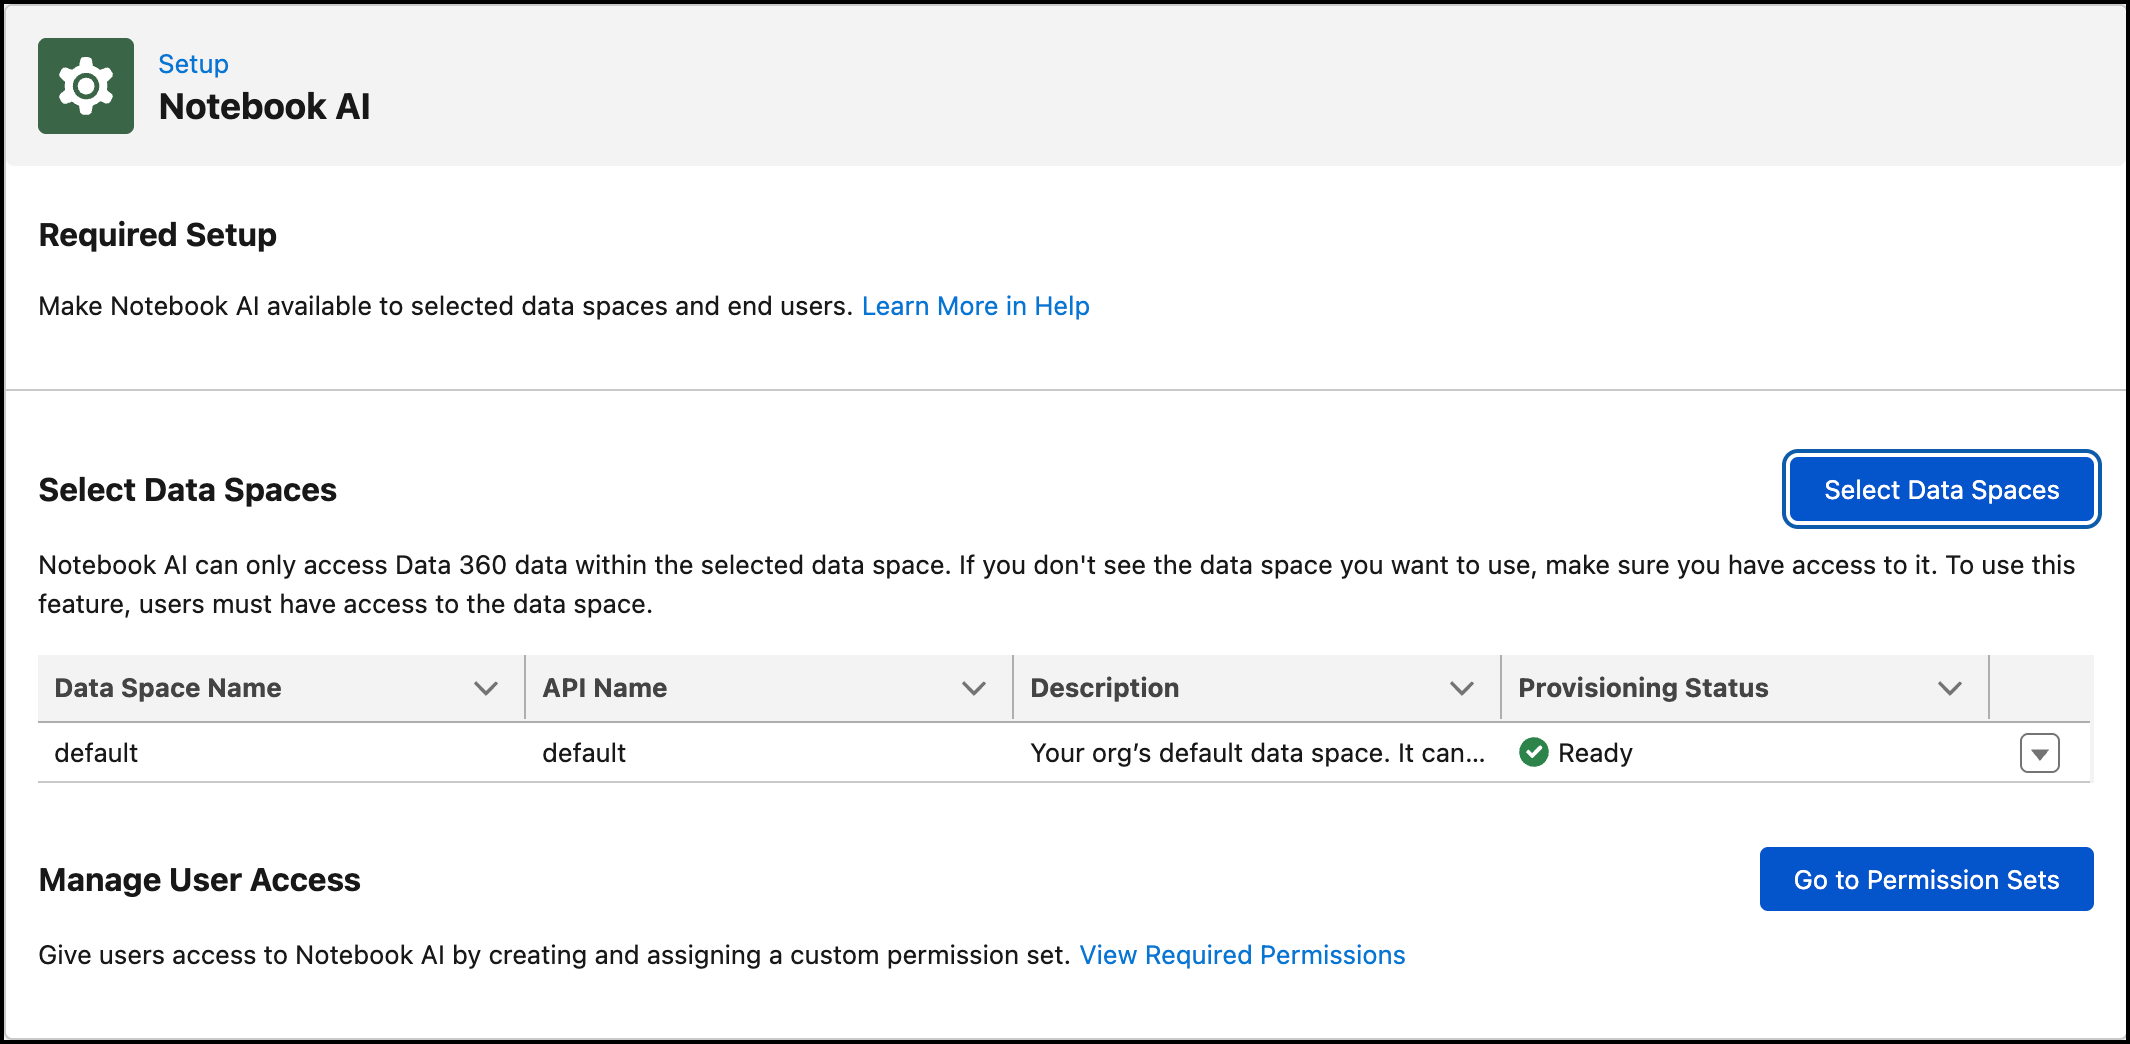
Give Notebook AI access to data by selecting data spaces. To use Notebook AI, users must also have access to those data spaces.
-
From Data Cloud Setup, enable Notebook AI in
Feature Manager.
Notebook AI gets access to the default data space.
-
In Feature Settings, select Notebook AI and select the data spaces where you want to
give Notebook AI access to data.
If you don't see the custom data spaces, update Data Cloud Data Space Management. For more information see, Troubleshoot Notebook AI Errors.
Next, go to Manage Users to give enterprise users access to Notebook AI.
Enable Notebook AI User Access
To give users access to Notebook AI, create and assign them to a custom permission set. You can also clone an existing Data Cloud permission set and add the necessary permissions.
- From Setup, in the Quick Find box, enter Permission Sets, and then select Permission Sets.
-
In the Permission Sets page, create a permission set and add the necessary
permissions to ensure that user gets access only to Notebook AI.
Select Data Cloud as the license for the permission set. You can also clone the Data Cloud permission set and modify the permissions.
- Update permission set information and click Save.
-
Select the new permission set and ensure that only the following permissions are
enabled.
System Permissions Permission Name Access Grant users permission to sfDrive Enabled Create, edit, and delete knowledge spaces Enabled Object Settings Permission Name Access Data Knowledge Library Source Relationships Read, Create, Edit, Delete, View All Records, Modify All Records Data Knowledge Source Read, Create, Edit, Delete, View All Records, Modify All Records Data Knowledge Space Config Read, View All Records Data Knowledge Space Definitions Read, Create, Edit, Delete
Data Knowledge Space Library Read, Create, Edit, Delete Data Knowledge Space Library Relation Read, Create, Edit, Delete, View All Records, Modify All Records Data Model Domain Capability Usage Read, View All Records Data Model Fields Read, View All Records Data Model Objects Read, View All Records Data Model Taxonomies Read, View All Records Data Object Categories Read, View All Records Data Semantic Search Definitions Read, View All Records Data Space Definitions Read Data Spaces Read - To manage user access to data spaces, assign Dataspaces to the permission set from Data Cloud Data Space Management.
- In Agent Access, add Notebook AI Agent to the permission set.
- Assign users to the Notebook AI custom permission set from Manage Assignments. For more information see, Manage Permission Set Assignments.
- Optionally, to ensure that the Notebook AI tab is visible in your org, from Setup, navigate to the user's profile and Tab Settings, and enable Notebook AI.