
You are here:
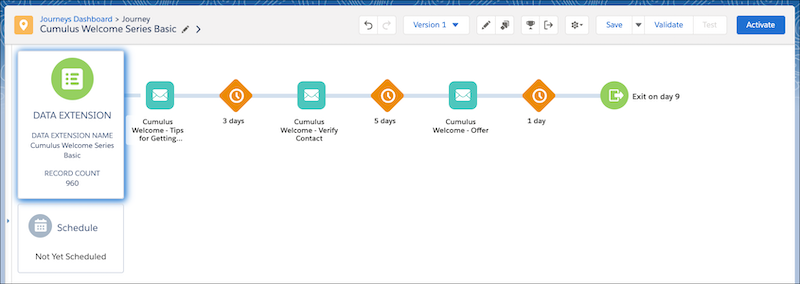
Create a Welcome Series in Journey Builder
Now that the emails are complete, you can create the journey.
- In Marketing Cloud Engagement, go to Journey Builder.
- Click Create New Journey.
- Select Multi-Step Journey and then click Create.
- For the entry source, drag a Data Extension activity to the canvas.
- To select the New Auto Policy data extension, click the data extension activity.
- Click Summary and then click Done.
- Next drag an Email activity to the interface.
- Click the email activity and then select the Cumulus Welcome - Tips for Getting Started Email after clicking Select Message.
- Click Summary to review Message Configuration, Delivery Options, and Advanced Options. Click Done.
- Repeat these steps for the other welcome emails.
- Adjust the wait times between the emails to 3 days, 5 days, and 1 day.
- To make this journey an ongoing campaign, click Schedule,
Recurring, and then Select.
- Select a Start Date, Start Time, and
Time Zone. For this campaign, select
Weekly, on Monday, and ending
Never.
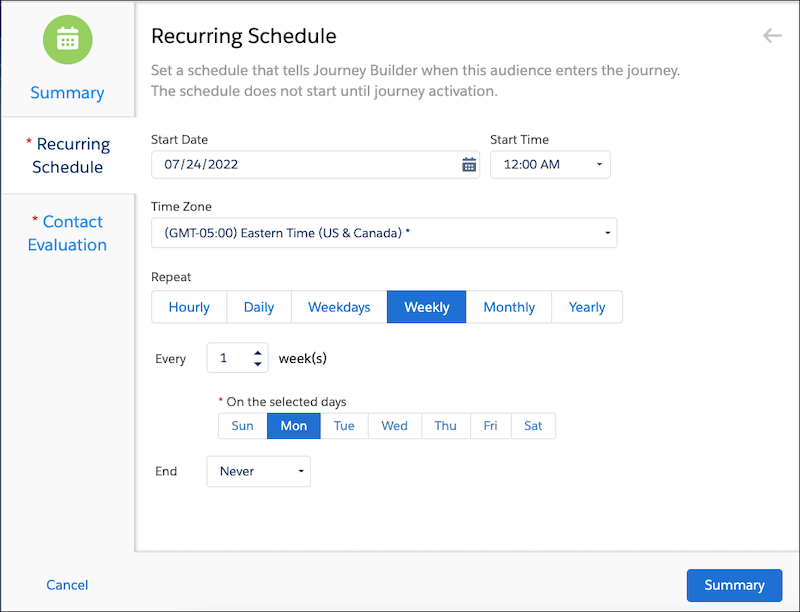
- Select a Start Date, Start Time, and
Time Zone. For this campaign, select
Weekly, on Monday, and ending
Never.
- Click Contact Evaluation and select Evaluate new
records only.
- For the first run, select to evaluate All records in the file.
- Click Summary and then Done.
- Review the journey and click Save.
- To ensure that all information has been completed, click Validate.
- Test the journey, and then click Activate when ready.
The campaign is ready for customers.
Did this article solve your issue?
Let us know so we can improve!