
You are here:
Create an SMS Journey in Journey Builder
With the data extension located and content reviewed, Cumulus can now build the SMS campaign.
You can build this campaign in Journey Builder.
- In Marketing Cloud Engagement, go to Journey Builder.
- Click Create New Journey.
- Select Multi-Step Journey and then click Create.
- For the entry source, drag a Data Extension activity to the canvas.
- Click the data extension activity and select Modified Account
- To ensure a contact is opted into SMS, follow these steps.
- Click Edit from Filter Contacts
- From the Attribute list under MobileConnect Data, select MobileConnect Demographics, then select Status.
- Drag Status to the canvas and click the pencil icon.
- Set Status so that it equals Active and click
Done
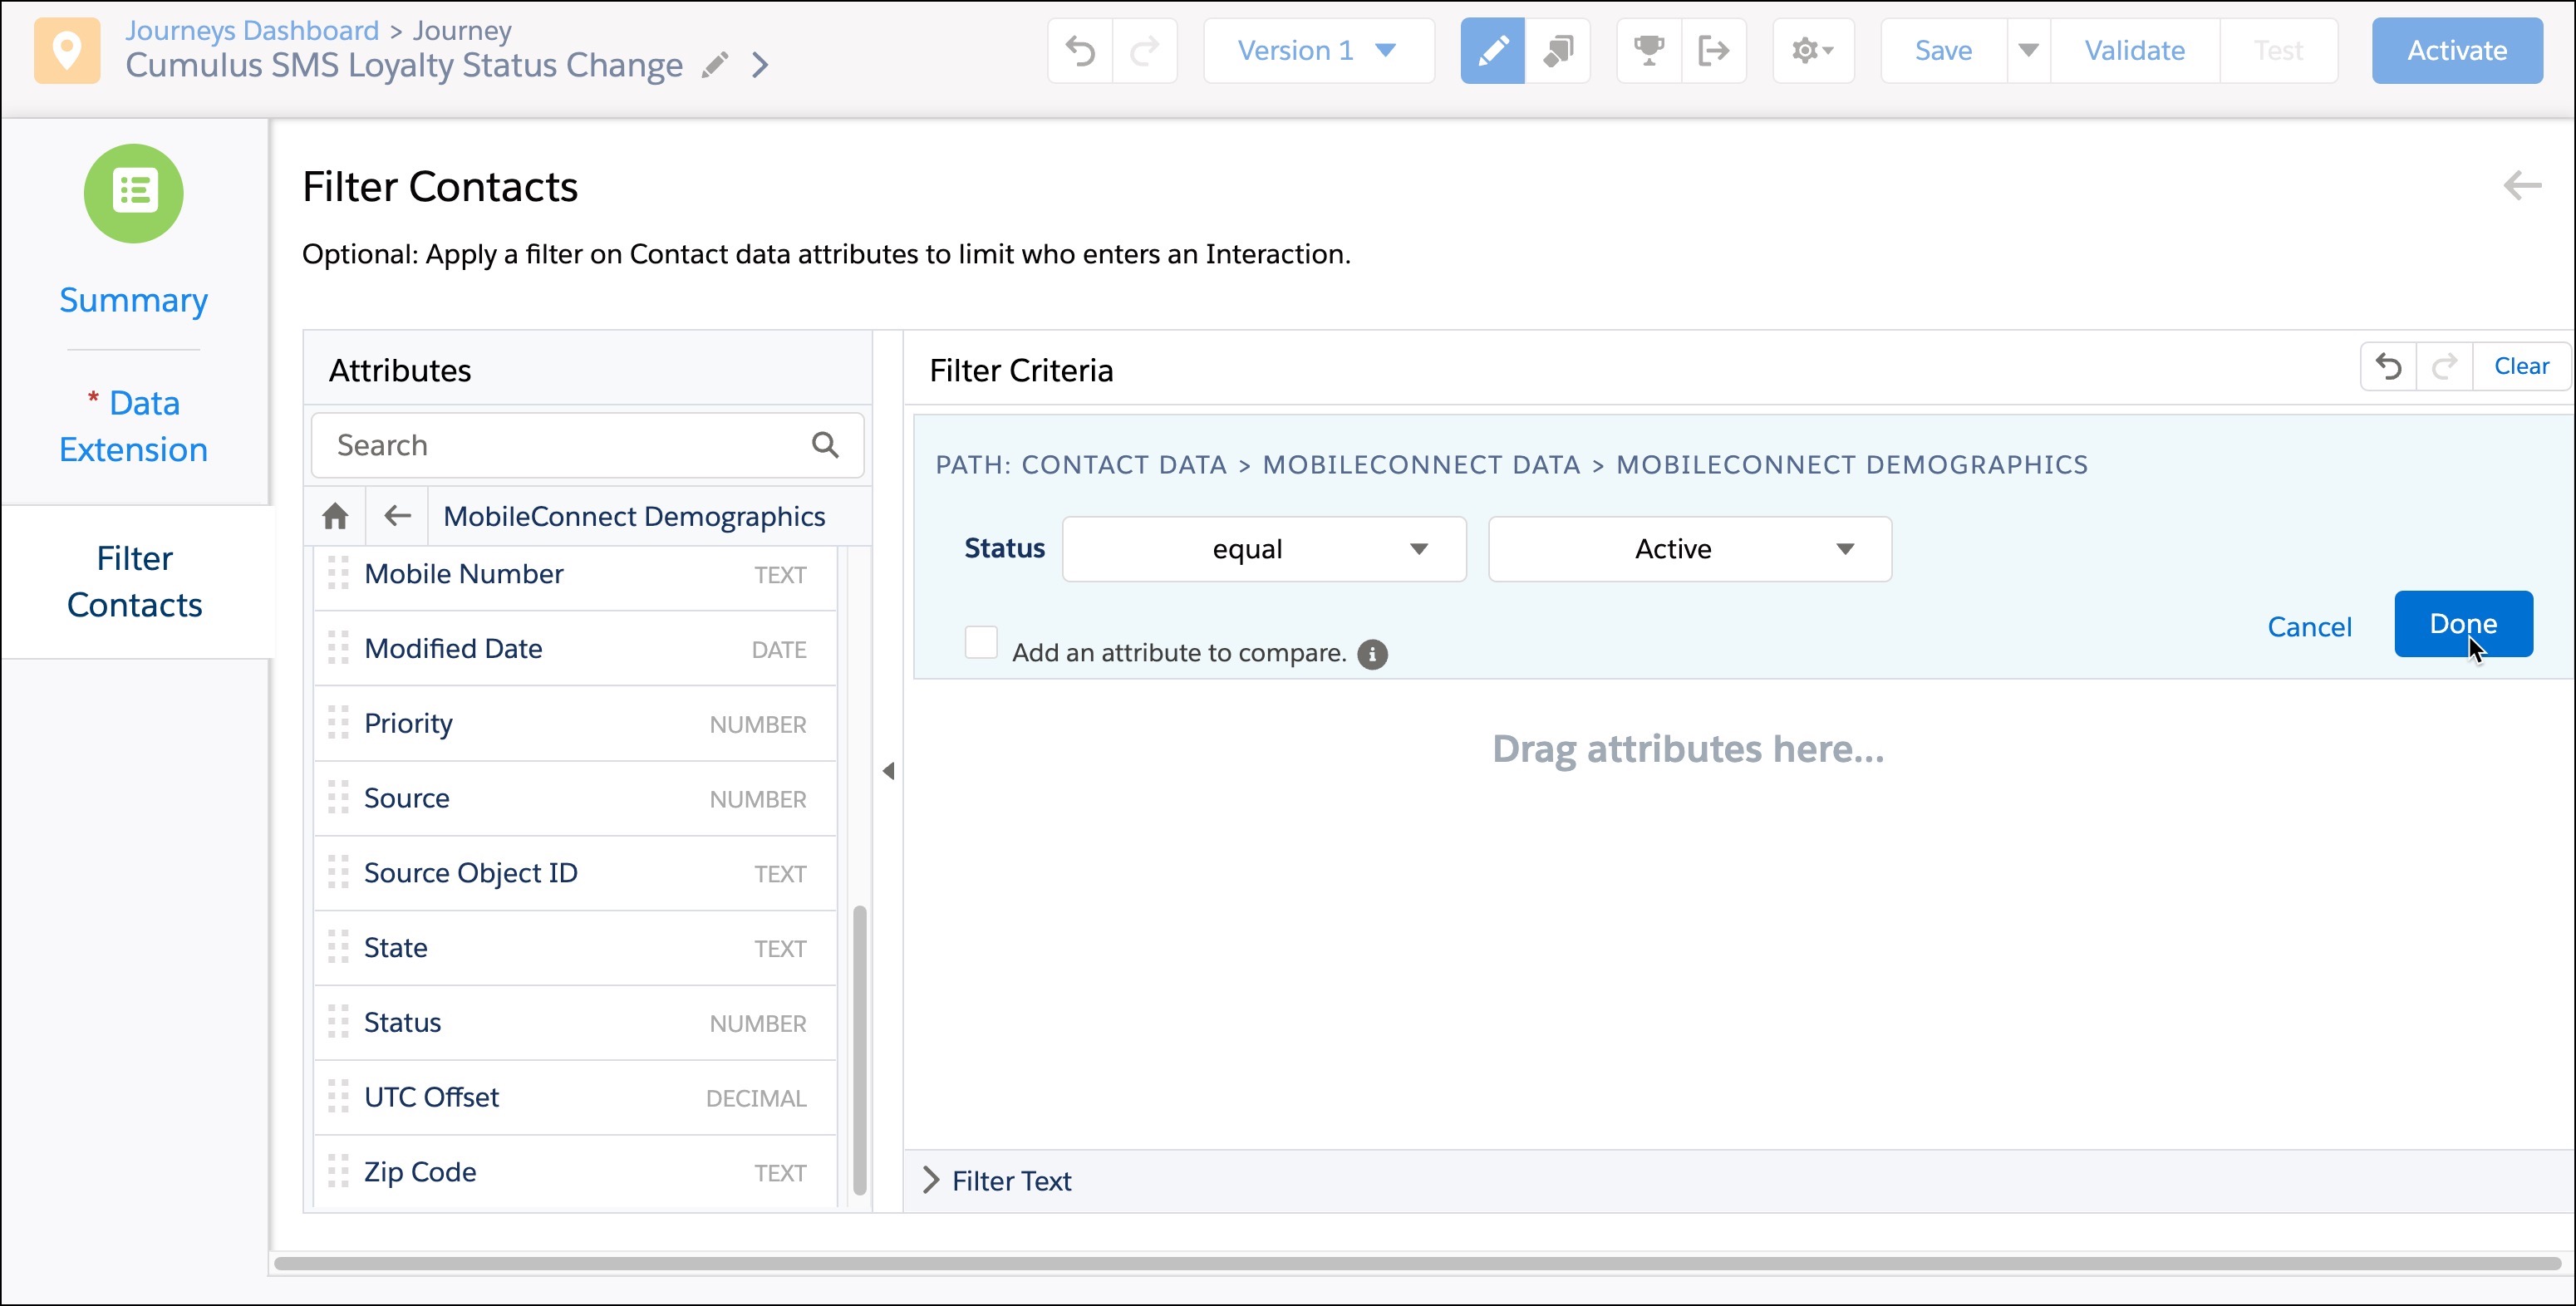
- Click Summary and then click Done.
- Now we can create an SMS message directly in Journey Builder.
- Drag an SMS activity to the interface.
- Click the SMS activity and click New Message.
- Under Message Definition, add your message. For example, for this campaign:
<script runat="server"> Platform.Load("core","1"); //Get First Name from Data Extension var First_Name = Platform.Recipient.GetAttributeValue("FirstName"); Variable.SetValue("@First_Name", First_Name); //Get and Parse JSON Block from Data Extension var JSONblock = Platform.Recipient.GetAttributeValue("Loyalty_Program_Member"); var JSONObj = Platform.Function.ParseJSON(JSONblock); //Read JSON Block variables Variable.SetValue("@program_name", JSONObj[0]["program_name"]); Variable.SetValue("@loyalty_tier", JSONObj[0]["Loyalty_Member_Tier"][0]["loyalty_tier"]); </script> Congrats, %%=v(@First_Name)=%%!! Your %%=v(@program_name)=%% loyalty status level has changed to %%=v(@loyalty_tier)=%%! - From the dropdown, select a code type and click Save.
- Under Message Configuration, click Edit from the section.
- Select the code the message can be sent from and an optional From Name.
- Click Delivery Options.
- Read and agree to the Opt-Out Availability Policy.
- Confirm subscriber opt-in from a keyword. If users are already unsubscribed from a keyword, this action doesn’t resubscribe them.
- Set a blockout window when you don’t want the text message to be sent.
- Click Summary.
- To check how subscribers see the message, click Subscriber Preview.
- Click Done.
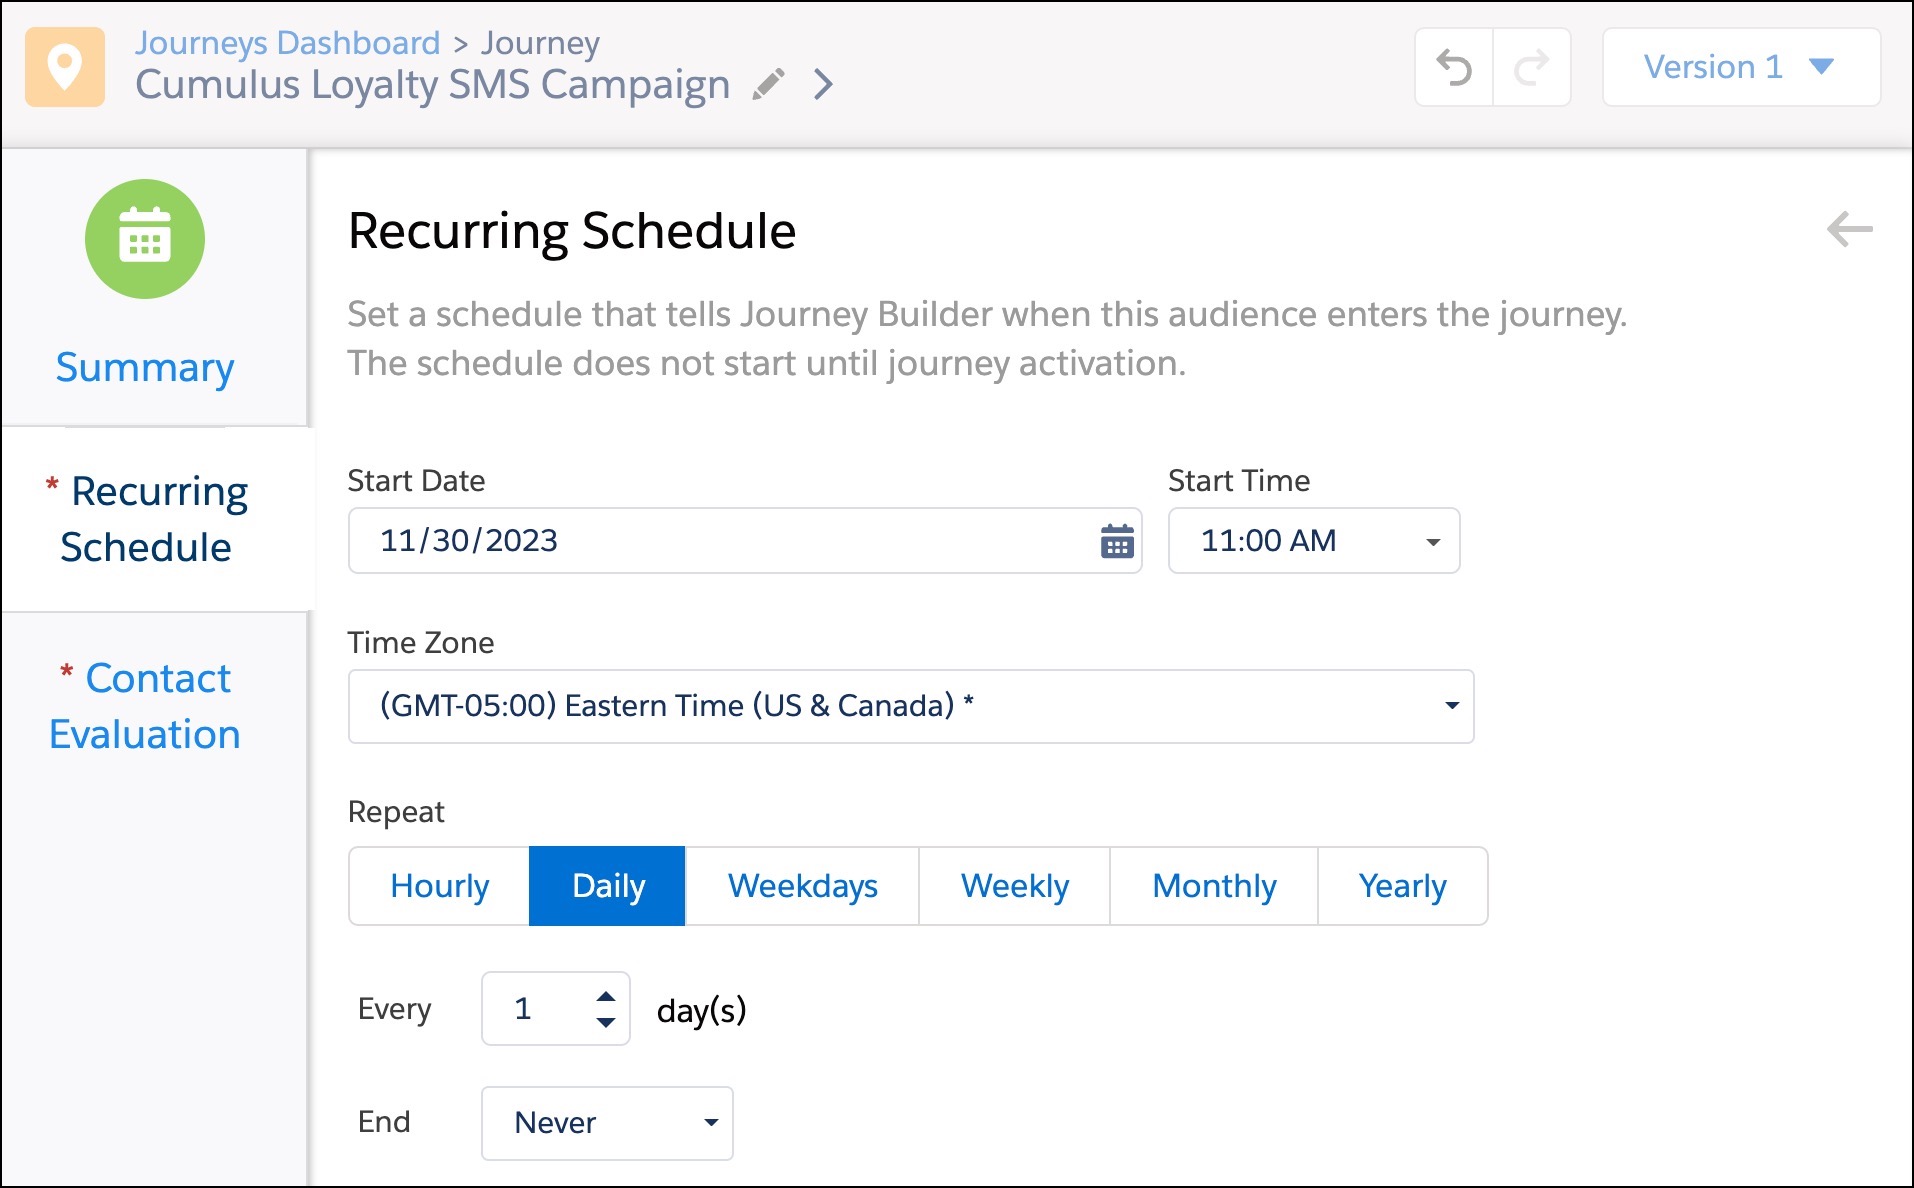
- Click Set Schedule and select the start date, time, and time zone.
For this campaign, select every 1 day, repeating
Daily, and Never ending.
- Click Contact Evaluation and select Evaluate new records
only.
- For the first run, evaluate All records in the file.
- Click Summary and then click Done.
- Review the journey, and click Save.
- To ensure that all information has been completed, click Validate.
- Test the journey and then click Activate when ready.
The campaign is ready for customers.
Did this article solve your issue?
Let us know so we can improve!