
You are here:
Manage Your Site’s Pages and Their Properties in Experience Builder
The Pages and Page Action menus centralize all your page-related needs, from page creation to audience criteria-based page visibility and everything in between.
Required Editions
| Available in: both Salesforce Classic and Lightning Experience |
| Available in: Enterprise, Performance, Unlimited, and Developer Editions |
| User Permissions Needed | |
|---|---|
| To customize or publish an Experience Cloud site: |
|
From the Pages menu (1), you can search for a page, add a page (2), or click  to access the Page Action menu (3).
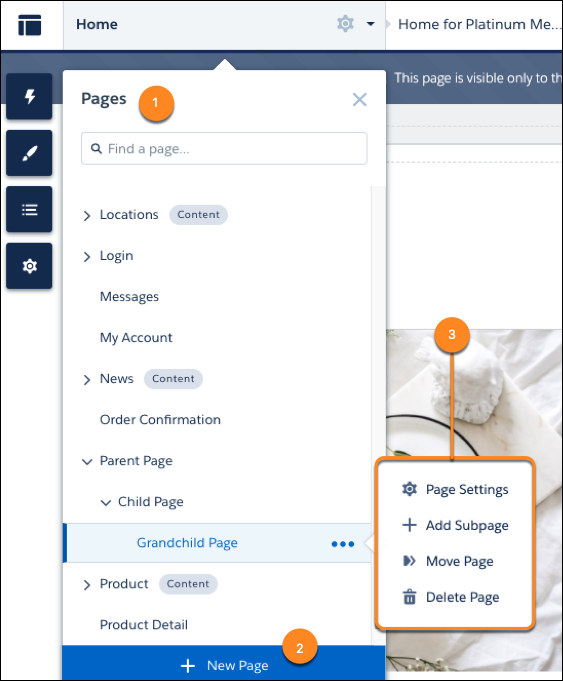
From the Page Action menu, you can:
-
Click Page Settings to edit a page’s properties, such as its URL, layout, or variations.
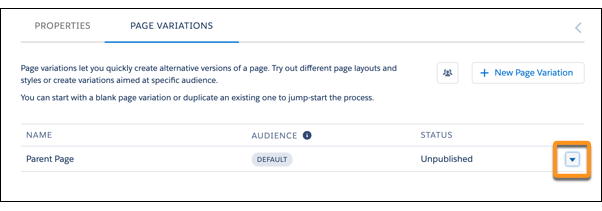
From Page Settings, click Page Variations to create alternative versions of a page and set audience criteria for the page’s visibility. If the selected page isn’t a template, you can easily delete it and its page variations with a single click.
-
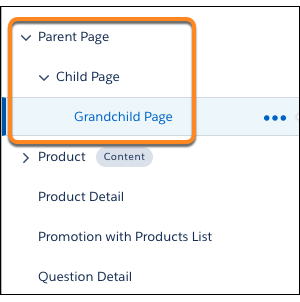
Click Add Subpage to build out your site’s hierarchy with up to
six page levels by nesting a standard, object, or content page under an existing page.
-
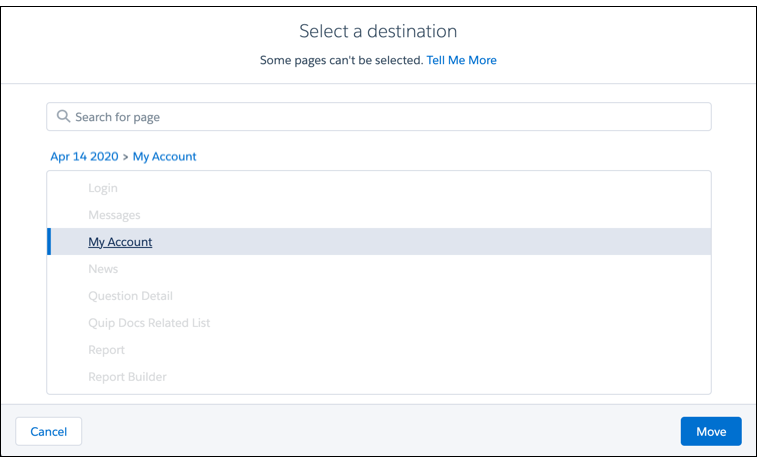
Click Move Page to change your page hierarchy and move a page
and its subpages to a new destination. When you move a parent page, the URLs for its
subpages update automatically to reflect your changes.
- Click Delete Page to remove a page from the Pages menu. When you delete a parent page, its subpages are also deleted.
-
Click + New Page at the bottom of the Pages menu to create a standard, object, or custom page.
 Note Not all pages have the Move Page, Add Subpage, and Delete Page options in the Page Actions menu. Review Considerations for Page Hierarchy and URL Conflicts in Experience Builder.
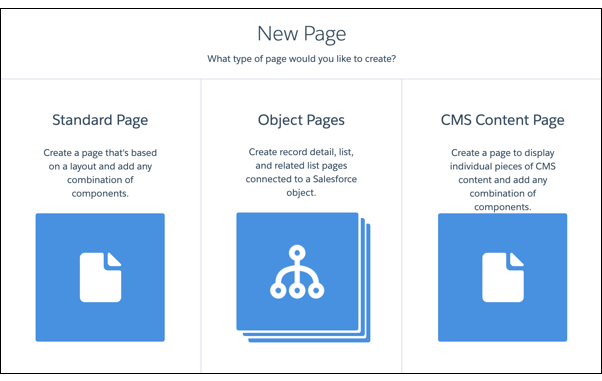
- Page Properties and Types in Experience Builder
Use the Page Action menu to view and edit the properties of the pages that make up your Experience Builder site. - Considerations for Page Hierarchy and URL Conflicts in Experience Builder
When you create and organize pages in your Experience Builder site, some pages behave differently than others. Keep these page management considerations in mind when you use the Page Action menu. - Enable the App Launcher in Experience Builder Sites
Display the App Launcher in Experience Builder Sites to make it easy for members to move between their sites and their Salesforce org. This functionality is available in any site based an Experience Builder site template or Lightning Bolt solution. - Inform Customers About Your Experience Builder Site Availability
Keep your customers informed when they can’t immediately access your Experience Builder site. Customizable availability pages describe what’s happening while customers wait for your site to load. The Service Not Available page lets them know when your site is down. When your site has higher-than-usual demand, the Too Many Requests page appears. - Edit Pages and Components in Experience Builder
Each page contains a collection of components that are organized around a task or function, whether it’s opening a case or searching for an article. The pages in each Experience Builder template are ready for you to use with little configuration. Add new components to your site’s pages, edit the properties of existing components, or delete components that you don’t require. - Add Data Providers to Get Data on Enhanced LWR Site Pages (Beta)
Configure data providers on enhanced LWR site pages in Experience Builder and get access to data from different sources. You can bind data from Apex or Record data providers to individual builder components on to these pages. - Create Custom Site Pages with Experience Builder
To extend your Experience Builder template, create custom site pages. To get the most from your Salesforce data, add custom record detail, list, and related list pages. To display individual pieces of content along with any combination of components, use CMS content pages. - Add Markup to the Page <head> to Customize Your Experience Builder Site
Add custom analytics, improve your SEO results, and more by adding custom markup to the page<head>in Experience Builder. For example, you can include SEO meta tags that are visible only to search engines, add a favicon, or add custom code for Adobe Analytics and Google Tag Manager. - Expression-Based Component Variations in Enhanced LWR Sites
Site visitors are important to your business and deserve to have the most custom experience possible. With Expression-Based Component Variations, you can create multiple versions of a component and then change the style and visibility settings to make each version unique. You can choose to have a single variation for a targeted group or several variations that apply broadly to subsets of your users. Apply visibility rules to each variation to make it appear to the appropriate site visitors. And when you have multiple variations for the same component, prioritize them so you know when your variations appear and to whom. - Expression-Based Visibility in Enhanced LWR Sites
With Expression-Based Visibility, you can create a set of rules that dictate when and to whom your components in your enhanced LWR sites appear. Choose visibility settings based on User and Product object fields such as location, language, buyer groups, and more. Creating visibility conditions based on expressions improves the agility of your site. - Personalization with Audience Targeting in Aura Sites
Keep your users engaged by offering personalized, relevant content that’s customized for a particular audience. To create an audience, you assemble a set of criteria that defines a user segment. You can then tailor a single site to meet the needs of multiple user segments. For example, you can present the same site with a different look and feel for each audience or show different pages, components, or data to different audiences. - Use Visualforce in Experience Builder Sites
If you created Visualforce pages, actions, buttons, links, and canvas apps for your Salesforce Tabs + Visualforce template-based sites, you can use them in Experience Builder sites. - Add Streams to Your Experience Builder Site
Your site users can combine multiple feeds into a stream to create a single point of access to related information. Combine feeds of top contributors or discussions concerning a particular product line. Create a stream that combines feeds from discussions, groups, topics, profiles, and all kinds of objects, like cases, opportunities, and accounts. No more jumping from feed-to-feed to get a sense of what people are saying. Each member can create up to 100 streams.
Did this article solve your issue?
Let us know so we can improve!