You are here:
Set Up Dynamic URLs with Experience Workspaces
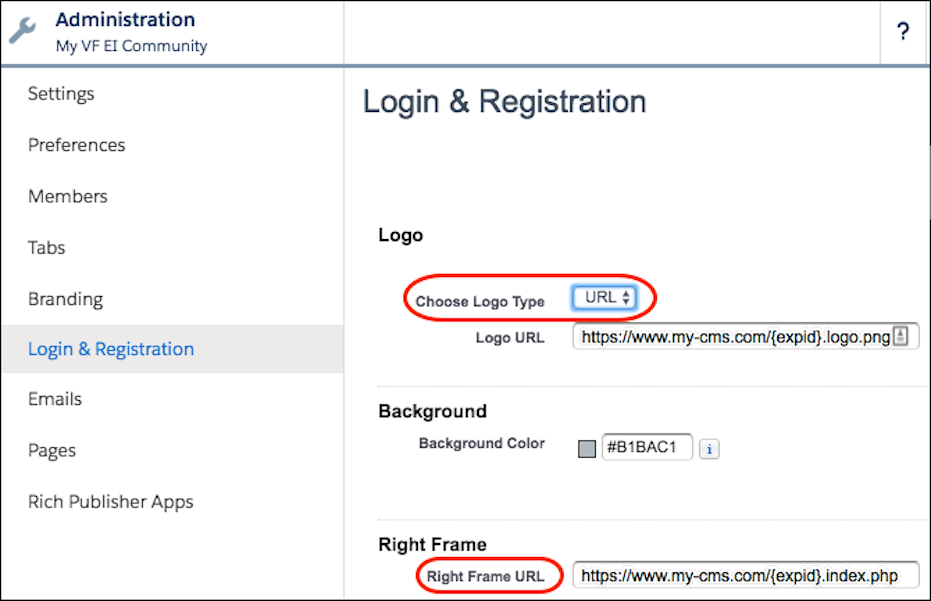
You set up dynamic URLs for your login experience from the Login & Registration page of the Administration workspace. Create dynamic URLs by including a placeholder that resolves at run time. Implement the dynamic URLs for the logo and right-frame content on the pages used to log in, verify identity, reset passwords, and self-register.
Set up dynamic branding from the Experience WorkspacesLogin & Registration page. You can add custom login pages to your site regardless of the template that you used to create the community.
The dynamic URL contains the expid placeholder for your logo and right-frame content. For example, the dynamic URL https://www.my-cms.com/{expid}/logo.png controls the logo displayed on your pages. The dynamic URL https://www.my-cms.com/{expid}/index.php controls the right-frame content displayed on your pages. The right-frame URL displays the contents of the URL in an iframe. At run time, for the logo and right-frame content, the external site replaces the dynamic URL with the brand specified by the expid value (for example, coffee) in the query parameter.
The brand that appears at run time depends on the expid dynamic URL that you specify on the Login & Registration page. For example, given the dynamic URL, https://www.my-cms.com/{expid}/logo.png, the Fix Coffee logo appears when the login URL is https://fix.my.site.com/?expid=coffee.
You deliver different brands, or user experiences, based on how the expid query parameter
gets set in your implementation. You can set it in a URL that you send to your site users in
an email. Or you can set the URL on a login button. You can also set the query parameter
programmatically with the setExperienceId method of the
System.Site class.
In addition to using dynamic branding for the login process, you can use it to brand the user’s experience during the entire user session. To do so, instruct the site to store the expid value in the user’s browser. When stored, you can retrieve it as long as the user’s logged in to the site.
When specifying your logo and right-frame URLs, keep in mind these considerations.
- Most browsers don’t allow mixing the
http://andhttps:// protocolson the same page. - The URL for your right-frame content must use the same protocol as your site. Your resource and test or demo servers must also use the same protocol.
Generally, we recommend using https:// for your logo
and right-frame URLs. However, in local and test environments, http:// can be more flexible.
To set up dynamic URLs for your logo and right-frame content, take these steps.
- From Setup, in the Quick Find box, enter All Sites, and select All Sites.
- To access Experience Workspaces, next to your site name, click Workspaces
- Select Administration, and then select Login & Registration.
-
To set up dynamic branding for your logo, take these steps.
- For Logo Type, select URL.
- For the Logo URL field, enter a dynamic URL. For example, https://www.my-cms.com/{expid}/logo.png.
-
To set up dynamic branding for your right-frame content, for Right Frame URL, enter a
dynamic URL. For example,
https://www.my-cms.com/{expid}/index.php.