Customize the email you send to verify a user's identity when they access your
Experience Cloud site from an unfamiliar browser, application, or IP address. The email includes a
one-time password (OTP) that users enter to verify their identity. Change the look and wording of
the email to match your brand.
Required Editions
Available in: Experience Builder sites
Available in: Enterprise, Performance, Unlimited, and
Developer Editions
User Permissions
Needed
To create an Experience Cloud site:
Create and Set Up Experiences AND View Setup and Configuration
To customize or publish an Experience Cloud site:
Create and Set Up Experiences AND View Setup and Configuration AND be a member
of the site
OR
View Setup and Configuration AND be a member of the site AND have appropriate
role-based site access
Device activation works differently based on whether you've configured a trusted IP address
range. If you haven't defined a trusted IP range, users are prompted to verify their identity
when they log in from a new browser or app. If you have defined a trusted IP range, users must
verify their identity when they log in from an IP address outside of the range. For more
information on how device activation works, see Device Activation.
You can enable device activation for Experience Cloud site users through Profiles in Session Settings.
From Setup, in the Quick Find box, enter Sites, and then select
All Sites.
Next to your site, click Workspaces.
Select Administration, and then select
Emails.
Under Email Templates, click next to Device Activation Verification, and
select Experience Cloud: Device Activation Verification Email.
Save your settings.
Your site is set up to send device activation notifications to users.
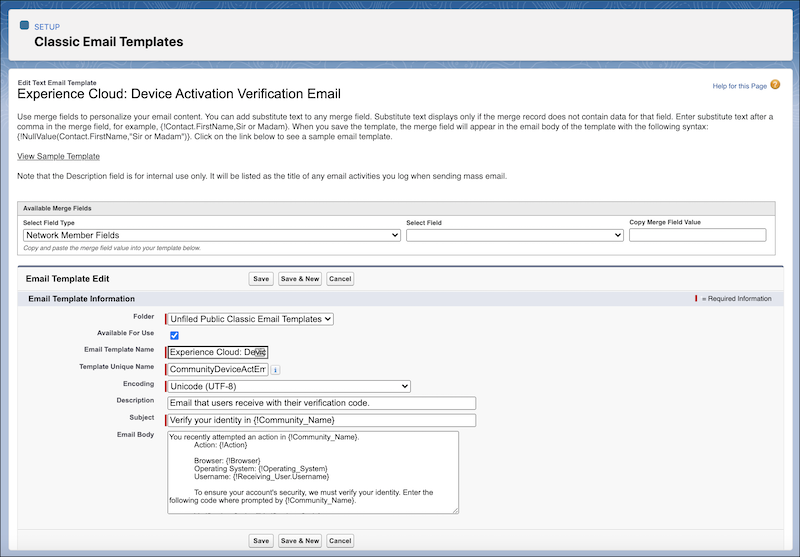
To customize the notification, edit the email template.
From Setup, in the Quick Find box, enter Email Templates, and then
select Classic Email Templates.
Next to Experience Cloud: Device Activation Verification Email, click
Edit.
Edit the text in the email body.
Important Don't remove {!Verification_Code}.
Optionally, to personalize the text, use the available merge fields listed at the top of
the page. For more information, see Merge Fields for Experience Cloud
Sites.
Example
Did this article solve your issue?
Let us know so we can improve!
Loading
Salesforce Help | Article
Cookie Consent Manager
General Information
Required Cookies
Functional Cookies
Advertising Cookies
General Information
We use three kinds of cookies on our websites: required, functional, and advertising. You can choose whether functional and advertising cookies apply. Click on the different cookie categories to find out more about each category and to change the default settings.
Privacy Statement
Required Cookies
Always Active
Required cookies are necessary for basic website functionality. Some examples include: session cookies needed to transmit the website, authentication cookies, and security cookies.
Functional Cookies
Functional cookies enhance functions, performance, and services on the website. Some examples include: cookies used to analyze site traffic, cookies used for market research, and cookies used to display advertising that is not directed to a particular individual.
Advertising Cookies
Advertising cookies track activity across websites in order to understand a viewer’s interests, and direct them specific marketing. Some examples include: cookies used for remarketing, or interest-based advertising.