
You are here:
Assign an Audience to a Component Variation
Use audiences to vary the content that users see within the CMS Collection, Navigation Menu, or Tile Menu components. For example, show one navigation menu to your site members and a more abbreviated navigation menu to guest users. Or show different CMS content to internal employees and external partners.
Required Editions
| Available in: Salesforce Classic and Lightning Experience |
| Available in: Enterprise, Performance, Unlimited, and Developer Editions |
| Applies to: Aura sites |
| User Permissions Needed | |
|---|---|
| To customize or publish an Experience Cloud site: |
|
When you assign an audience to a CMS Collection component variation, you can determine which CMS content that audience sees within the component. When you assign an audience to a Navigation Menu or Tile Menu component variation, you can determine which items appear in the navigation menu for that audience.
You can assign only one audience to each component variation. To prioritize audiences for component variations, see Prioritize Audiences in Aura Sites.
Assign an Audience to a CMS Collection
- In Experience Builder, click the CMS Collection component that you want to work with.
- In the component’s properties panel:
- If no CMS collection has been added to the component, click Add Collection, select a collection, and click Personalize.
- If a CMS collection has been added to the component, click Personalize.
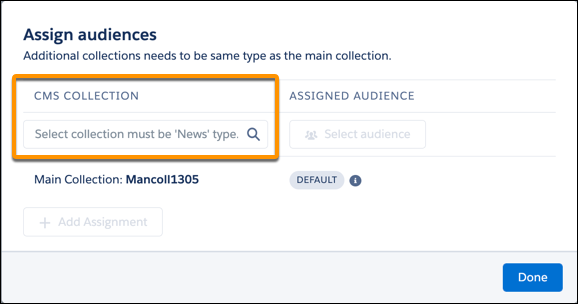
- In the first Assign audiences window:
- If no collection has an assigned audience, click in the CMS Collection field, and
select a collection from the menu.
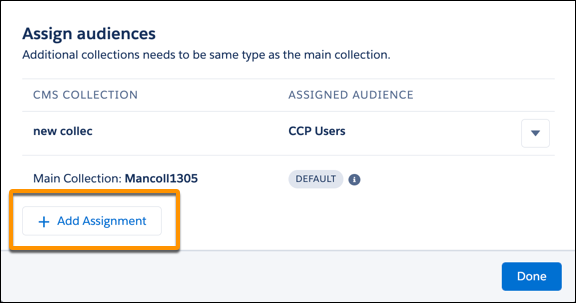
- If an audience is already assigned to at least one collection, click Add
Assignment, click in the CMS Collection field, and select another
collection from the menu.
- If no collection has an assigned audience, click in the CMS Collection field, and
select a collection from the menu.
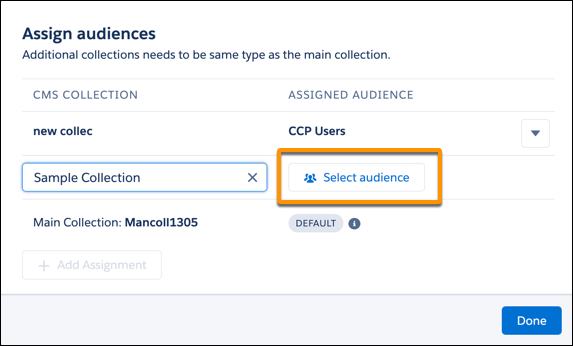
- Click Select audience for the collection.
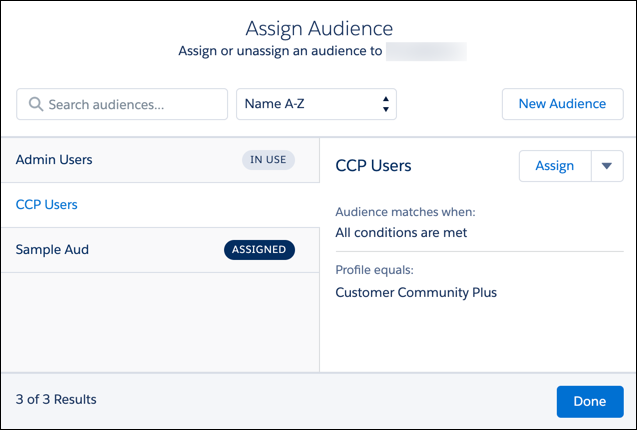
- In the second Assign Audience window:
- To create an audience, click New Audience. Name the audience, set the criteria to define it, select the conditions when the audience matches, and click Save & Assign.
- To assign an existing audience, select the audience, click Assign, and click Done.
- To assign an audience to another CMS collection, click Add Assignment, and follow steps 3–5. Otherwise, click Done.
- To make these changes visible to your site visitors, publish the site.
Assign an Audience to a Navigation Menu or Tile Menu
- In Experience Builder, click the Navigation Menu or Tile Menu component that you want to work with.
- In the component’s properties panel:
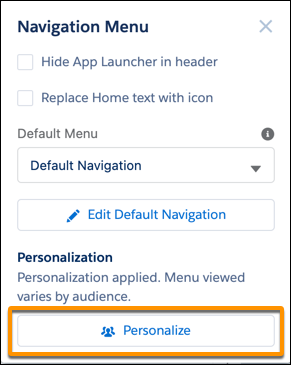
- If no default menu has been selected in the Default Menu field, select one. Then click Personalize.
- If a default menu has been selected, click Personalize.
- In the first Assign audiences window:
- If no navigation menu has an assigned audience, click in the Menu field, and select a navigation menu.
- If at least one navigation menu has an assigned audience, click Add Assignment, click in the Menu field, and select another menu.
- Click Select audience for the menu.
- In the second Assign Audience window:
- To create an audience, click New Audience. Name the audience, set the criteria to define it, select the conditions when the audience matches, and click Save & Assign.
- To assign an existing audience, select the audience, click
Assign, and click Done.
- To assign an audience to another menu variation, click Add Assignment, and follow steps 3–5. Otherwise, click Done.
- To make these changes visible to your site visitors, publish the site.