
You are here:
Deploy the Agent to Your Experience Cloud Site
First, deploy the agent to your selected Experience Cloud site. This action adds the necessary components to your site page.
Required Editions
| Available in: Salesforce Classic and Lightning Experience |
| Available in: Enterprise, Performance, Unlimited, and Developer Editions |
| Available in: Enhanced Chat with the Einstein for Service, Einstein Platform, Community, Community Plus, or Agentforce for Service add-on |
| Available in: LWR and Aura |
| User Permissions Needed | |
|---|---|
| To enable digital experiences: | Create and Set Up Experiences AND View Setup and Configuration |
| To customize or publish an Experience Cloud site: | Create and Set Up Experiences AND View Setup and Configuration AND be a member of the site OR View Setup and Configuration AND be a member of the site AND have appropriate role-based site access |
| To set up this Enhanced Chat: | Customize Application AND Modify Metadata Through Metadata API Function |
| To create and manage Agentforce Service agents: | Create and Set Up Experiences AND View Setup and Configuration AND be a member of the site OR View Setup and Configuration AND be a member of the site AND have appropriate role-based site access |
Before you begin, make sure you've completed these steps:
- Create an Agent from an Agentforce Service Agent Template.
- Create an Experience Cloud site.
- Provision Digital Engagement in your Salesforce org.
- Confirm your org uses Omni-Channel or Enhanced Chat (formerly Messaging for In-App and Web).
- From Setup, in the Quick Find box, enter Agentforce Agents, and then select Agentforce Agents.
- From the list of agents, select the specific agent you want to deploy (for example, Agentforce Service Agent).
- In the top right corner of the Agent Details page, click Open in Builder.
- From the Agent Readiness Checklist, select Deploy Your Agent to an Experience Cloud Site, and then click Go to Sites.
-
Select an Experience Cloud site from the list and click
Deploy.
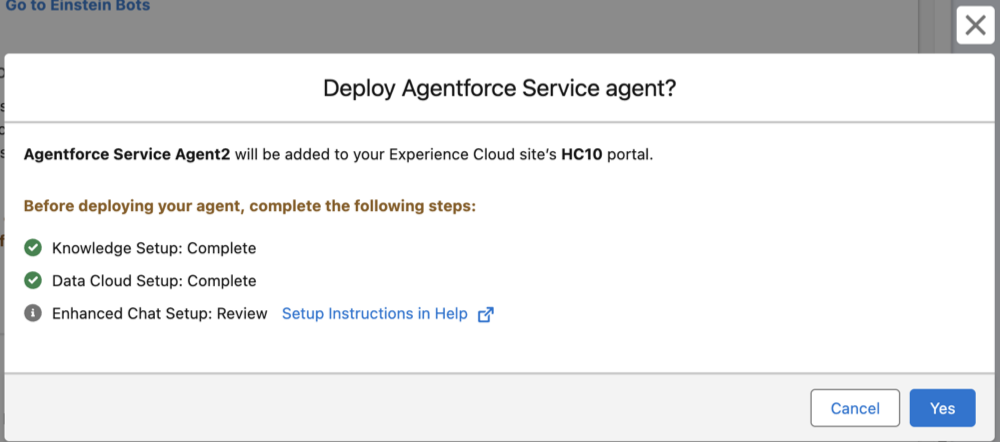
-
When the confirmation window appears, verify the prerequisites are complete, and then
click Yes to proceed.
 Note The chat panel doesn’t automatically open in preview mode. Users must manually click the chat icon. In Experience Builder, verify that the Enhanced Chat component is added to the page. If you don’t see it, make sure that Enhanced Chat is configured in Setup. See Quickly Set Up Enhanced Chat v1 or v2 for Testing.
Did this article solve your issue?
Let us know so we can improve!