You are here:
Create a Multi-Site Quote or Order in Industries CPQ
When you create a master quote or order from an opportunity, it’s linked to the account with which the opportunity is associated. You can create multi-site groups based on the service points, premises, service accounts, subscribers, and other objects associated with the account. After you add and configure products, promotions, and discounts to a group, you can then apply them to all the individual members of the group. At that point, a child quote or order is created for each group member.
This procedure is for the Lightning Web Components (LWC) version of Industries CPQ available in Spring '22 and later. See Industries CPQ in LWC.
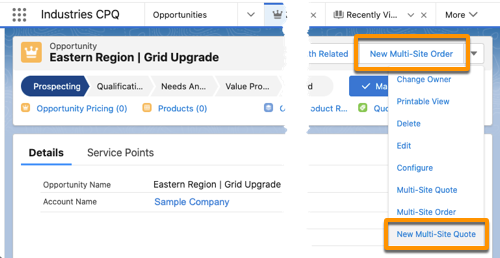
- From an opportunity, click New Multi-Site Order, or select New Multi-Site Quote from the opportunity menu.
- In the dialog, provide the quote or order information, and click Next.
-
In the group tab, select items to add to groups.
-
To view specific attributes for each item, click
 and select the columns to display.
- After selecting items, select Add New Group or an existing group.
- For a new group, enter the group's name and description, and click Save.
-
To remove a member from a group, click
 and select Remove from Group.
- After creating groups, click Next to group the next type of items to group or to open the cart.
 Note The items shown are based on your selection in the new quote or order dialog. If you selected more than one type of items, you can select and group items of each type. For example, if you selected premises, service points, and service accounts, the group tab guides you through creating groups for each type.
 -
To view specific attributes for each item, click
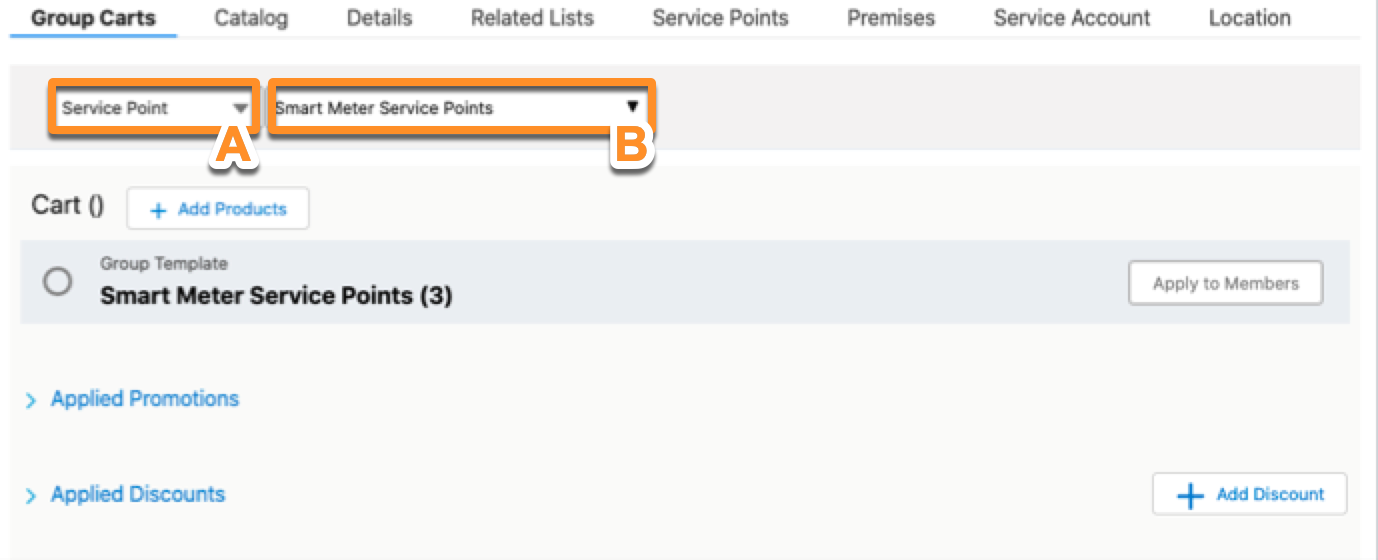
- From the cart, you can create groups or modify groups that you created in step 3. If you skipped creating groups earlier, create them here so that you can add products to the cart.
- In the Group Carts tab, select an item type (A) and then a group (B).
-
In the Group Carts tab, add products, promotions, and discounts to the selected group.
- Click Add Products to products and promotions. For details, see Search for Products and Promotions from the Cart in LWC.
- Configure products before or after you add them to the cart. See Configure a Product from the Cart in LWC.
- Click Add Discounts to select an existing discount or to create a custom discount. See Define Custom Discounts from the Cart in LWC.
- If needed, adjust the price of products in the cart. See Manually Adjust a Price in the Cart in LWC.
-
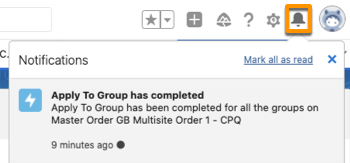
After adding products, promotions, and discounts to a group, click Apply to
Members.
-
Child quotes or orders are created for all the group members. If you add members to the group or change the products, promotions, or discounts, click Apply to Members again to recreate the child quotes or orders.
-
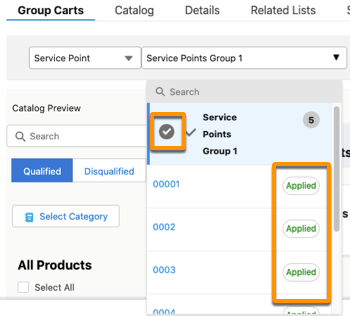
The group in the cart has a gray check before the group name. The Validate and Price button is available.
-
You can also verify the status for the group and its members by clicking the group menu. The group has a gray check, and each member has a status of Applied.
-
- For each group in each item type, repeat steps 5–7.
-
To address the null pointer exception when using MultiService ApplyToGroup, please
follow these steps:
- Ensure all service points are linked to the same premise: This premise should be specified in the vlocity_cmt__PremisesId__c field on the account.
- Review the configuration of the quote group: Verify that the member type is set correctly to service point.