You are here:
Pricing Rules
Pricing rules determine the price of the products in the cart. They use calculation procedures to calculate the appropriate prices and apply discounts. When you create a pricing rule, you specify a calculation procedure as the rule action.
Pricing rules can be hard or soft. When a pricing rule is soft, a customer can see a price even if she is not eligible for it. When a pricing rule is hard, a customer cannot see the price if she is not eligible for it.
Many pricing rules run in a defined sequence to result in the correct order pricing. Pricing rules, using entity filters and rule actions, modify orders. Actions may include calculation procedures, offering procedures, product relationships, and entity filters.
Pricing depends on pricing rules, which are based on attributes. The attributes drive the pricing. You can offer one product with pricing based on its attributes.
For example, you can offer broadband Internet service at different prices for 50 Mbps, 100 Mbps, and so on. You can also define rules that specify one price for a product by itself, but a different price when the product is part of a bundle.
You can implement promotions using pricing rules and the PricingRulesFlow. For more information about flows, see Flows.
Pricing rules use the PricingInterface and associated implementations to calculate the correct order total. The pricing interface and implementation are triggered when a product is added to, deleted from, or modified in an opportunity, order, or quote.
Pricing rule implementations include:
-
DefaultPricingImplementation: Use with standard pricing rules that are not dependent on any external factors.
-
PricingRulesFlowImplementation: Use with advanced pricing rules that are dependent on external factors.
You must associate the PricingRulesFlowImplementation class with the flow name. For more information see PricingRulesFlowImplementation .
Example pricing rules include:
-
Office Internet Solution costs $25 per month with a $10 one-time fee.
-
All non-discounted child items should be priced at $0.
-
Office Internet Solution is discounted by 10% if the quantity is 10 to 25, discounted by 15% for a quantity of 26 to 99, and discounted by 20% for a quantity of 100 or more.
-
The monthly price of Office Internet Solution is based on the selected download speed and upload speed.
Pricing rules must be run on Line Item objects—Opportunity Line Item, Order Line Item, or Quote Line Item.
Create a Standard Pricing Rule
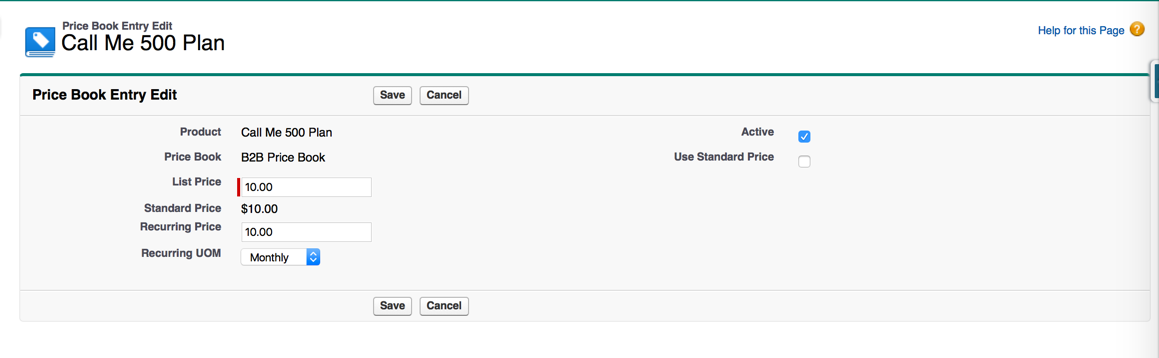
In the example, the Call Me 500 Plan costs $10 per month with a $10 one-time fee. One-time and monthly totals reflect quantity and manual discounts. To implement this, you must define the one-time and recurring list price for Call Me 500 Plan.
- Click the Products tab.
- Search for and go to the Product to price.
-
Scroll down to the Price Books section and confirm that the
appropriate Price Book is there, including the List Price and Standard
Price.
For more information about Price Books, see Manage Price Books in the Salesforce Help.
- Click Edit.
- On the Price Book Entry Edit page, enter the List Price and Recurring Price.
- Click Save.
Create an Advanced Pricing Rule
Use advanced pricing rules to implement attribute- and volume-based pricing. Advanced pricing rules price products based on attributes instead of a price book.
For example, you can base the price of the Office Internet Solution on download and upload speeds. You can also provide a discount if a customer orders more than one Call Me 500 Plan. For more information about pricing, see Pricing Rules.
To create an advanced Pricing Rule:
- If necessary, create a Calculation Matrix to define quantity ranges or discounts. For more information, see Calculation Matrices.
- Create a Calculation Procedure to calculate the different charges. For more information, see
- If necessary, create one or more Entity Filters. For more information, see
-
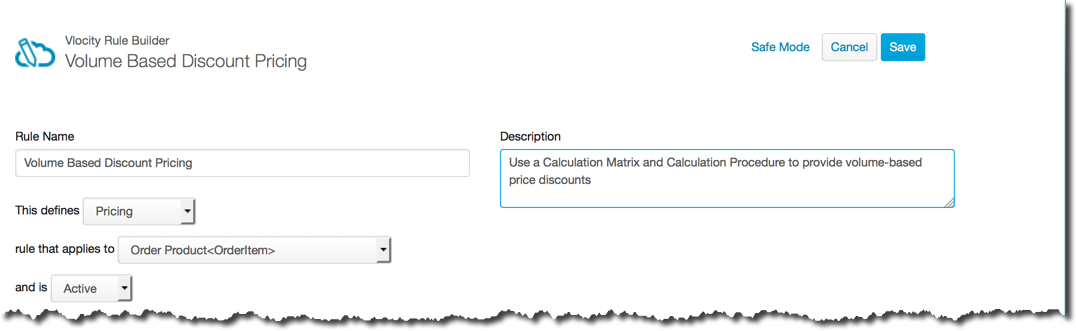
Click the Vlocity Rules tab. Click New and enter the following information:
- Rule Name is the name of the Rule. Enter a descriptive name so you can easily remember what the Rule does.
- From the This defines picklist, select the Rule type, for example, Pricing.
- From the Rule that applies to picklist, select the object to which the Rule applies, for example, Order Product<Order Item>.
- From the And is picklist, select if the rule is Active or Inactive.
- In the Description field, enter a description of what the Rule does.
-
Scroll down to the Filters and Actions section.
-
Click the Filters button.
-
Click the Add to Rule Filter link to the right of the filter to add.
-
- Click the Actions button.
- In the Filters and Actions list, click the Add to Rule Action link to the right of the action to add.
- Scroll to the top of the page and click Save.
Test a Pricing Rule
You can test Pricing Rules by adding products to the cart in the Opportunity, Order, or Quote Manager. You can create a new Opportunity, Order, or Quote from the appropriate Account and add items to the cart.
To test a Pricing Rule:
- Add the Rule to the Pricing Flow. For more information, see Add a Rule to the Pricing Flow.
- Click the Orders tab.
- Create a new Order.
- On the Order detail page, scroll down to the Order Manager.
- Add the products that are relevant to the Pricing Rule.
- Confirm that the price each product is correct.
Add a Rule to the Pricing Flow
A pricing flow defines the sequential processing of rules and logic.
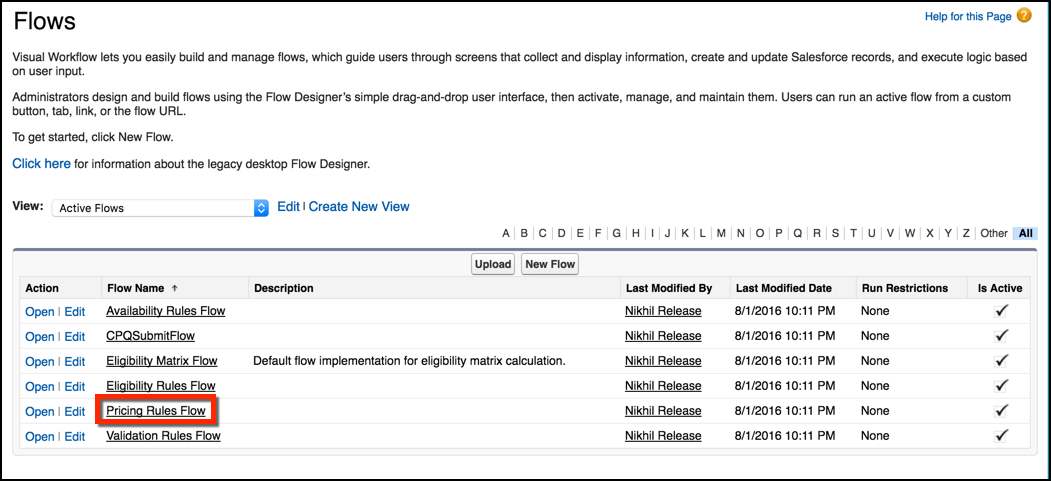
- From Setup, in the Quick Find box, enter Flows.
- Click Flows.
- Click Pricing Rules Flow.
-
Open the flow.
If…
Then…
An active flow is not present
Next to the latest inactive flow, click Open.
An active flow is present
Deactivate the latest flow, and then click Open. Save the flow as a new version.
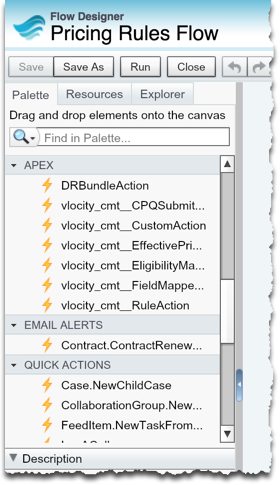
- In the palette, scroll to the Apex section.
-
Select vlocity_cmt__RuleAction and drag it to the flow.
The vlocity_cmt__RuleAction dialog box opens.
-
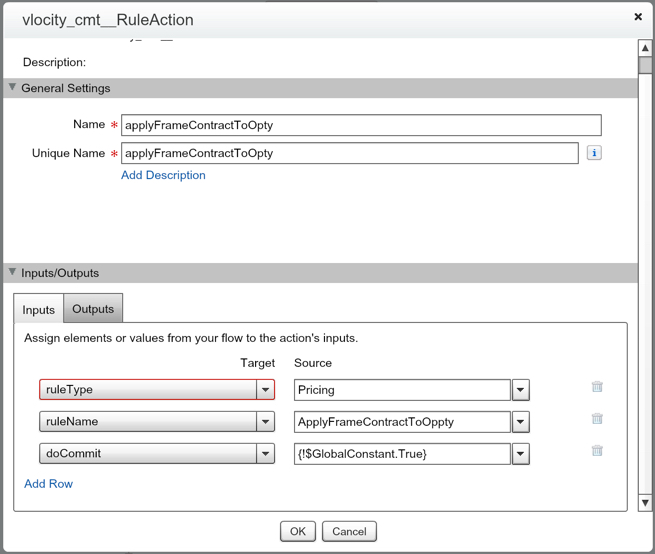
Enter a unique Name for the step.
-
On the Inputs tab, select ruleType. In the Source field, enter Pricing.
-
Click Add Row.
-
Select ruleName. In the Source field, enter the exact name of the pricing Rule. You may want to copy the Rule name and paste it to avoid errors.
-
Click Add Row.
-
Select doCommit. In the Source field, enter {!GlobalConstant.True}.
-
Click OK.
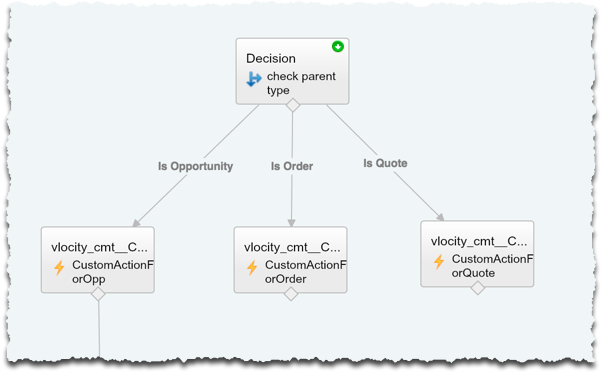
-
- Connect the new step as the last step under the Is Order branch.