You are here:
Set up Custom Master Quote Record Types
In the Energy & Utility market, the C&I space has a large diverse customer base. These customers can be differentiated based on the utility service provided such as electricity, gas, or both. The multisite framework lets you generate master quotes and the subsequent master orders based on the type of customers.
You can define your own record types and associate custom page layouts and fields based on your business needs. For example, you can create record types to differentiate the electricity and gas quotes, and have different page layouts for each of these quotes based on the record type.
The multisite framework picks up the configured record types and displays them to the user to choose from during the master quote generation process.
To configure master quote record types for use in the multisite framework:
- Make sure you have the record types configured for the Quote and Order object. To learn more about how to create record types, see Tailor Business Processes to Different Users Using Record Types.
- In the AppLauncher, select Vlocity CMT Administration.
- Select CPQ Configuration Setup.
-
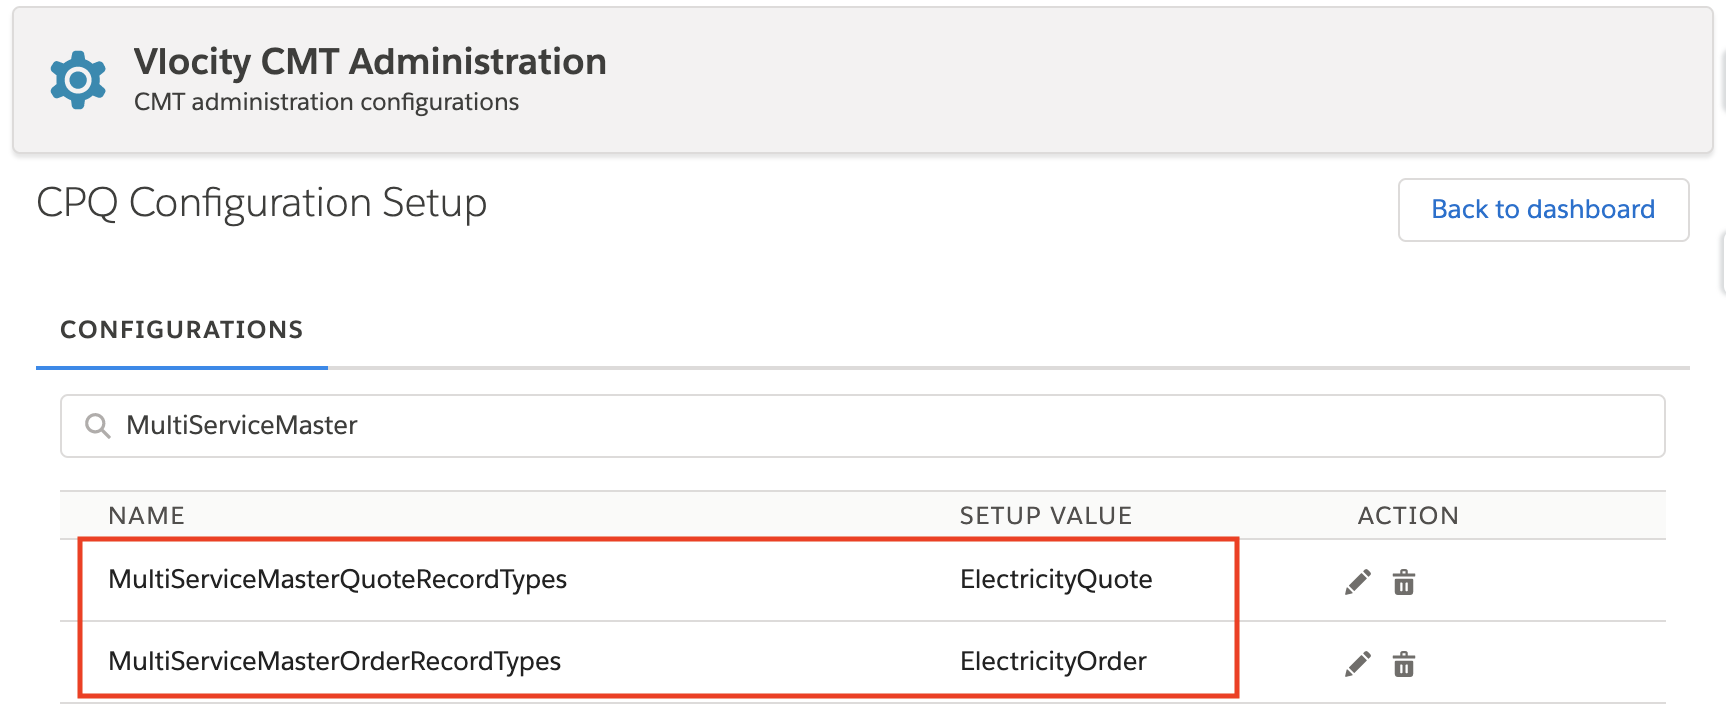
In the Find box, search masterquote, and click the Edit icon next to MultiServiceMasterQuoteRecordTypes.
If you don’t see MultiServiceMasterQuoteRecordTypes configured in the setup, go to the bottom of the page, and click Add. Enter MultiServiceMasterQuoteRecordTypes in the Name field.
- In the Setup Value, add the name of the Record Type Label you’ve configured in step 1 for the Quote object. Click Save.
-
In the Find box, search masterorder, and click the Edit icon next to MultiServiceMasterOrderRecordTypes.
If you don’t see MultiServiceMasterOrderRecordTypesconfigured in the setup, go to the bottom of the page, and click Add. Enter MultiServiceMasterOrderRecordTypes in the Name field.
- In the Setup Value, add the Record Type Label of the record types you’ve configured in step 1 for the Order object. Click Save.
-
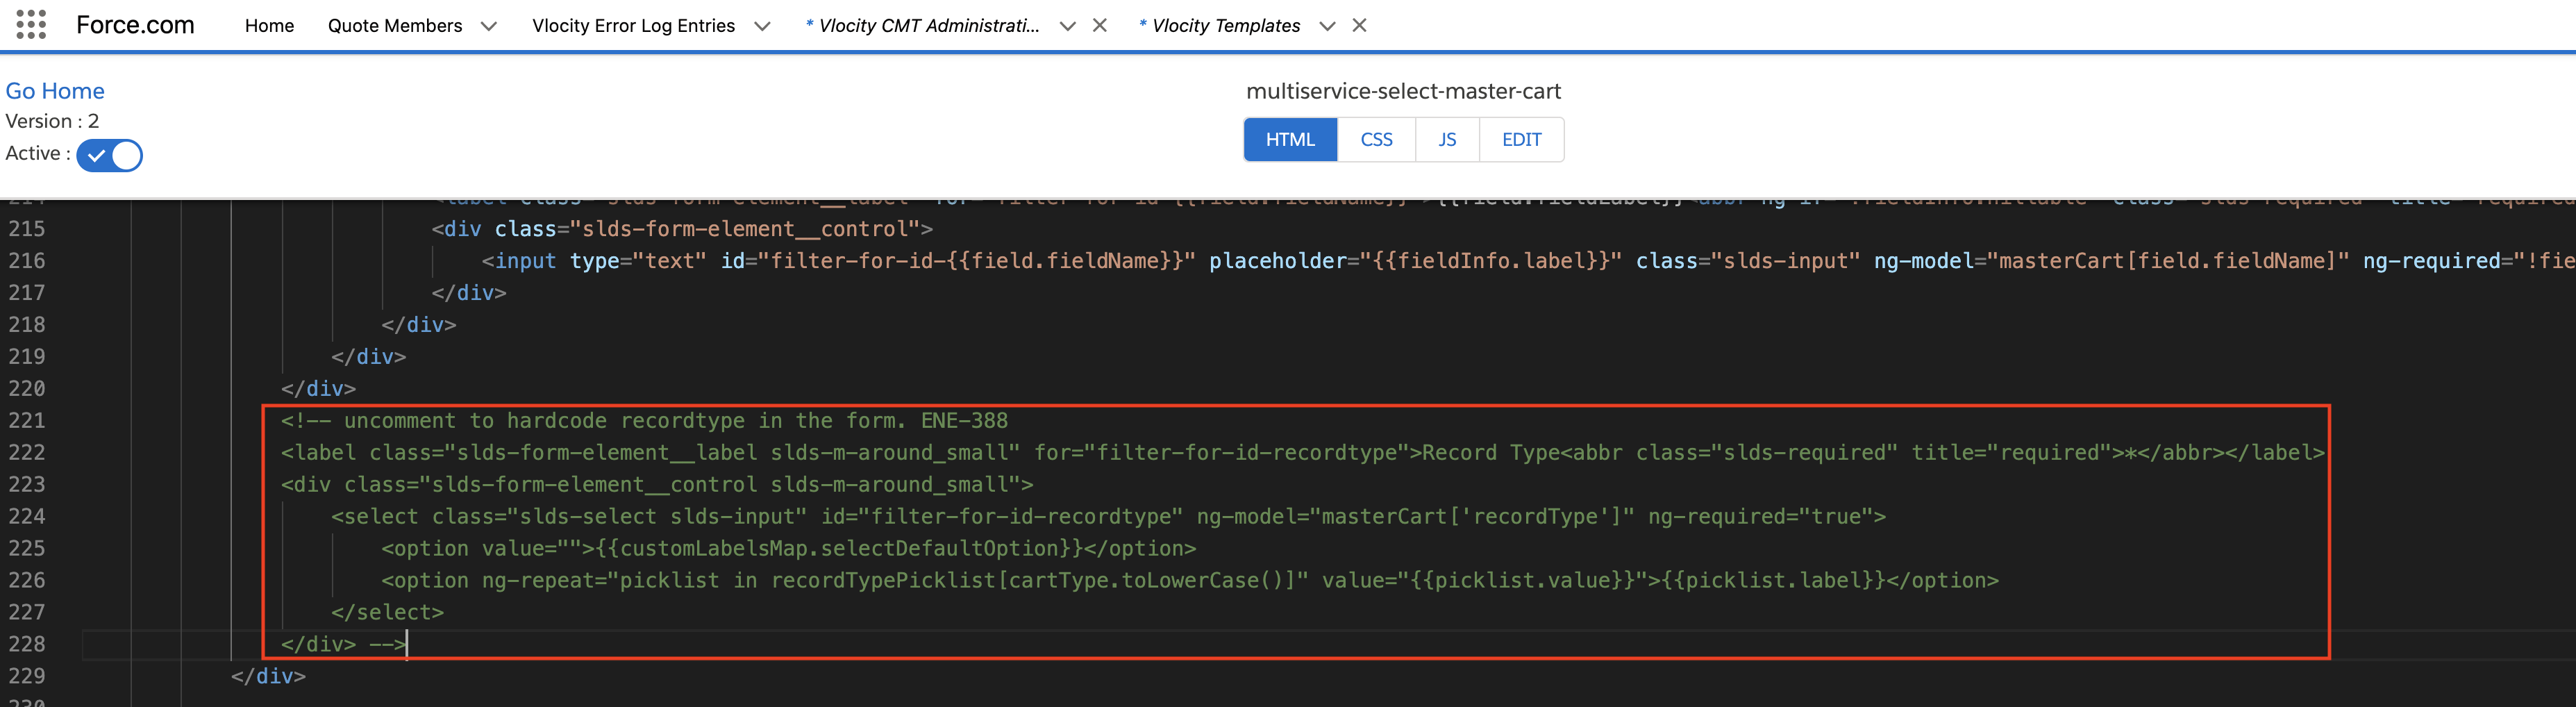
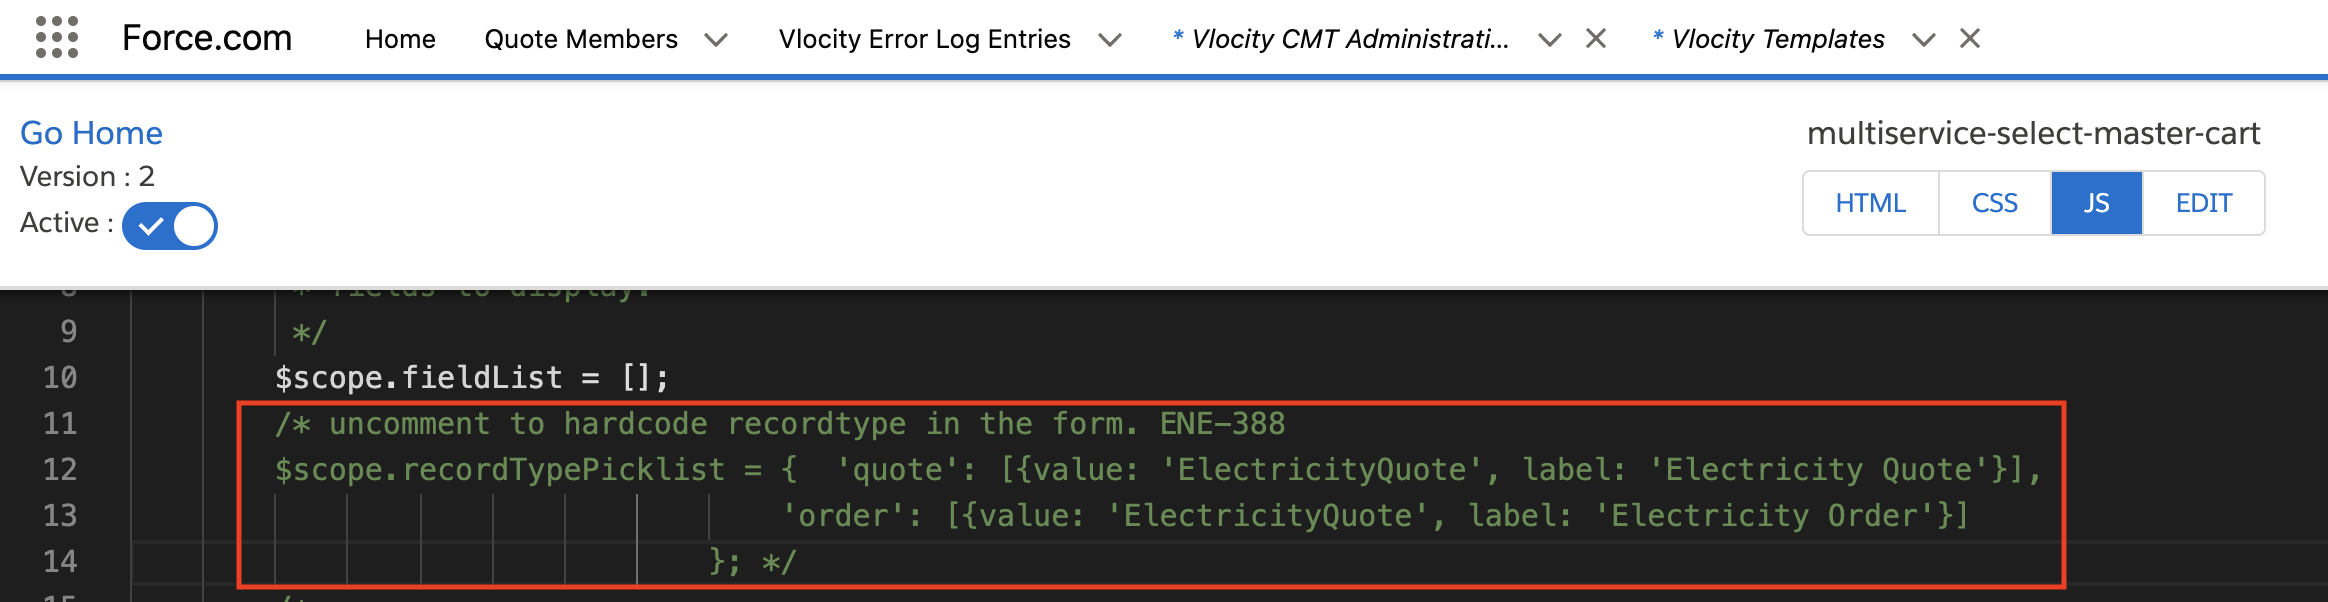
Enable the record type selection dropdown during the multi-site quote generation process.
- In the AppLauncher, select OmniStudio Templates.
- In the Find box, search master-cart.
- Expand multiservice-select-master-cart and select the latest version.
- On the HTML tab, uncomment the following code:
- On the JS tab, uncomment the following code:
- Click Save and close the template.
-
Optionally, enable the generated master Order record type to match the master Quote record type.
By default in Create & Submit Order, the Master-Quote is mapped to the order with record type Master-Order. You can optionally change this behavior to map the master quote to a matching order record type with a similar name pattern.
 Note
NoteThe Record Type Label for Quote and Order created in step 1, must match the naming pattern <ServiceName><objectType>. For example, for the Electricity service, the record labels can be named as ElectricityQuote and ElectricityOrder. The Multi-Site framework matches the pattern in the record type names for Quote and Order to find the parent record type.
-
In the AppLauncher, select Omnistudio Integration Procedures.
-
In the Find box, search startcheckout.
-
Expand MultiService/StartCheckoutQuote, and select the latest version.
-
Click Create Version.
-
Select CreateParents remote action.
-
Under ADDITIONAL INPUT/OUTPUT/FAILURE RESPONSE, set the value of matchParentOrderRecordType to true.
-
In the Procedure Configuration, click Save.
-
Click Activate Version.
-