You are here:
Upgrading the Vlocity Applications Package for Earlier Releases
You must install the Vlocity Applications package to upgrade to the latest generally available (GA) release for an existing sandbox or production org.
For Order Management Plus customers, part of upgrade planning requires a discussion between the customer, Engineering, and Services and Support to determine what package to upgrade to and to ensure all required fixes on the current release are implemented in the target release.
The topics for upgrading CME Winter '20 and later releases include pre-upgrade instructions, but for CME Fall '19 and earlier releases, follow these pre-upgrade instructions before performing the post-upgrade steps.
-
Find and note the package versions currently
installed in your org so you can reference these versions during the upgrade
steps:
-
From Setup, in the Quick Find box, enter Installed Packages.
-
Click Installed Packages.
-
On the Installed Packages page, look for the Version Number of the following packages.
-
Vlocity CMT
-
Vlocity Installation CMT
-
The CME managed package cannot be uninstalled. Vlocity maintains a fix-forward methodology when resolving packaging issues and bugs.
-
-
Log off all orgs except the org where you are
performing the installation. Make sure you are logged into only one environment
and that you do not deploy the managed package to the wrong environment.
Verify the correct environment:
-
Copy the tail of the package URL. For example, if the package link is:
https://login.salesforce.com/packaging/installPackage.apexp?p0=xxxxxxxxxxxxxxx, the tail of the URL would be /packaging/installPackage.apexp?p0=xxxxxxxxxxxxxxx. -
Check the URL tail to ensure the package along with the package ID, for example, xxxxxxxxxxxxxxx, is correct.
Alternatively, if you are logged out of all other environments, click the installation URL for the major release package in the CME release summary table.
-
-
Ensure the Salesforce Recycle Bin is empty, and
that your strategic backup plan that does not involve using the Recycle Bin.
-
In Salesforce Classic, the Recycle Bin is typically located at the bottom of the navigation panel on the Home page.
Click Recycle Bin, then click Empty your organization's recycle bin.
-
In Salesforce Lightning, you can use the App Launcher to find the Recycle Bin.
Click Empty Org Recycle Bin.
If you can not find the Recycle Bin in Lightning, switch to Classic to complete this step.
-
-
Ensure you have created a domain to enable
Lightning Web Components. If not, then enable Lightning Web Components by
setting up a domain for your Salesforce org and deploying it to all users:
-
Log in to your Salesforce org.
-
From Setup, in the Quick Find box, enter My Domain.
-
Click My Domain.
-
Choose a domain to use, then click Check Availability.
-
Click Register Domain, then wait for an email that confirms your domain is registered and ready for testing.
-
Return to My Domain in Setup. and click Log in.
-
Click Deploy to Users, then click OK to confirm.
-
-
Verify that Advanced Currency Management is
disabled.
From Setup, in the Quick Find box, enter Manage Currencies.
-
If you cannot find Manage Currencies, then Advanced Currency Management is disabled and you can go to the next step.
-
If you find Manage Currencies and Advanced Currency Management is enabled, then disable it.
 Note
NoteYou can enable Advanced Currency Management after the installation is complete.
See also Enabling or Disabling Advanced Currency Management in Salesforce Help.
-
- Ensure that Deliverability is set to All Email:
- Ensure Enhanced Email is enabled:
-
Set up Content Deliveries:
-
From Setup, in the Quick Find box, enter content deliveries and public links.
-
Click Content Deliveries and Public Links.
-
Click Content Deliveries feature can be enabled for users.
-
Click Public Links can be enabled for users (Requires Content Deliveries).
-
Click Content Deliveries and Public Links can be enabled to let communities users share files managed by libraries (Requires Content Deliveries).
-
Choose a default option for content-delivery passwords:
-
Password protection is optional and defaults to OFF—If this option is selected, users can choose to require a password when they create a content delivery, but the Require Password to Access Content field on the create-delivery wizard is not selected by default.
-
Password protection is optional and defaults to ON—If this option is selected, the Require Password to Access Content field on the create delivery wizard is selected by default. Users can deselect the option if they don’t want to require a password.
-
Password protection is required—If this option is selected, a password is generated each time a content delivery is created. Users cannot opt-out of the password requirement.
-
-
Click Save.
For more information, see Set up Content Deliveries.
-
- Enable Orders:
- Enable Work Orders:
- Ensure Salesforce CRM Content is enabled:
-
Ensure Scheduling is enabled:
-
From Setup, in the Quick Find box, enter Product Schedule.
-
Click Product Schedules Settings.
-
Select Enable quantity scheduling and Enable for all products.
-
Select Enable revenue scheduling and Enable for all products.
-
Click Save.
Enable for all products is deselected in the UI when you return to Product Schedules Settings because it only affects new products.
-
-
Allow users to relate multiple contacts to tasks
and events:
-
From Setup, in the Quick Find box, enter Activity.
-
Click Activity Settings.
-
Click Allow Users to Relate Multiple Contacts to Tasks and Events.
-
Ignore the Salesforce warning and click Submit.
-
Click Refresh and ensure the Feature enabled message appears. Wait for this confirmation because the package will fail to deploy if the feature is not enabled.
-
- Allow users to relate a contact to multiple accounts:
- Delete the tab name of any custom Vlocity tabs that already exist in the managed package, especially Pricing Variable (PricingVariable__c), Price List (PriceList__c), and Promotion (Promotion__c). Do not delete the actual object. The tabs in the managed package will replace the custom tabs once the deployment is complete.
-
Go to the Salesforce Industries Communications, Media, and
Energy Release Summary and click the installation URL for the release
package.
You can also open the org you are upgrading in a new incognito window in your browser. In Google Chrome, the command is File → New Incognito Window. This ensures that the upgrade process won’t interfere with other Salesforce orgs that you might have open in other browser windows.
You can also right-click the Installation URL, select Copy link address from the context menu, and paste the bolded portion of the URL containing the package ID as shown in the example below after the domain name in your URL, replacing the rest of your URL.
https://login.salesforce.com/packaging/installPackage.apexp?p0=04t1J000000mAMe
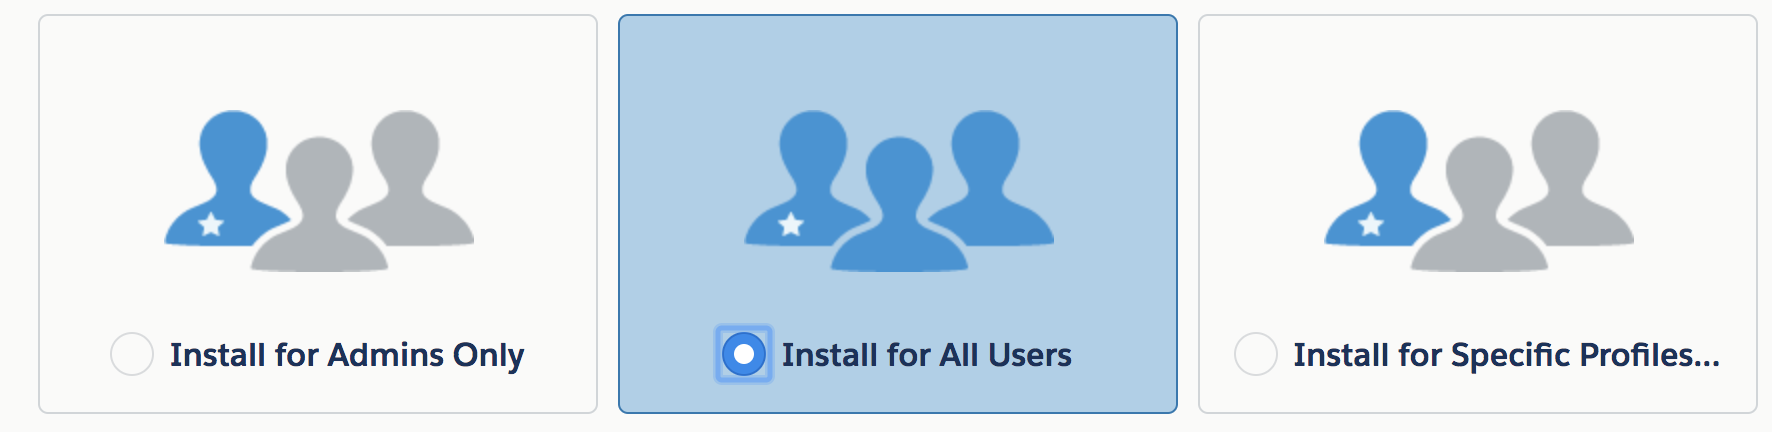
- Select a Salesforce install option. Salesforce recommends Install for All Users.
-
If you selected Install for Specific
Profiles, scroll down to the Select Specific Profiles section. Next
to the user profiles that should have access to Vlocity Applications, change
No Access to
Full Access.
 Important
This step maps Vlocity preconfigured profiles to your existing profiles. Mapping profiles grants additive access to the new Vlocity objects, page layouts, record types, and fields—it does not overwrite any existing access on your existing profiles. If you skip this step, you must manually configure your profiles. There is no post-install option to apply Vlocity profiles; it must be done at this stage of installation.
If you chose the wrong install setting, wait for the package installation to complete, then install the same package again using the correct install setting. When prompted to select Profiles, you will have the opportunity to set these manually again. Salesforce recommends installing for All Profiles and limiting Profile access post-upgrade.
- Click Upgrade.
-
If you see the Approve Third Party Access window,
select the option to grant access and click Continue.
CME packages are large and take longer to install than Salesforce's timeout window allows.
-
Click Done.
When the Vlocity installation is finished, you will receive an email informing you that the upgrade was successful.
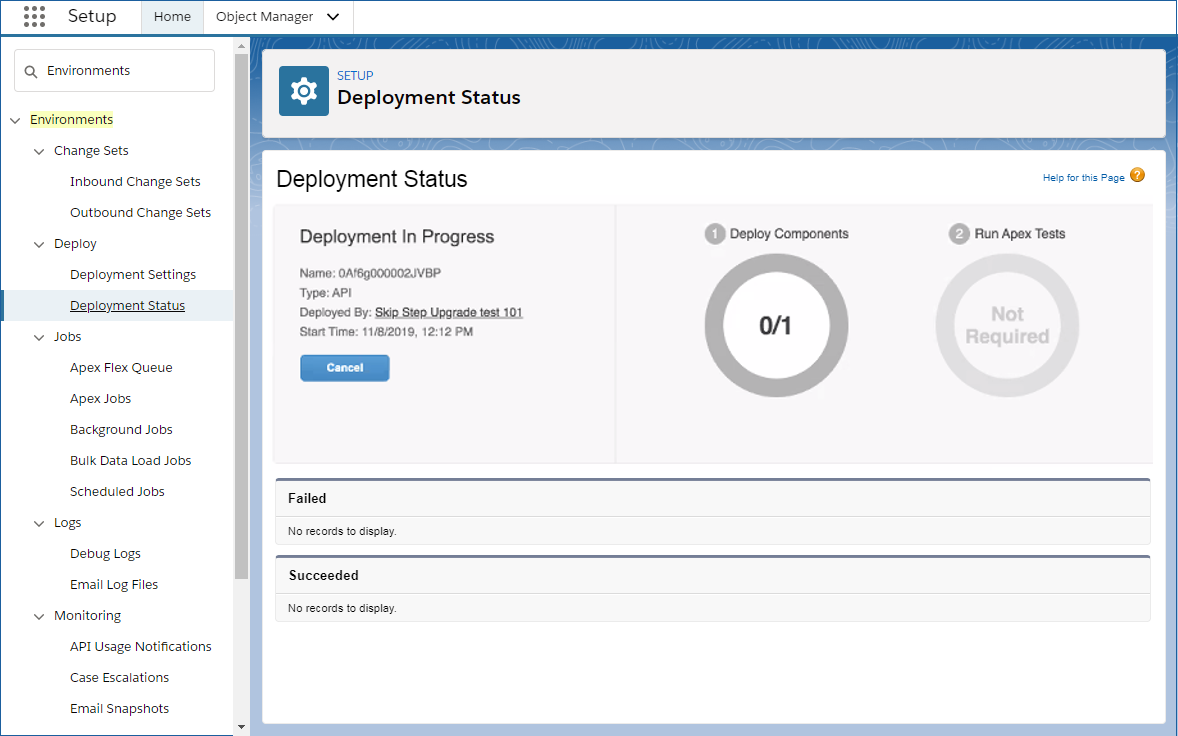
You can check the progress of your deployment:
-
Click Setup.
-
Type Environments in the Quick Find field.
-
From the search results, click Deployment Status.
Once the deployment is complete, the status turns green. A few moments after the status turns green, the version number updates and an email arrives, informing you that the upgrade was successful.
-
- Go to Post-Upgrade Steps for CMEPost-Upgrade Steps for Earlier Releases of Salesforce Industries Communications, Media, and Energy, for Order ManagementPost-Upgrade Steps for Earlier Releases of Order Management, and for Contract Lifecycle ManagementPost-Upgrade Steps for Contract Lifecycle Management for Salesforce Industries Communications, Media, and Energy for Earlier Releases.