
You are here:
Add Context Mapping
To make sure that your nodes and attributes are updated with the right input data, Salesforce objects, or context definition objects, create a mapping structure for your context definition.
Required Editions
| Available in: Lightning Experience |
| Available in: Developer, Enterprise, Professional, and Unlimited editions for Industries clouds where Context Service is enabled |
| User Permissions Needed | |
|---|---|
| To create context mappings: | Context Service Admin |
Important
- You can add a mapping to only an inactive context definition. We recommend that you create a context definition, define its structure, set its mapping, and only then make the context definition active.
- To make a context definition active, you must set up a default mapping.
- You must map the nodes first and then map all the attributes.
- To save a context map, map at least one attribute and a node.
- The Profile, UserRole, RecordType, and Permission Set Assignment entities aren’t available for mapping.
- From Setup, in the Quick Find box, find and select Context Definitions.
- On the Custom Definitions tab, select the context definition that you want to add a mapping to.
- On the Context Definition Details page, select the Map Data tab.
- Click Add Mapping.
-
Specify the mapping details.
- Give your mapping a name.
- Provide a description. Enter additional details about the context mapping, if necessary.
- To automatically map your definition to standard objects, select Automatic Salesforce Object Mapping.
- To set this mapping as your default mapping, select Mark as default.
 Note To manually map your context definition, deselect the Automatic Salesforce Object Mapping checkbox.
 - Click Next.
-
On the Mapping Intent Details tile, select at least one Mapping Intent operation. For
more information, see Mapping Intent Types.
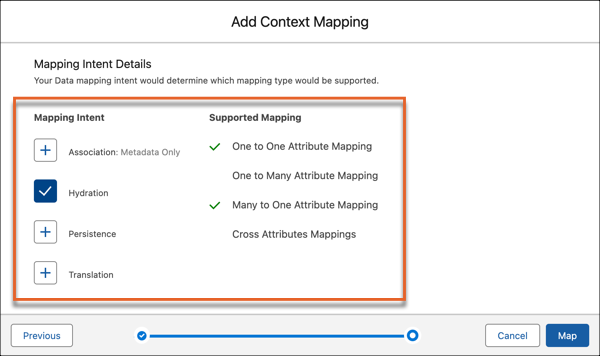
-
To begin the mapping, click Map.
Note The Context Mapping’s builder page opens so you can begin to map your nodes and attributes.
- To map a node to an object, click Select Object.
-
To select an sObject or to retrieve data from a Data Model Object (DMO),
- Click the sObjects & DMO tab, then search for the object or DMO you want to connect with the node.
-
Select the objects you want to connect with the node, then click
Save.
Note You can map to only one type of object in a single context mapping.
-
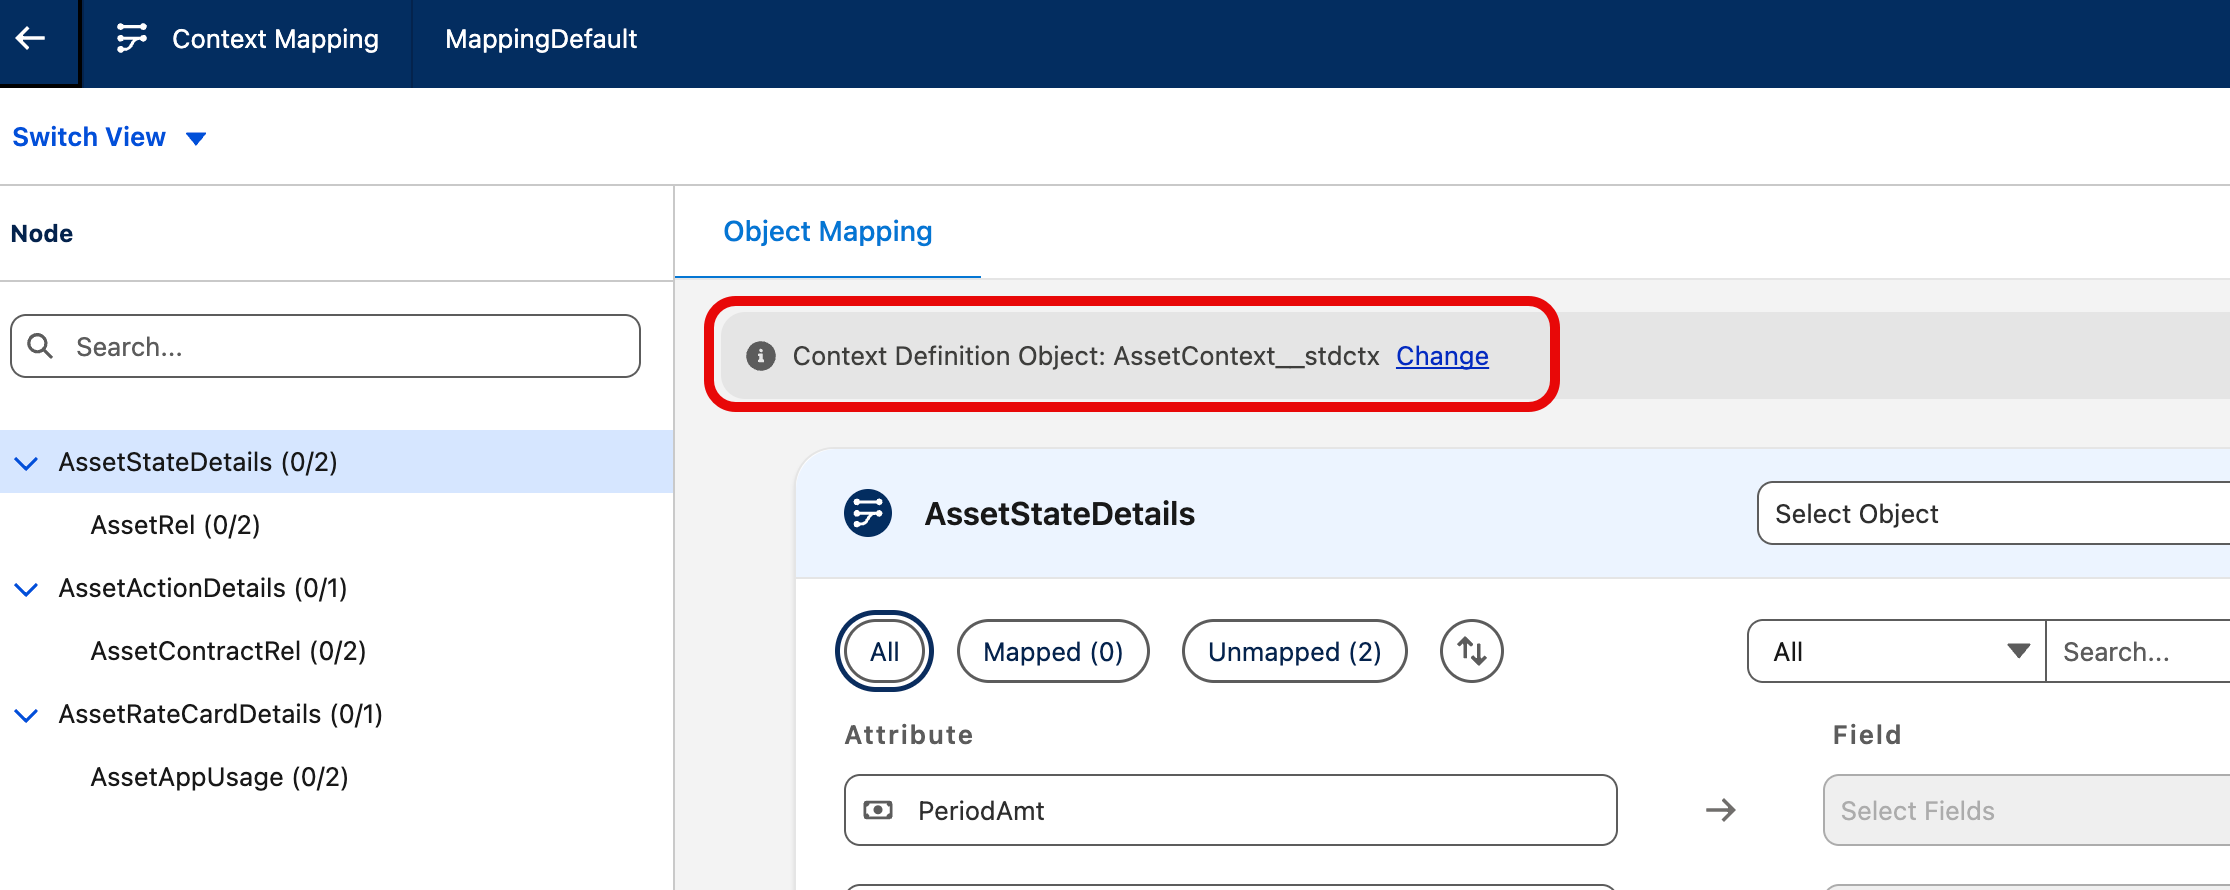
To select a context definition,
- Click the Context Definition tab, then click Proceed.
- Select a definition from the list of available context definitions for mapping.
-
Click Confirm.
The mapped reference context definition is displayed in the attribute mapping screen for all nodes.
- To change the mapped reference context definition, click Change.
 Note You can map to only one type of object in a single context mapping.
 -
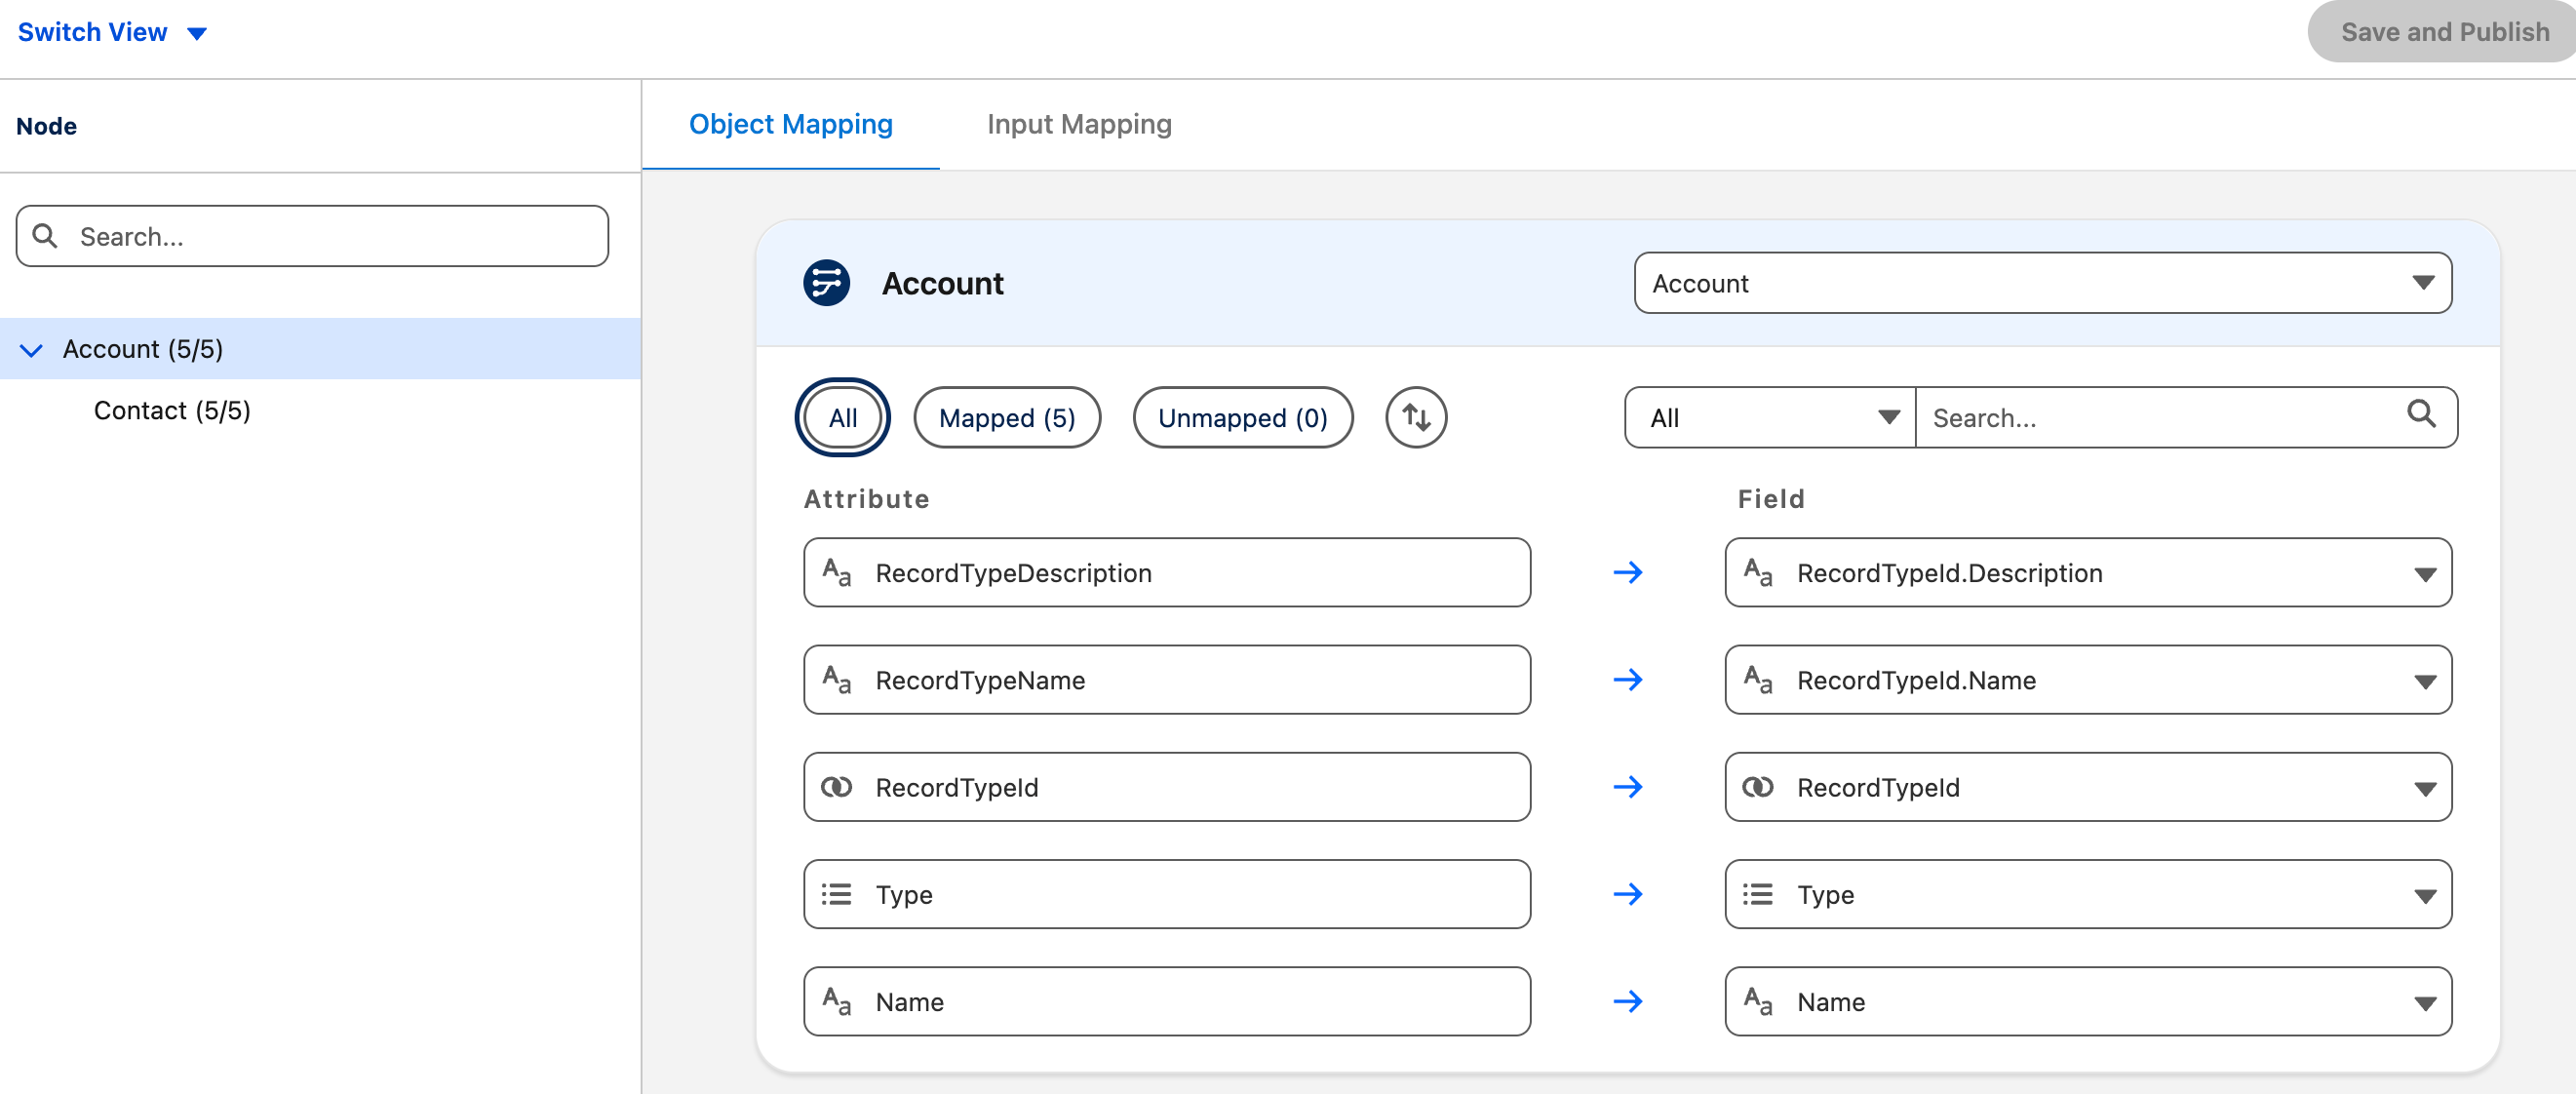
To map an attribute,
- In Select Fields, search for the field you want to map it to.
-
Select the fields and save your changes.
Note You can map attributes to fields that have a matching or supported data type.
-
After you create all your mappings, save your changes.
After you define your context definition, its structure, and its mapping, activate it. Your consuming application can now use the context definition to perform application processes with improved performance.
To remove a mapping, select the node, click the mapped object, click Clear All, and save your changes.
To remove an attribute mapping, click the mapped field, click Clear All, and save your changes.
Did this article solve your issue?
Let us know so we can improve!