
You are here:
Create a Relationship Graph in Actionable Relationship Center
Show how records relate to each other.
Required Editions
| View supported product editions. |
| User Permissions Needed | |
|---|---|
| To create a relationship graph in ARC: | View permissions information. |
- From Setup, in the Quick Find box, enter Actionable Relationship Center, and then select Actionable Relationship Center.
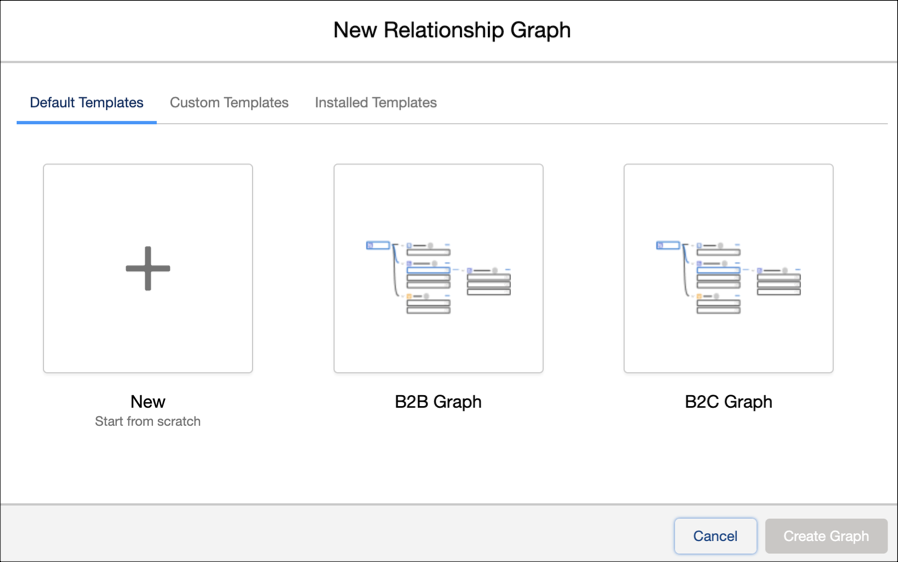
- Click New Relationship Graph.
-
Select a graph template and click Create Graph.
- Default Templates: Included in your Salesforce org.
- Custom Templates: Created by you.
- Installed Templates: Created by a third party.
-
Specify the Graph Properties.
-
Enter a label, for example, Business Accounts, and a unique
developer name.
When you add the ARC Relationship Graph component to a record page, the label shows in the list of available graphs.
- To save the graph configuration as a custom template to use later, select Set as Template.
-
Select a graph display type.
- Horizontal Hierarchy is the default view on a record page. When a user clicks a node, new nodes appear from left to right.
- Vertical Hierarchy shows nodes vertically on a record page. When a user clicks a node, new nodes appear from top to bottom.
-
To enable users to customize graphs, turn on Customize Views.
When Customize Views is turned on, users can change the objects that appear in the graph, apply filters to show records based on certain criteria, sort records, and save custom views with applied filters.
-
Enter a label, for example, Business Accounts, and a unique
developer name.
-
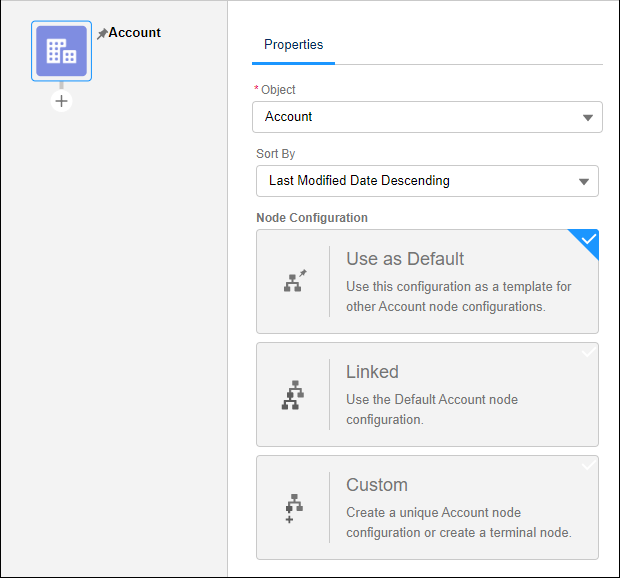
Click the root node on the graph and on the Properties tab, add the details of the root
node.
- Select an object, for example, Account.
- In Sort By, select the order to sort the records in the node.
-
Select a node configuration.
- Default: Save the configuration as a template for other node configurations of the same object.
- Linked: Use the Default node configuration of the target object.
- Custom: Create a unique object node configuration or create a terminal node.
- Add child nodes to the relationship graph. Under the root node, click the plus icon.
-
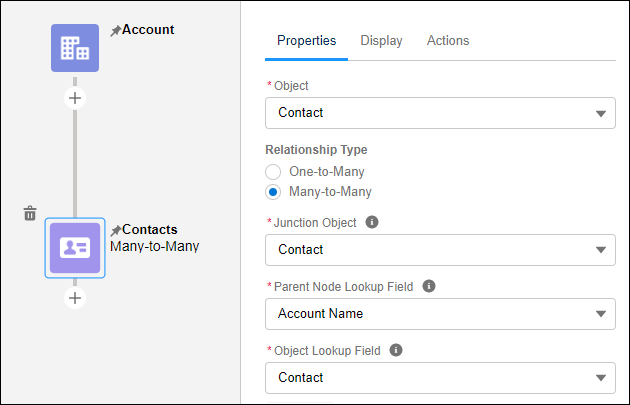
On the Properties tab, add the details of the child node.
- Select an object, for example, Contact.
-
If necessary, select a peer object.
Select an object with a one-to-one lookup relationship to the node object. You can select fields on the object and peer object to show on the node.
-
If necessary, select Show Child Records.
Show all of the object records and its child records in one node on the ARC graph. To enable this setting, you can have only 1 child node on the object.

-
Select One-to-Many relationship type and then select a
Parent Node Lookup field.
The lookup field is a field from the node object (for example, Contact) that points to the parent node object (for example, Account).
 Tip The one-to-many relationship type allows each record of one object to be linked to multiple records from another object. Many-to-many relationship type allows each record of one object to be linked to multiple records from another object, and vice versa. The many-to-one relationship type uses a lookup relationship to link many records from an object to a single record from another object.
 -
OR, select Many-to-Many relationship type, and then specify
the objects and fields.
- Junction Object: When you model a many-to-many relationship, select a junction object to connect the two objects you want to relate to each other, for example, Contact.
- Parent Node Lookup Field: Select a field from the junction object that points to the parent node object, for example, Account Name.
- Object Lookup Field: Select a field from the junction object that points to this node’s object, for example, Contact.
-
OR, select Many-to-One relationship type, and then select a
lookup field on the parent node.
The lookup field is a field from the node object, for example, Contact, that points to the parent node object, for example, Account.
-
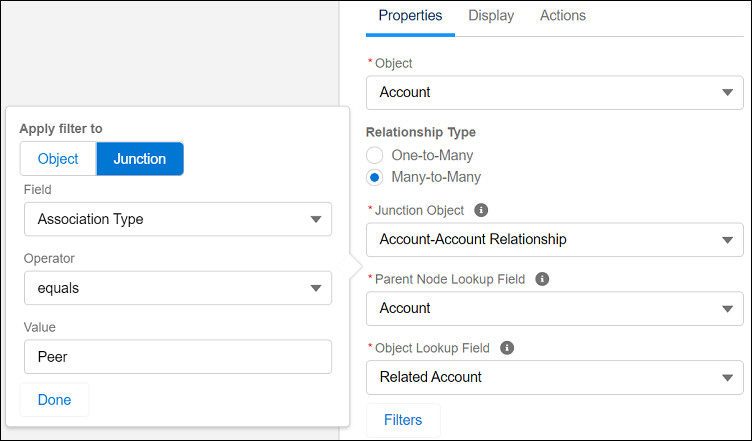
To determine the records that are collected in the node, click
Filters.
- Select what the filter applies to, either Object, Junction, or Peer.
- In Field, click Select an Option and choose a field on the node object to filter by.
- In Operator, click equals and select how to filter the field.
- In Value field, enter a value to apply the filter.
- To save your filter. click Done.Tip Use filter logic if you add more than 1 filter.
- Select a Node Configuration.
-
To configure how the node appears on the record page, click the
Display tab.
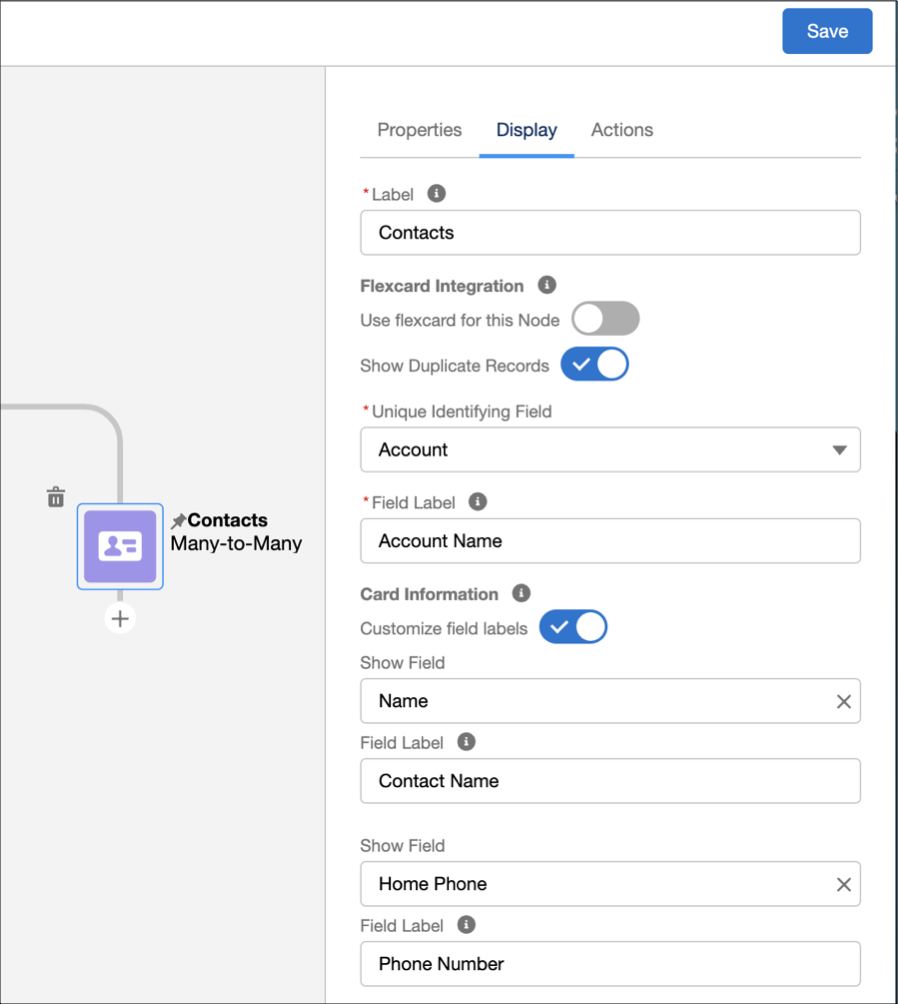
- Enter a label, for example, Contacts.
-
If necessary, select Use flexcard for this Node and select a
Flexcard.
Use Flexcards to show your users contextual information in an at-a-glance format and give them access to relevant tasks for the data in an ARC graph. To use this feature, you need an Omnistudio license and build your Flexcards in Omnistudio.
-
If necessary, select to Show Duplicate Records.
Duplicate records only display for the many-to-many relationship type. When you select this option, duplicate records collapse into a single record card when the graph loads on a record page.For Unique Identifying Field, select an identifying field that's used to differentiate between junction objects. Then, enter a Field Label.
- Under Card Information, for Show Field, select the card fields to that you want to show.
-
If necessary, select Customize field labels and update the
field labels based on the needs of your users.
Enter a label.
-
To select and show up to 4 fields, click Show Field.
Tip When you select many-to-many relationship type, the node object and junction object fields appear in the order that you select in the ARC graph builder.
However, when you select many-to-many relationship type and show duplicate records, fields from the node object appear first, followed by the junction object, regardless of the order that you select in the graph builder.
-
Save your changes.
-
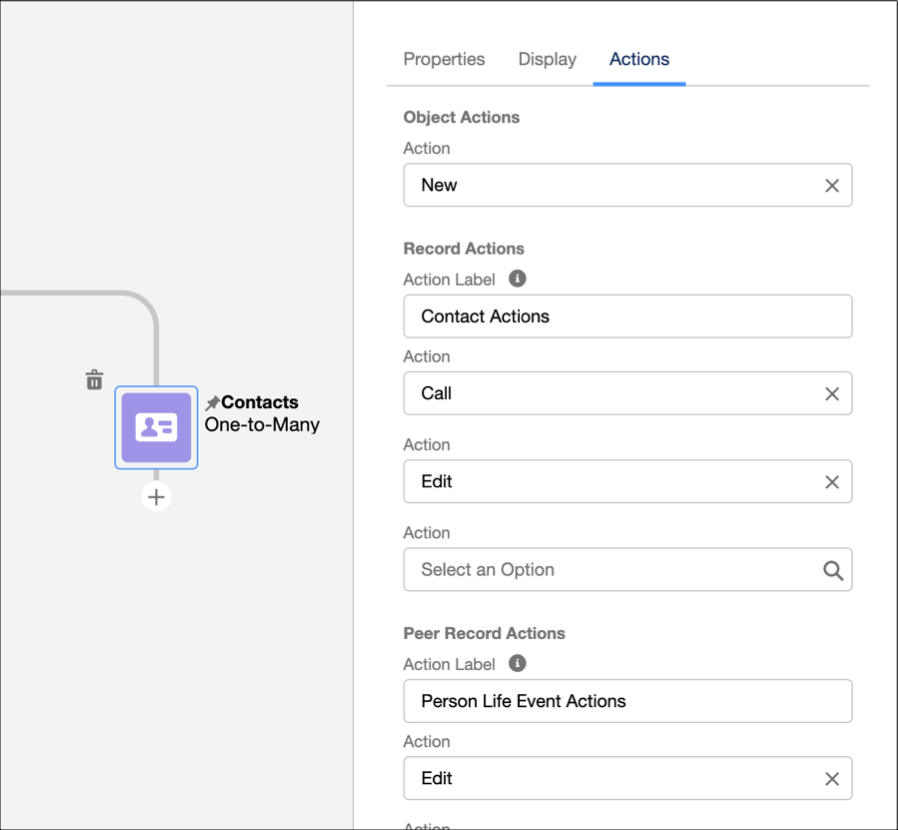
To configure the ability for a user to respond to new information, click the
Actions tab.
You can create and add custom buttons, and then add the buttons to your ARC object nodes.Show your users action labels that are most relevant to them by customizing the label. The label is visible when the user clicks the action menu on an ARC node. To use the default label, leave the field blank.
- In Object Actions, click Select an Option and select one object action.
- In Record Actions, enter a label for the record actions section on the ARC graph. The default label is Record Actions.
- In Record Actions, click Select an Option and select up to four record actions.
- In Junction Actions, enter a label for the junction actions section on the ARC graph. The default label is Junction Actions.
-
In Junction Actions, click Select an Option and select up to
4 junction object actions.
Junction actions are available for only the many-to Many relationship type.
- In Peer Record Actions, enter a label for the peer record actions section on the ARC graph. The default label is Peer Record Actions.
- In Peer Record Actions, click Select an Item and select up to 4 peer record actions.
-
To add an Omniscript action, click Select an Option in an
Action menu, and select Omniscript. Configure the Omniscript
and save your changes.
- Save your changes.
- Similarly, add more child nodes.
-
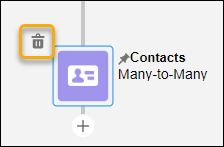
To delete a node, select a node on the graph and click the delete icon.
See Also
- Salesforce Help: Create a Many-to-Many Relationship
- Salesforce Help: Build Localized Component Labels and Attribute Values on Lightning Pages with Custom Labels
- Consolidate Duplicate Records in an ARC Graph
- Salesforce Help: Custom Labels
- Metadata API Developer Guide: RelationshipGraphDefinition
- Add Peer Objects to an ARC Relationship Graph
- View Parent and Child Records in One Node on an ARC Relationship Graph
- Salesforce Help: Custom Buttons and Links
Did this article solve your issue?
Let us know so we can improve!