You are here:
Basic Example of Ramp Deals for Groups in Agentforce Revenue Management
Let’s see how sales reps can structure a simple, multiyear deal with phased rollouts, segment-specific pricing, and consolidated assets.
Required Editions
| Available in: Lightning Experience |
| Available in: Enterprise, Unlimited, and Developer Editions of Revenue Cloud where Transaction Management is enabled |
First, we create a ramp deal such that products and services are deployed incrementally. Then, we apply segment-specific adjustments by applying discounts and price uplifts. Finally, we see how Transaction Management tracks consolidated assets for simplified management.
Introduction
Alex, a sales rep from Smartbytes, is negotiating a 3-year deal with Susan from Acme, a fast-growing client. Acme wants a solution that can scale with their business, starting with a core set of products that increase over time.
Alex knows that the Salesforce admin at Smartbytes set up the Ramp Deals for Groups in Quotes and Orders feature, which perfectly meets his requirements.
Create a Ramp Deal for Multiple Products
Alex creates a quote with the products required for the first year, and converts it into a group ramp segment.
- Create a quote.
-
Add the necessary products,
and enter the quantity..
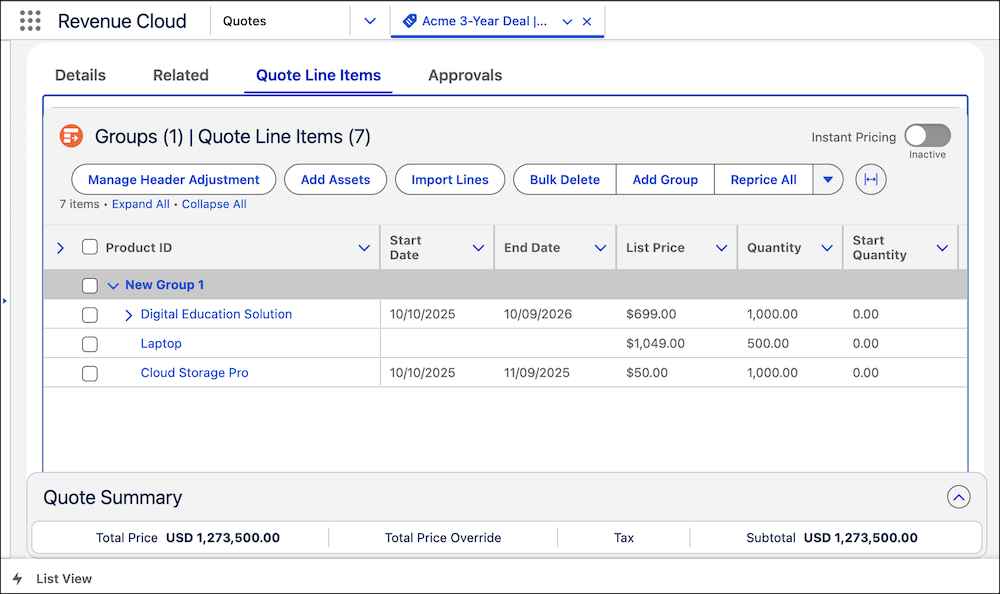
- Laptop with the One-Time product selling model: 500
- Digital Education Solution with the Term-Defined product selling model: 1000
- Cloud Storage Pro with the Term-Defined product selling model: 1000
-
Click Add Group, and then click Save.
A group is created. Transaction Management automatically moves all the products into the group.
- Click the group name to open the side panel.
-
Set the start and end dates for the first year.
 Note If the segment type is Yearly, set the segment duration to 365 days.
 - For segment type, select Yearly.
-
Turn on Is Ramped.
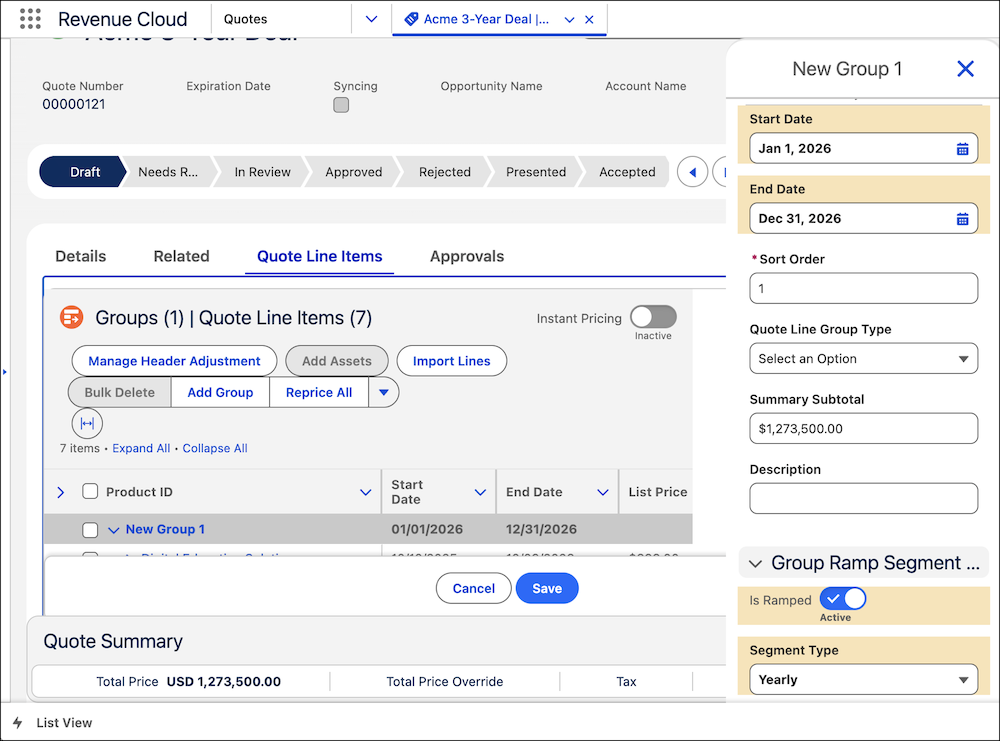
- Save the changes.
After Alex enters the dates for the group and turns on the Is Ramped setting, Transaction Management:
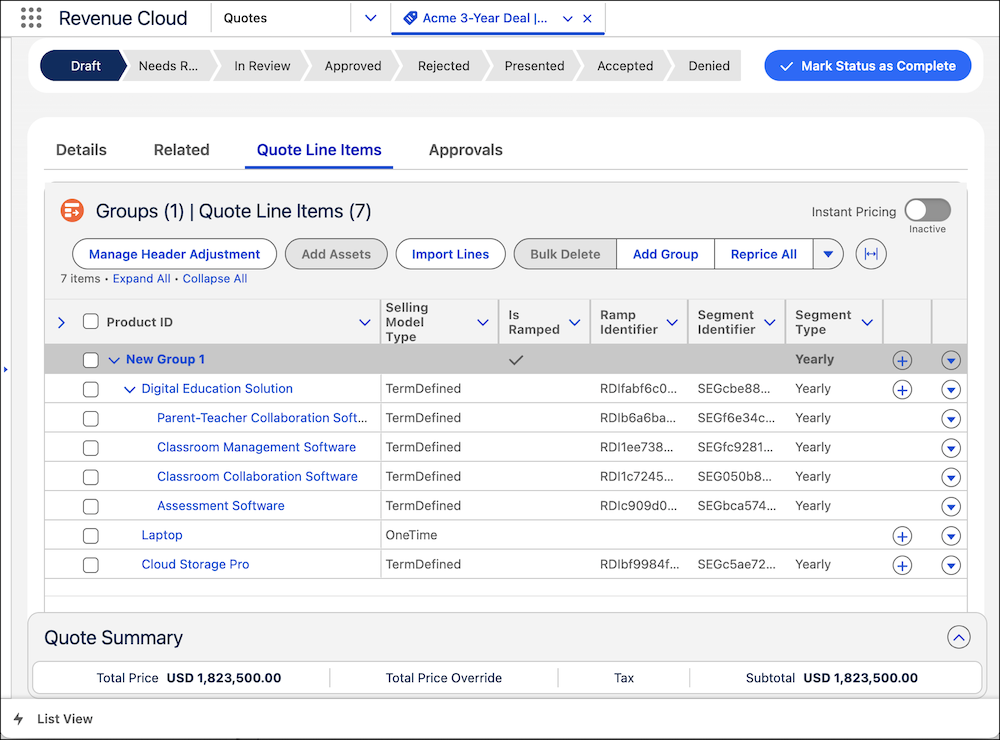
- Creates a group ramp schedule and converts the group into the first ramp segment
- Applies the group's dates to all the lines in the quote
- Populates ramp and segment identifiers for all rampable products, including child products
In this example, Cloud Storage Pro, Digital Education Solution, and child products of Digital Education Solution are rampable products. So Transaction Management populates ramp and segment identifiers for these products.
Because the product Laptop has a One-Time product selling model, it’s not a rampable product. So Transaction Management doesn’t populate ramp and segment identifiers for it.
Add Segments for Multiple Terms
For the second year, Susan wants the same number of laptops but twice the number of licenses. For the third year, Susan doesn’t want any laptops but wants to retain the same number of licenses as the second year.
Alex clones the segments to create segments and copy lines to the new segments.
-
To create a segment for the second year, click
 corresponding to the group, and then select Clone
Segment.
The Specify lines to clone window opens.
corresponding to the group, and then select Clone
Segment.
The Specify lines to clone window opens. -
Select All Line Items, and then click
Clone.
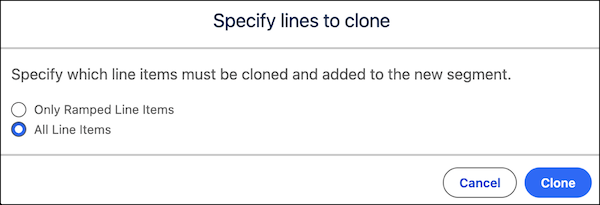 Transaction Management copies all the lines, including the non-ramped laptop line. Transaction Management also automatically increments and assigns dates to the new segment and the lines in it.
 - In the Quantity column for Digital Education Solution and Cloud Storage Pro, enter 2000.
-
To create a segment for the third year, click corresponding to the second group, and then select Clone
Segment.
-
Select Only Ramped Line Items, and then click
Clone.
Transaction Management creates another ramp segment and copies only the ramped products to the newly created segment. Because laptops have the One-Time product selling model, they’re not copied to the new segment.
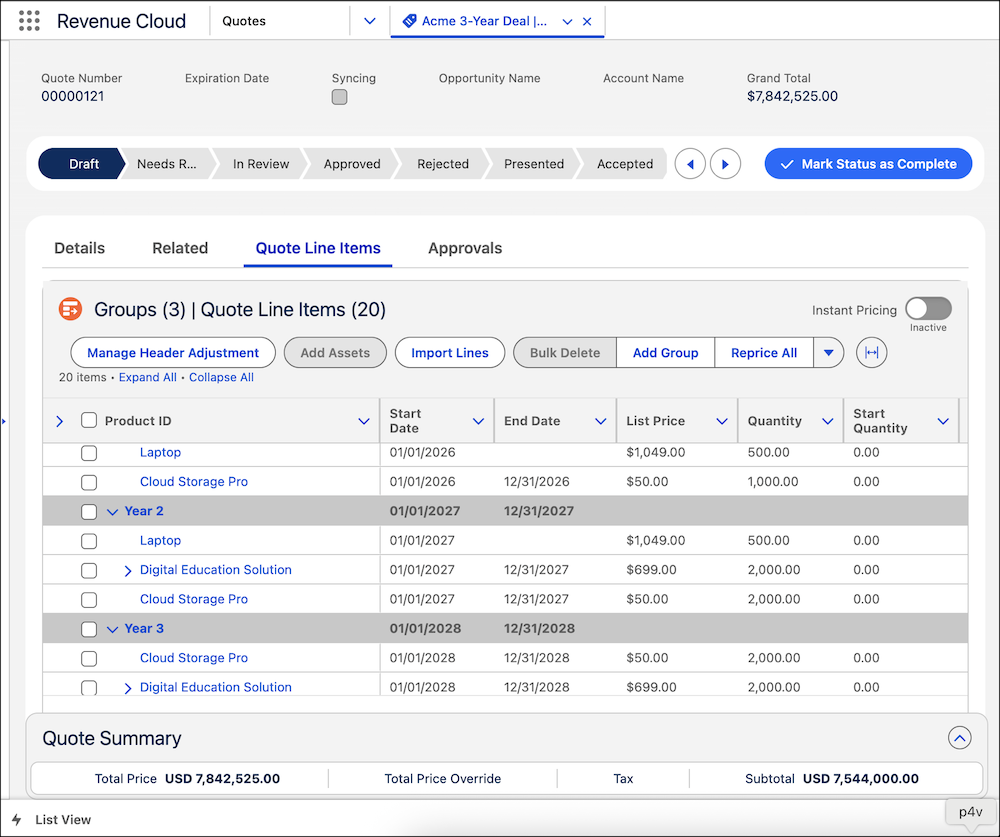
-
To make it easier to read the group names, click corresponding to any group, and then select Edit Ramp
Schedule.
-
Update the segment names, and then save the changes.
If needed, change the start and end dates of the segments too.
Apply Discounts and Price Uplifts
After negotiating, Alex and Susan agree to a 5% discount for the first year and a price uplift of 5% and 10% for the second and third years, respectively. Susan also wants a quick snapshot of the pricing for Digital Education Solution before closing the deal.
Here’s how Alex applies the negotiated discount and price uplifts.
- To apply discounts for all the lines for the first year, in the Adjustment Type column of the Year 1 group, select Discount as the type and then enter 5 as the value.
- To apply price uplifts for the second and third year, in the Unit Price Uplift column of each line, enter the uplift percent values.
-
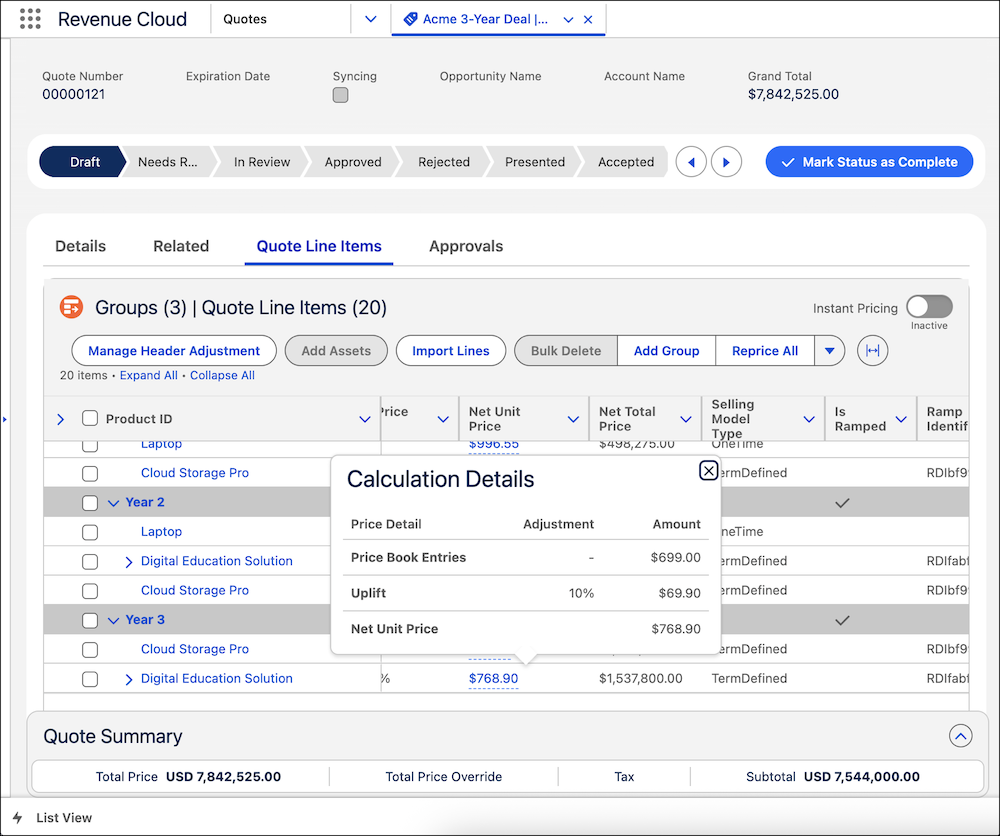
To view the price calculation, hover over values in the Net Unit Price column.
The price waterfall shows how the price was calculated, including the applied uplift.
-
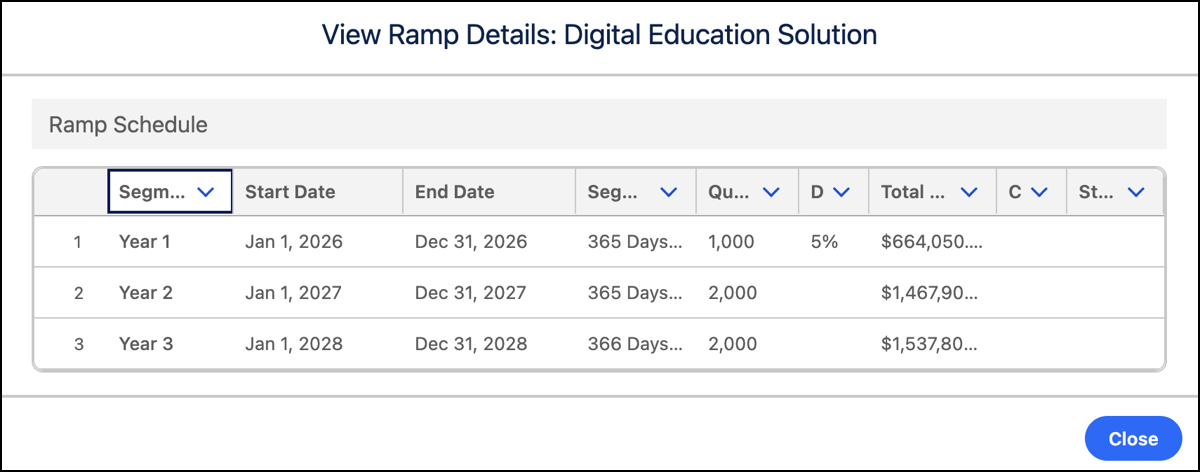
To view the snapshot of the Digital Education Solution product, click corresponding to any line of the product and then select View Ramp
Details.
The View Ramp Details window shows details of the product, including segments, quantity, prices, discounts, and uplifts.
After these steps, Alex shares a single quote that clearly outlines the 3-year commitment, including changes in quantity, discounts, and pricing over time. She shares the quote with Susan, who reviews the quote and confirms the order. Alex creates an order from the quote, and then activates the order.
View Consolidated Assets
Alex takes a quick look at the assets to get an overview of the deal.
- From the App Launcher, find and select Account.
-
In the All Accounts list view, click Acme.
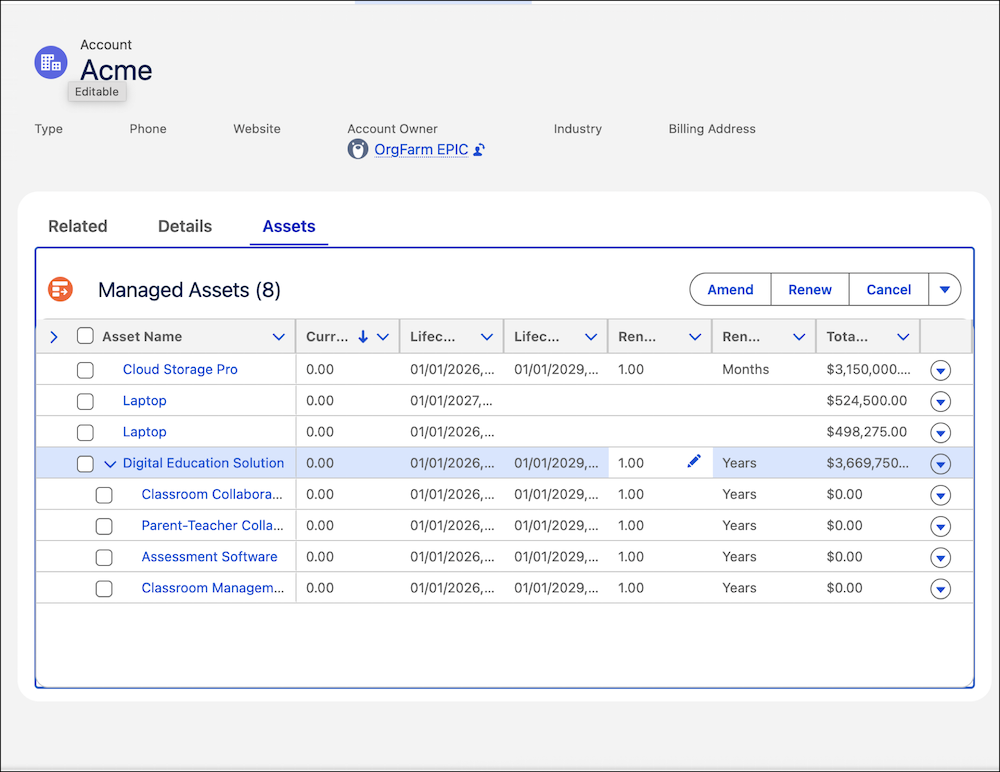
For ramped products, Digital Education Solution and Cloud Storage Pro, Transaction Management creates only one consolidated asset for all the lines. This consolidation makes it easy to track and manage assets. For the non-ramped product, Laptop, Transaction Management creates a separate asset for each line.
-
Click corresponding to Digital Education Solution, and then select
View.
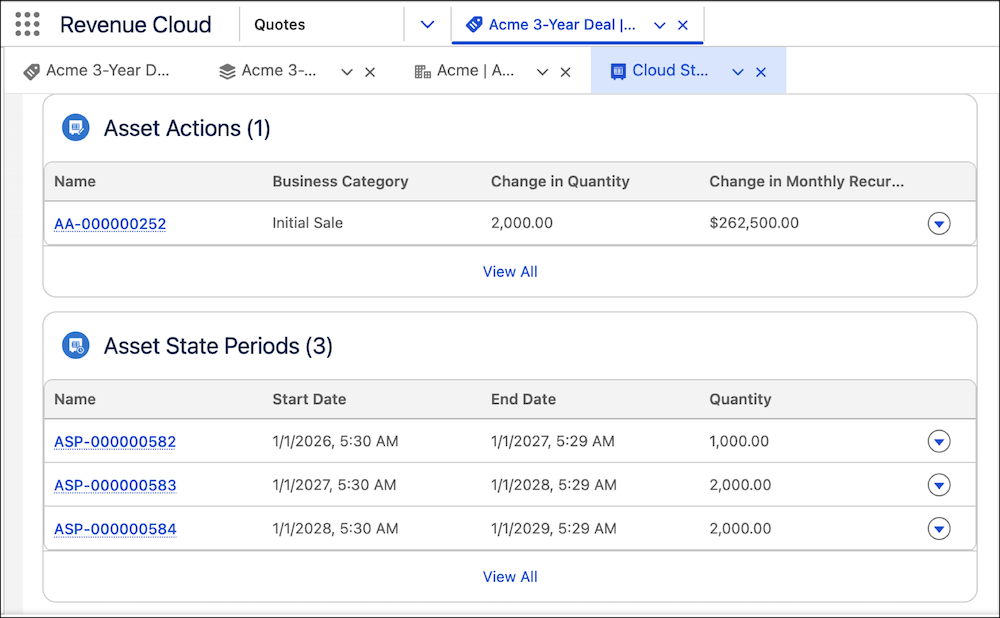
The Asset Action related list shows one asset action for the initial sale. The Asset State Period related list shows three asset state period records, one for each segment.
-
Click the Dashboard tab.
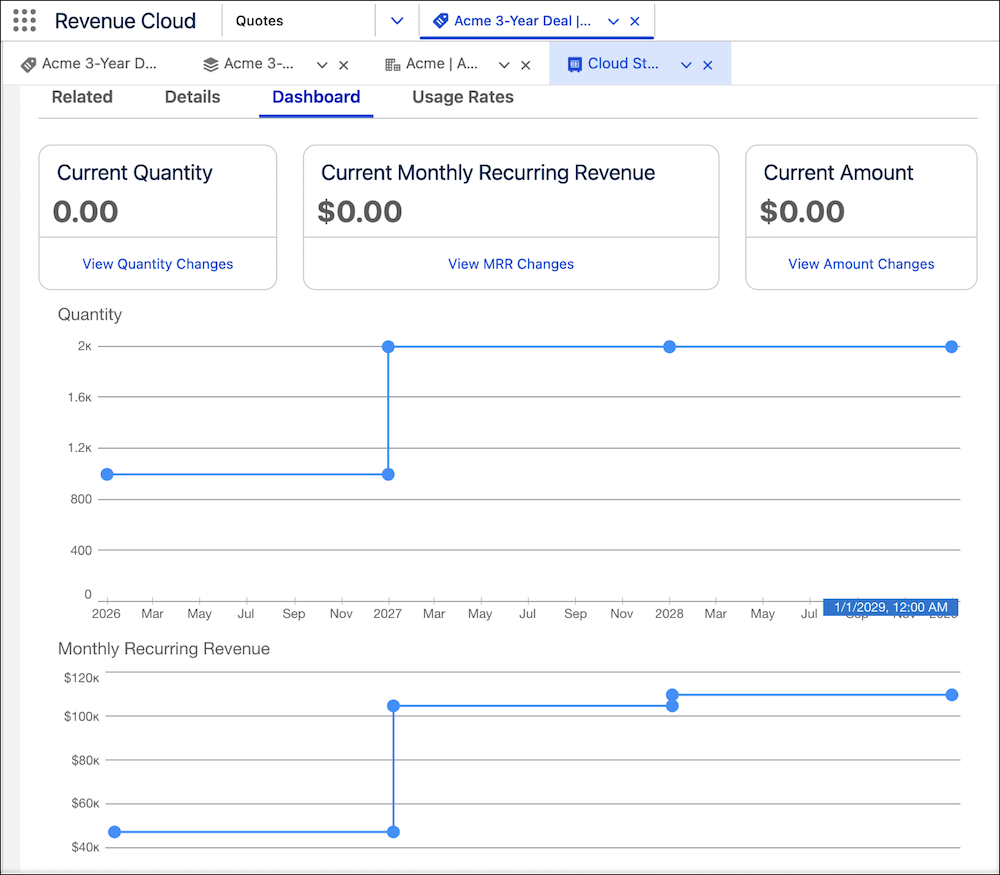
The Dashboard shows how quantity and monthly recurring revenue change over time.