
You are here:
Configure a Microsoft Azure App and Create a SharePoint Site Using Guided Setup
Set up a Microsoft Azure app and create a SharePoint site to prepare for integration with Salesforce. This includes generating a client secret, configuring the necessary permissions, and creating a SharePoint site to enable document storage and sharing.
Required Editions
| Available in: Lightning Experience |
| Available in: Professional, Enterprise, Unlimited, and Developer editions. |
| User Permissions Needed | |
|---|---|
| To access the Microsoft 365 and Azure Integration Guided Setup: | CLM Admin User |
-
Access the Microsoft Azure Setup:
-
In the guided setup, click Set Up a Microsoft Azure App to expand
the step.
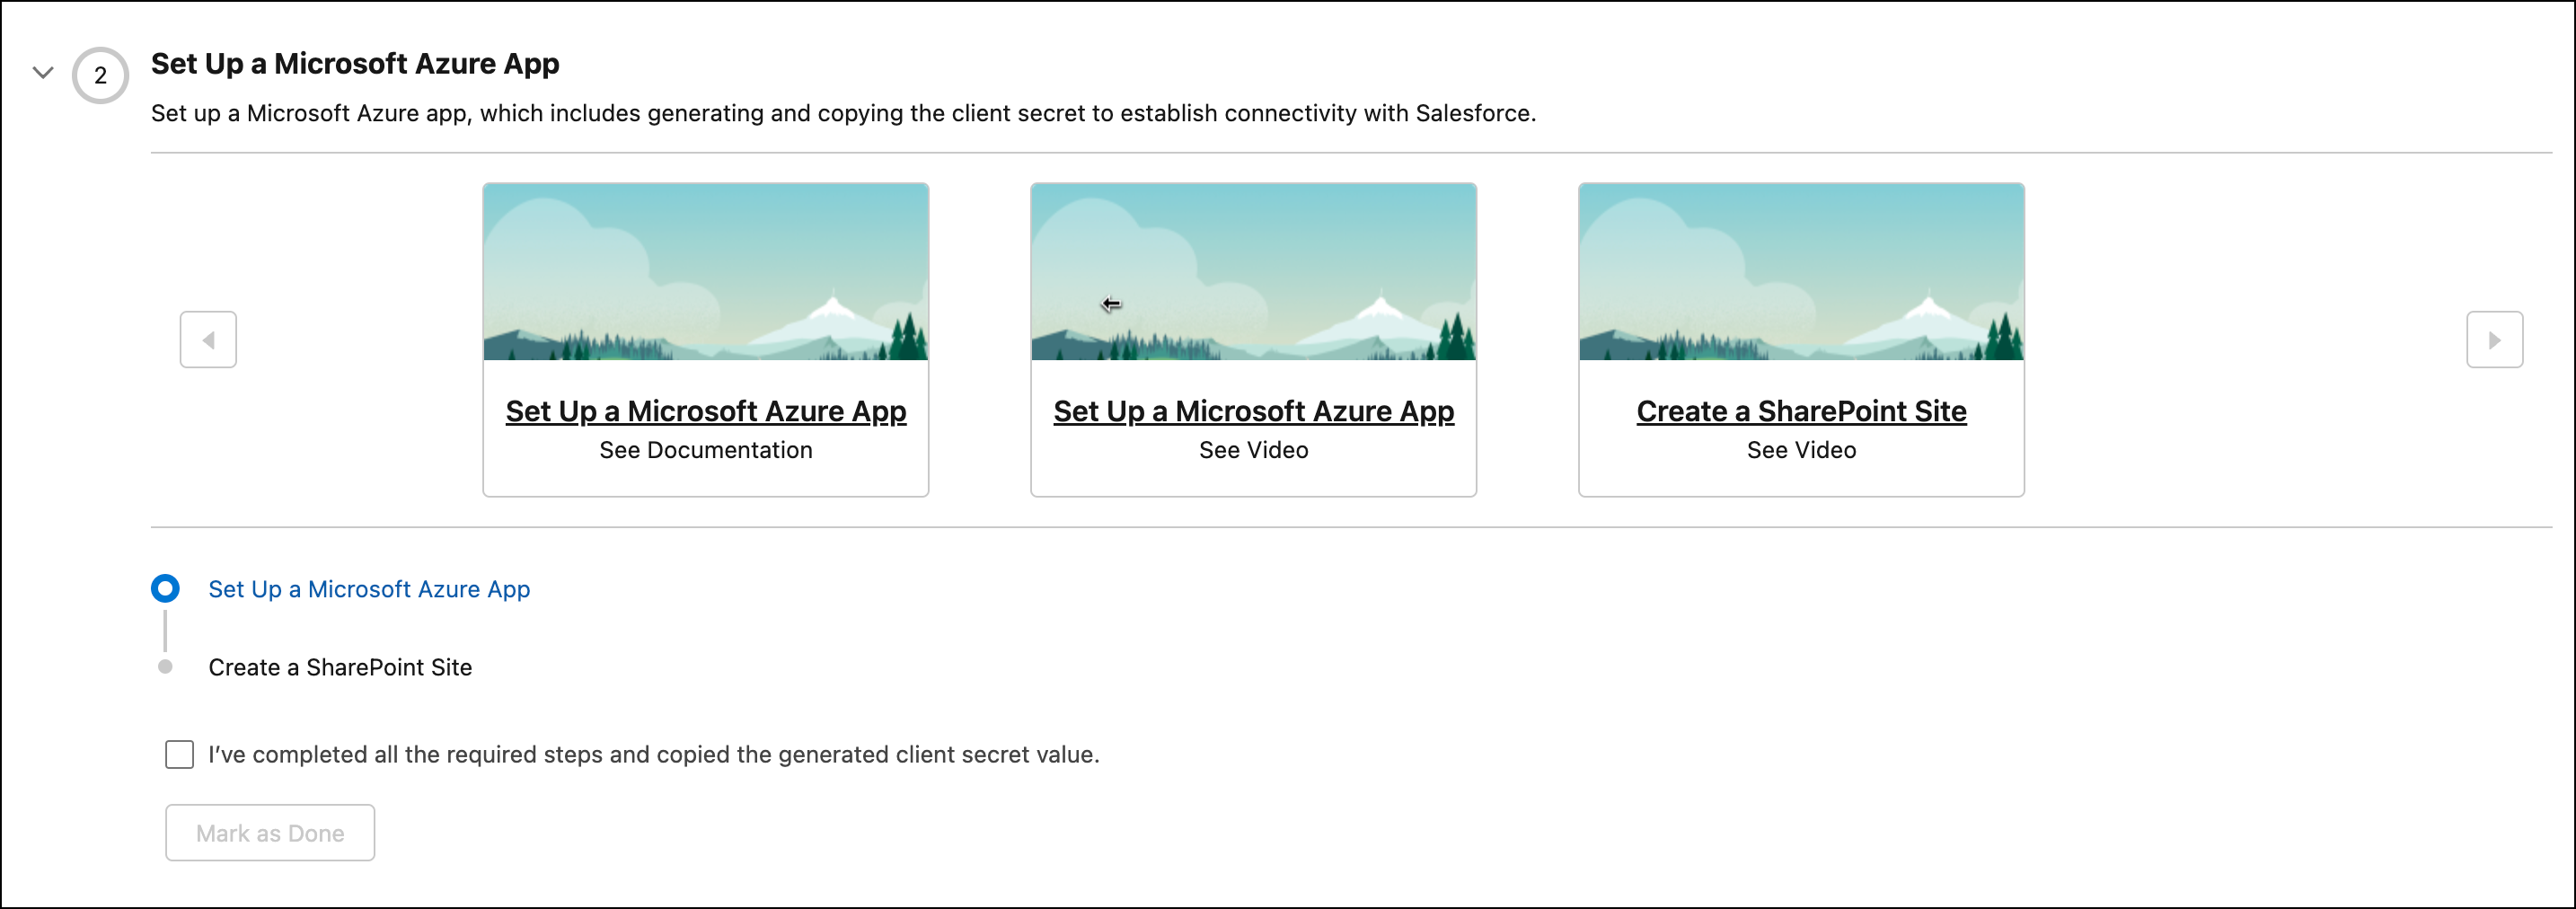
- Click Set up a Microsoft Azure App.
-
To learn more about the setup, you can either:
- See Documentation: Opens step-by-step documentation to guide you through app setup.
- See Video: Watch a tutorial to understand the app setup process.
-
In the guided setup, click Set Up a Microsoft Azure App to expand
the step.
-
Register a new app in Microsoft Azure:
The integration user can register the app and configure API permissions, but only a Global Administrator can provide admin consent.
- Log in to your Microsoft Azure account.
- To go to App registrations, search for Azure AD B2C, click Manage, and select App registrations.
-
Click New Registration and enter the details:
- Enter a name for the app. For example, MicrosoftApp.
- For supported account types, select Accounts in this organizational directory only (Salesforce -SFDC-CLM only - Single tenant).
- Click Register.
- Note the Application (client) ID.
-
Add permissions:
- Go to API permissions and click Add a permission > Microsoft Graph > Delegated permissions.
-
In Select permissions, enter these permissions:
- offline_access
- openId
- User.ReadBasic.All
- Sites.Selected
- mail.send
- Sites.Read.All
- User.Read
- Click … next to User.Read and select Remove, since the previous step provides the higher permission User.ReadWrite.All.
-
Click Grant admin consent for {TenantName}, confirm the consent in
the popup, and make sure that the status changes to Granted.
The integration user can only register the app but can’t grant admin consent. You may be prompted to request consent from a Global Administrator, who will receive an email with the request details to provide the required consent. Whether this step is necessary depends on the security policies of the customer's Microsoft tenant. In some cases, consent may have already been granted or the tenant may allow users to grant consent without admin approval. You can check whether Admin consent is required by referring to the Admin consent required column under API permissions. After the permission is granted, the Status updates to Granted for Salesforce – {tenant name}.
-
Add a client secret:
- Go to Certificates & secrets and click New client secret.
-
In the Add a client secret window:
- Enter a description (e.g., MicrosoftApp).
- Select an expiration timeframe and click Add.
- Copy and save the Client Secret Value immediately, as it cannot be retrieved later. If lost, you must create a new client secret.
-
Create a new SharePoint site or use an existing Share Point site:
The Microsoft Graph API returns only the SharePoint sites you’ve followed. To use an existing site, make sure you’re following it in SharePoint so it appears in the site list.
- To create a new site, log in to OneDrive and go to SharePoint.
- Click Create site | Team site.
- Enter a site name without any spaces, and click Next.
-
Search for and select the admin user.
Add only the Microsoft Admin as a member to maintain document security.
- Click Finish.
-
Retrieve your SharePoint site ID
- Go to Graph Explorer and log in with your Microsoft credentials.
-
Set the method to GET, API version to v1.0,
and URL to:
https://graph.microsoft.com/v1.0/me/followedSites - Run the query and copy the id of the SharePoint site used for document storage.
-
Grant Microsoft Azure app access to your SharePoint site
-
In Graph Explorer, set method to POST and
URL to:
https://graph.microsoft.com/v1.0/sites/<site_id>/permissionsReplace <site_id> with the ID. - Replace <site_id> with the ID.
- Go to the Modify permissions tab and ensure Sites.FullControl.All consent is provided.
-
In the request body, paste:
{ "roles": ["write"], "grantedToIdentities": [{ "application": { "id": "<Application_Id>", "displayName": "Salesforce App" } }] } - Replace <Application_Id> with the Client ID from the Azure App Registration's Overview tab.
- Go to the Headers tab and add: Content-Type: application/json.
- Run the query to assign permissions.
-
In Graph Explorer, set method to POST and
URL to:
-
Complete the step in the Guided Setup:
-
Select the checkbox and click Mark as Done.
The system automatically creates the Microsoft 365 Guided Setup Permission set when the admin completes the guided setup. It assigns the permission set only to the user who runs this guided setup.
-
Select the checkbox and click Mark as Done.
Did this article solve your issue?
Let us know so we can improve!