
You are here:
Configure a Microsoft Azure App for Salesforce Contracts
Configure a Microsoft Azure app to establish a connection between Salesforce Contracts and Microsoft 365. To connect Microsoft 365 with other Salesforce products, refer to the Salesforce documentation for that product.

Note This step is part of manually integrating Microsoft 365 Azure with Salesforce. To refer to guided
setup, see Set Up Microsoft 365 and Azure Integration Using Guided
Setup.
- Open Microsoft Azure.
- Log in to your Microsoft Azure account.
-
Go to App registrations.
You can access App registrations in two ways, either from Manage Microsoft Entra ID, click View, and find App registrations under Manage; or search for Azure AD B2C, click Manage, and select App registrations.
- Click New Registrations.
- Enter the details.
- Enter a name for the app.For example, MicrosoftApp.
- For supported account types, select Accounts in this organizational directory only (Salesforce -SFDC-CLM only - Single tenant).
- Click Register.
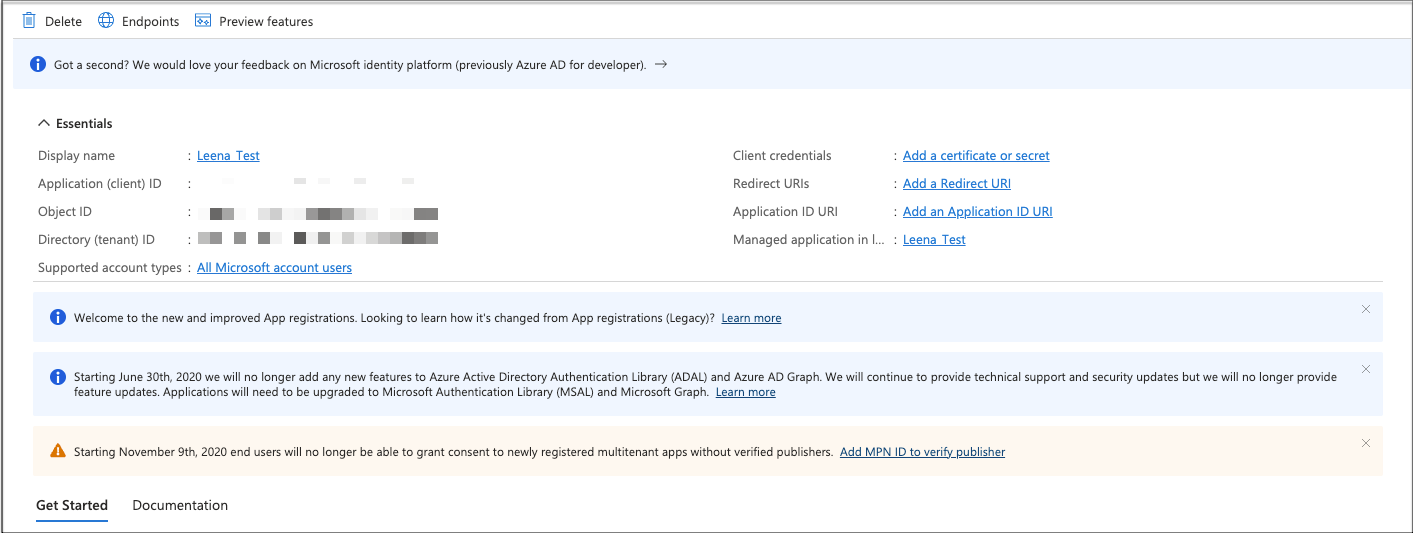
- Enter a name for the app.
- Note the Application (client) ID.
- Add permissions.
- Click API permissions.
- Click .
- In Select permissions, enter Files.ReadWrite.All.
- Select Files.ReadWrite.All permission, and click Add permissions.
- Similarly, add these permissions also:
- openId
- User.ReadWrite.All
- Offline_access
- To remove the user.read permission, click … next to it, and select Remove.
- Click Grant admin consent for {TenantName}.
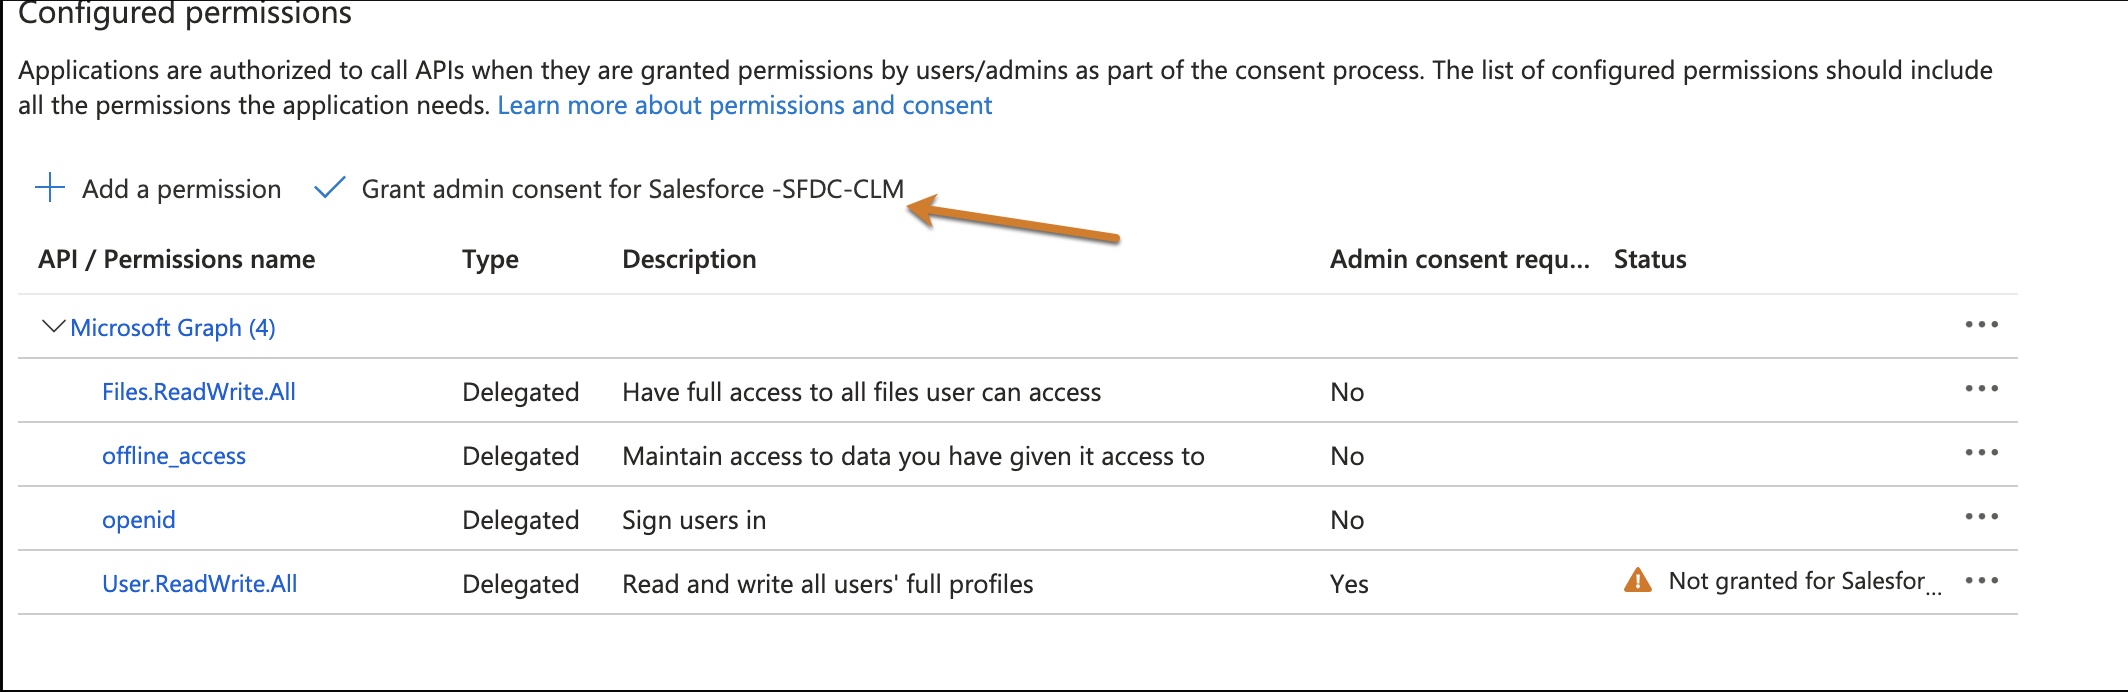 A confirmation window opens.
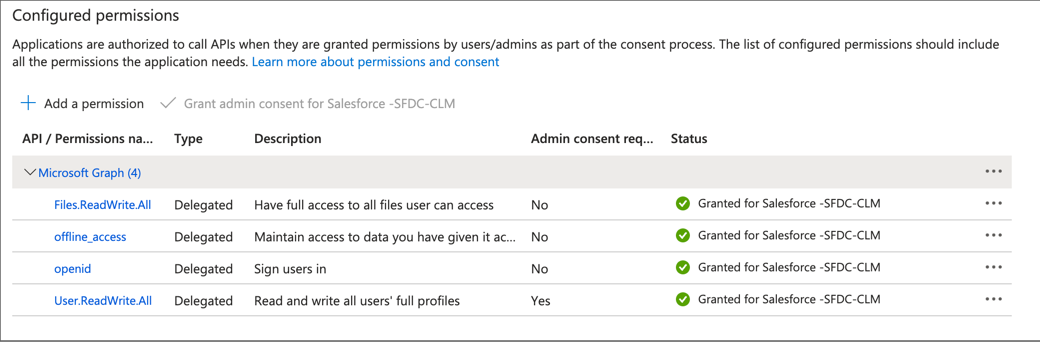
 - Click Yes.The status changes to Granted for Salesforce - {TenantName} for all permissions.
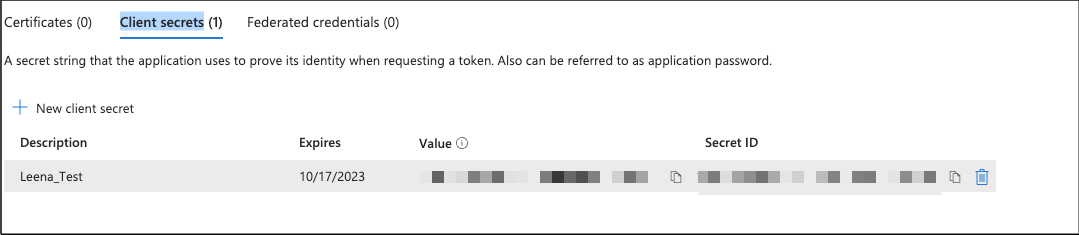
- Add the new client secret.
- Click Certificates & secrets.
- Click New client secret.The Add a client secret window opens.
- Enter a description for the client secret.For example, MicrosoftApp.
- Enter or select an expiration timeframe.
- Click Add.
- Immediately copy and save the Client Secret Value. Use the copied client secret value while configuring Auth. Provider.Automatic encryption prevents retrieval of the client secret value. If you don't to save the client secret value immediately, you have to create a new client secret value.
Did this article solve your issue?
Let us know so we can improve!
