
You are here:
Create a Named Credential for Salesforce Contracts Connector for Word Add-in Manually
Add a Named Credential to use the External Document Storage Configuration. You have to specify the Microsoft OneDrive location in External Document Storage Configuration so that the generated contract documents and document templates are stored in a single location. Ensure that the user authenticating the named credential after creating a named credential is the same user who created the Microsoft Azure app and has User Administrator permissions in Azure.
Note This step is part of manually integrating Microsoft 365 Azure with Salesforce. To refer to guided
setup, see Set Up Microsoft 365 and Azure Integration Using Guided
Setup.
| REQUIRED EDITIONS |
|---|
| Available in: Lightning Experience |
| Available in: Enterprise, Unlimited, Professional, and Developer Editions |
| USER PERMISSIONS NEEDED | |
|---|---|
| To create Named Credential: | System Administrator with Azure Tenant Administrator access |
- From Setup, in the Quick Find box, enter Named Credentials, and then select Named Credentials.
-
Click the dropdown next to New, and select New Legacy.
Don’t click New.
-
Enter MicrosoftApp as the label.
The Name field automatically gets filled with MicrosoftApp.
- Enter https://graph.microsoft.com/v1.0 as the URL.
- Select Named Principal as the identity type.
- Select OAuth 2.0 as the authentication protocol.
-
Select MicrosoftApp as the authentication provider.
Select the Auth.Provider you created while configuring the Auth Provider for Microsoft App..
- Select Start Authentication Flow on Save.
- Make sure that the Generate Authorization Header is selected.
-
Save your changes.
The named credential's authentication status changes to Authenticated after the successful authentication of Microsoft Azure.
 Note If your Microsoft account is already authenticated in your current browser session, you can successfully authenticate your Named Credential. If not, authenticate your Named Credential by using your Microsoft account credentials.
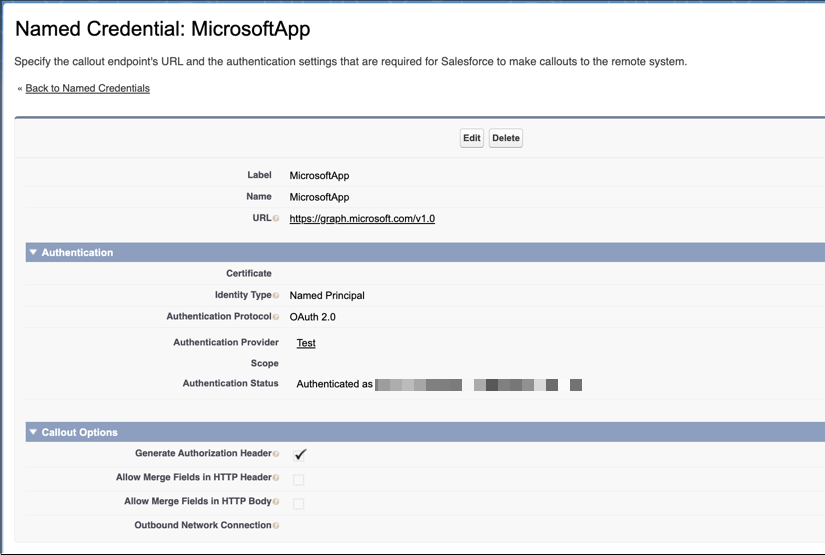
Verify that the named credential is authenticated correctly before proceeding further.
Did this article solve your issue?
Let us know so we can improve!