You are here:
Salesforce Contracts End To End Flow
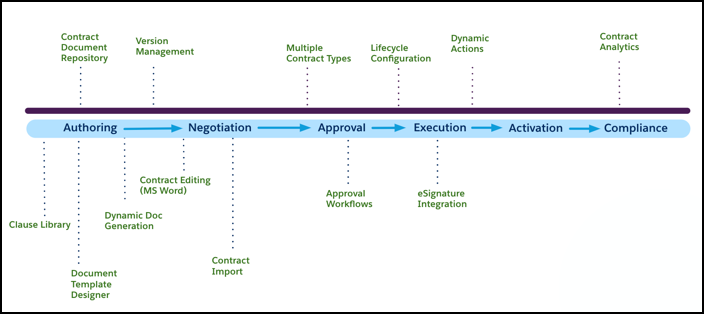
Salesforce Contracts has extensive configurations that automates and streamlines every stage of the contracting process.
Use case: B2B contracts go through various stages of contracting processes throughout their lifecycle. The first stage is authoring, where the documents are drafted. The next stage is negotiation, where all the parties agree on the contract’s language, tenure, terms and conditions, and require approvals from internal stakeholders. The contract then goes into the execution stage where each party electronically signs the agreement. Finally, the contract is signed and put into effect.
Let's look at how a sales executive creates a contract from a quote, negotiates and signs the contract document.
-
Authoring : The authoring stage helps in drafting the contract document. The contract documents can be generated either by using Document Template Designer to create contract document templates or dynamic document generation which picks up the designed contract document templates.
-
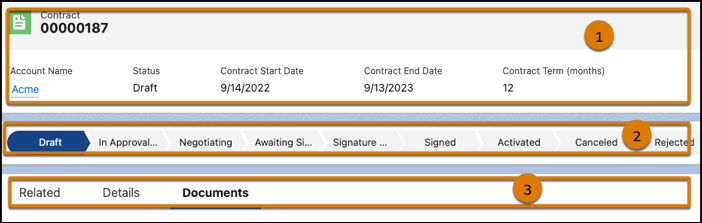
Initiate the creation of a contract document from an order, opportunity, or quote or from a standard or custom object. See Create a Contract from an Opportunity, Order, or Quote or Create a Contract from a Standard or Custom Object. For example, select Create Contract from the quote object to create a contract. This launches the contract page: where the contract header (1) displays the account name with which the contract is associated, the current contract status, the contract’s start and end dates and the length of time in months that the contract is valid. The Contract Status values (2) represent the various states that the contract goes through in its lifecycle. The three tabs (3) are available to view the additional contract details, related items, and documents.
-
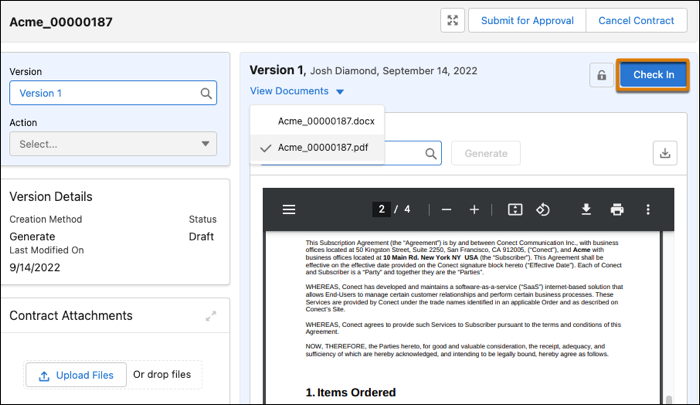
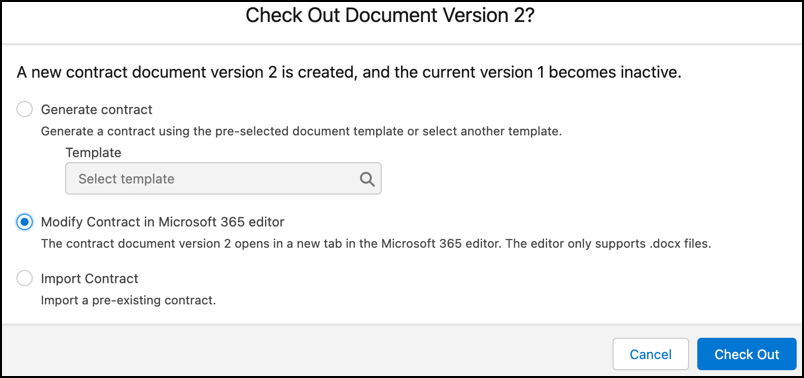
You can create a new document by selecting a document template or by importing a pre existing document or by creating a document in Microsoft 365. See Generate Contract Document Versions.To generate a contract document, select pre-configured template from the list under Generate Contract. The sales executive can view the pdf and docx document.
-
Create Version 1 of the contract document by checking in.
-
-
Negotiation - The contract document is shared offline with the parties. The customer can make adjustments to the document and send it back to sales rep. See Create New Contract Document Versions.
-
Download and share the .docx version of the contract document with the counter parties. Accept or reject the updates and save the .docx file. See Contract Review.
-
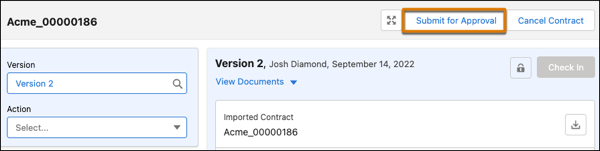
Upload the updated .docx file using Import a Contract. This generates a new contract document version that can be approved internally.
-
Select Check In to create Version 2 of the contract document.
-
-
Approval - Salesforce Contracts uses Salesforce approval workflows mechanism to configure approvers and approval criteria. The Salesforce Contracts application goes through the approval process based on the approval workflow configurations.
-
Select “Submit for Approval’ button to Send the contract document for internal approval. The contract status updates to In Approval Process. Once approved, the contract status updates to Negotiating.
-
-
Execution - The Salesforce Contracts application has in-built integration with docuSign. The sales rep sends the documents to various recipients for e-signature. Once all the recipients have signed the document, it is synced back into the existing version. See Submit a Contract for E-Signature.
-
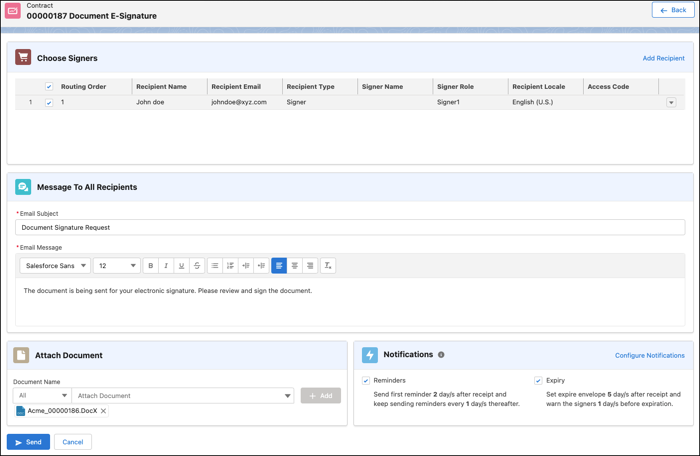
Use Send for Signature to send the contract document for e-signature.

-
This navigates to the Document E-signature page to add recipient details, email subject and message, and documents to be attached.
-
Once all the fields are updated, select Send. Docusign sends a notification email to the recipient where they can access the document, and review or sign it. The contract status updates to ‘Awaiting Signature’.
-
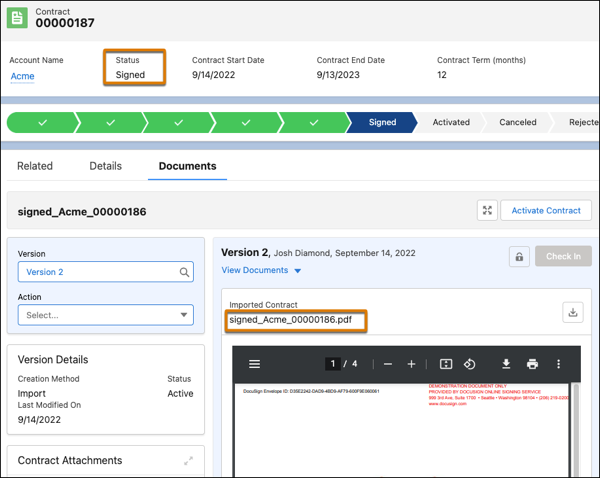
To verify the e-signature envelope was signed, update the envelope status using Update Envelope Status.
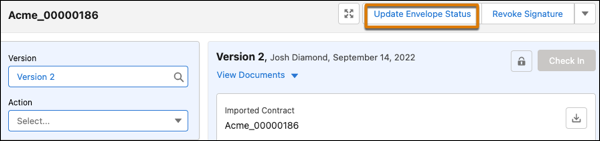
The contract status updates to Signed and the pdf version of the signed document is generated with the prefix ‘signed’.
-
-
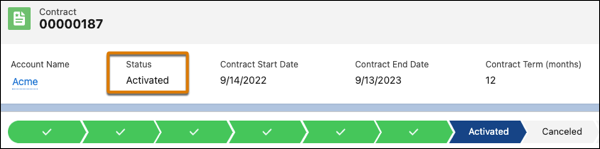
Activation - Select the Activate Contract button to activate the contract. This updates the status to Activated.