
You are here:
Set Up a Timeline in Salesforce
Configure interactive timelines that provide access to information about users.
Required Editions
| Available in: Lightning Experience |
| Available in: All editions with Industry Service Excellence permission set licenses |
Companion org users can use the Data Cloud engagement events. To enable and access Data Cloud features from your companion org, see Access Data Cloud One from a Companion Org.
| User Permissions Needed | |
|---|---|
| To configure a Timeline: | Read and Edit access for objects you’re including on the Timeline |
- From Setup, in the Quick Find box, enter Timeline, and then select Timeline.
-
Turn on Timeline Configuration.
 Note Enabling Timeline is a one-time task. After you enable Timeline in your org, you can’t disable it.
 -
Click New Timeline.
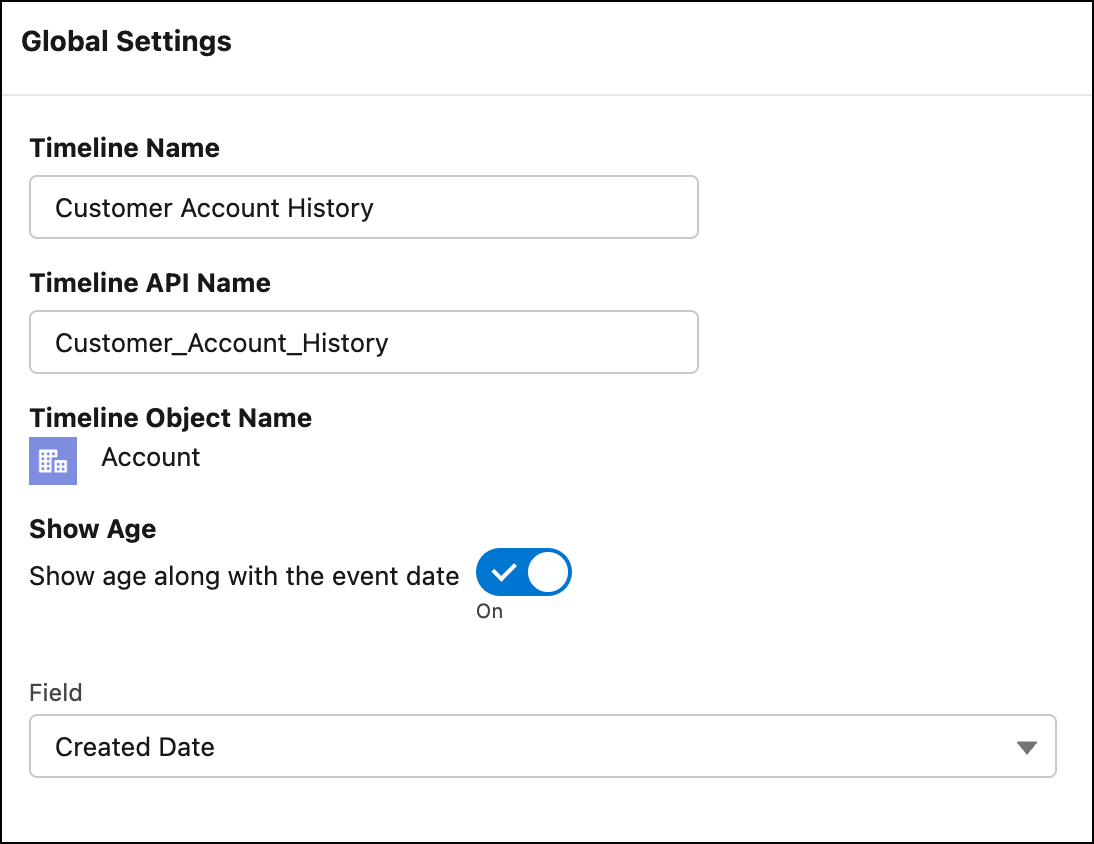
- Enter a name for the timeline.
- Enter an API name for the timeline, or accept the name that's automatically generated.
-
Select an object that serves as the basis for the timeline.
You can base your timeline on any Salesforce object (standard or custom). You can add related objects to the timeline later.For example, to represent a customer’s account history on a timeline, select Account as the timeline object.Note If you use a custom object on your timeline, ensure that it displays correctly by making sure it has a custom tab. See Create a Custom Object Tab for more information.
- Click Save.
-
On the Global Settings page, turn Show Age on to show how old a
record of the base or primary object was when an event occurred, along with the date of
the event.
For example, you can see the age of an account based on when it was created. If the base object is Asset, the age of the asset at the time of an event is shown. Otherwise, only the event and the date appear.
-
If you chose to show age along with the timestamp, choose the field to use for
calculating age.
To show the age of the user, select the Birthdate field.
- Click Next.
-
On the Timeline Related Objects page, click Add Related
Object.
-
Select a related object (standard or custom) that contains information you want to
display on the timeline.
You can add up to five related objects per base object. If an object has record types, you can select up to three record types by default. Contact Salesforce Support if you want to increase the record type limit to five.A related object for a Timeline anchor object must have a direct lookup to the anchor object.
-
Select the field that associates the related object with the base timeline object,
then click Next.
If a related object has only one lookup to the base object, then the field is auto-selected and can’t be changed.Note Enhanced Timeline doesn't support encrypted fields. Make sure any field you choose isn’t encrypted.
-
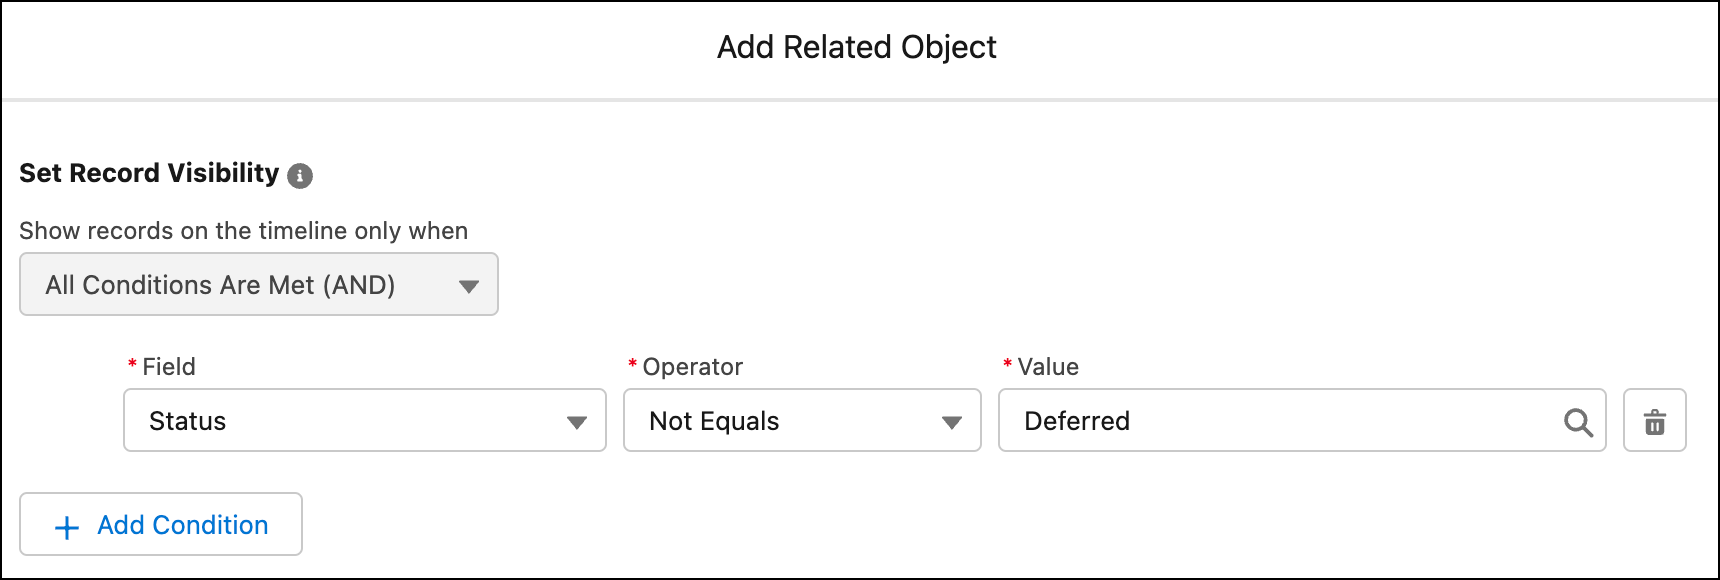
Add conditions for showing records on the timeline. You can add conditions only for
indexed fields. Then click Next.
For example, you can show tasks that aren’t canceled or deferred.
-
Select the Title, Subtitle, Timestamp, and Summary Field fields for the timeline
events, and select whether to let users create records from the timeline. Then click
Next.
Every event on a timeline has a title, an optional subtitle, a timestamp, and an optional summary, which are sourced from fields in the related object.
- Title
- You can use something like a Subject field. For example, “Call Customer.”
- Subtitle
- You can use something like a Description field. For example, “Ask about an upcoming event.”
- Timestamp
- Select a field that’s likely to have a value. You can only use fields that are indexed, such as Created Date. See Indexes for information on how to create custom indexes on other fields. The timestamp appears alongside the event on the timeline. Events without a timestamp don’t appear on the timeline.
- Summary Field
- Select a field that contains the summary that you want to show on Timeline. You can select only the string, text, and text area fields. Users, for example contact center agents, can read the summary to get a quick overview of an event and provide personalized support to customers. To see the Summary Field field, see Enable Summary. If you don't select a field, the summary card doesn't appear on Timeline.
If you select Let users create records from timeline, users with the required permissions can click New to create a record directly from the timeline. -
Select the fields and related lists that you want to show on the timeline, and then
click Add.
The selected Summary Field field isn't available for selection on the Fields tab.If a selected field isn't visible on the page layout of the object it belongs to, it will not appear on the Timeline.
-
Select a related object (standard or custom) that contains information you want to
display on the timeline.
-
To save the timeline and make it available for use, click
Activate.
Note To update the timeline configuration, deactivate the timeline, make your updates, and then activate the timeline again. For example, if you enable the Translation Workbench in your org, and you change the language for a user, you must deactivate and reactivate any existing timeline configurations to reflect the translations in the timeline for the user.
-
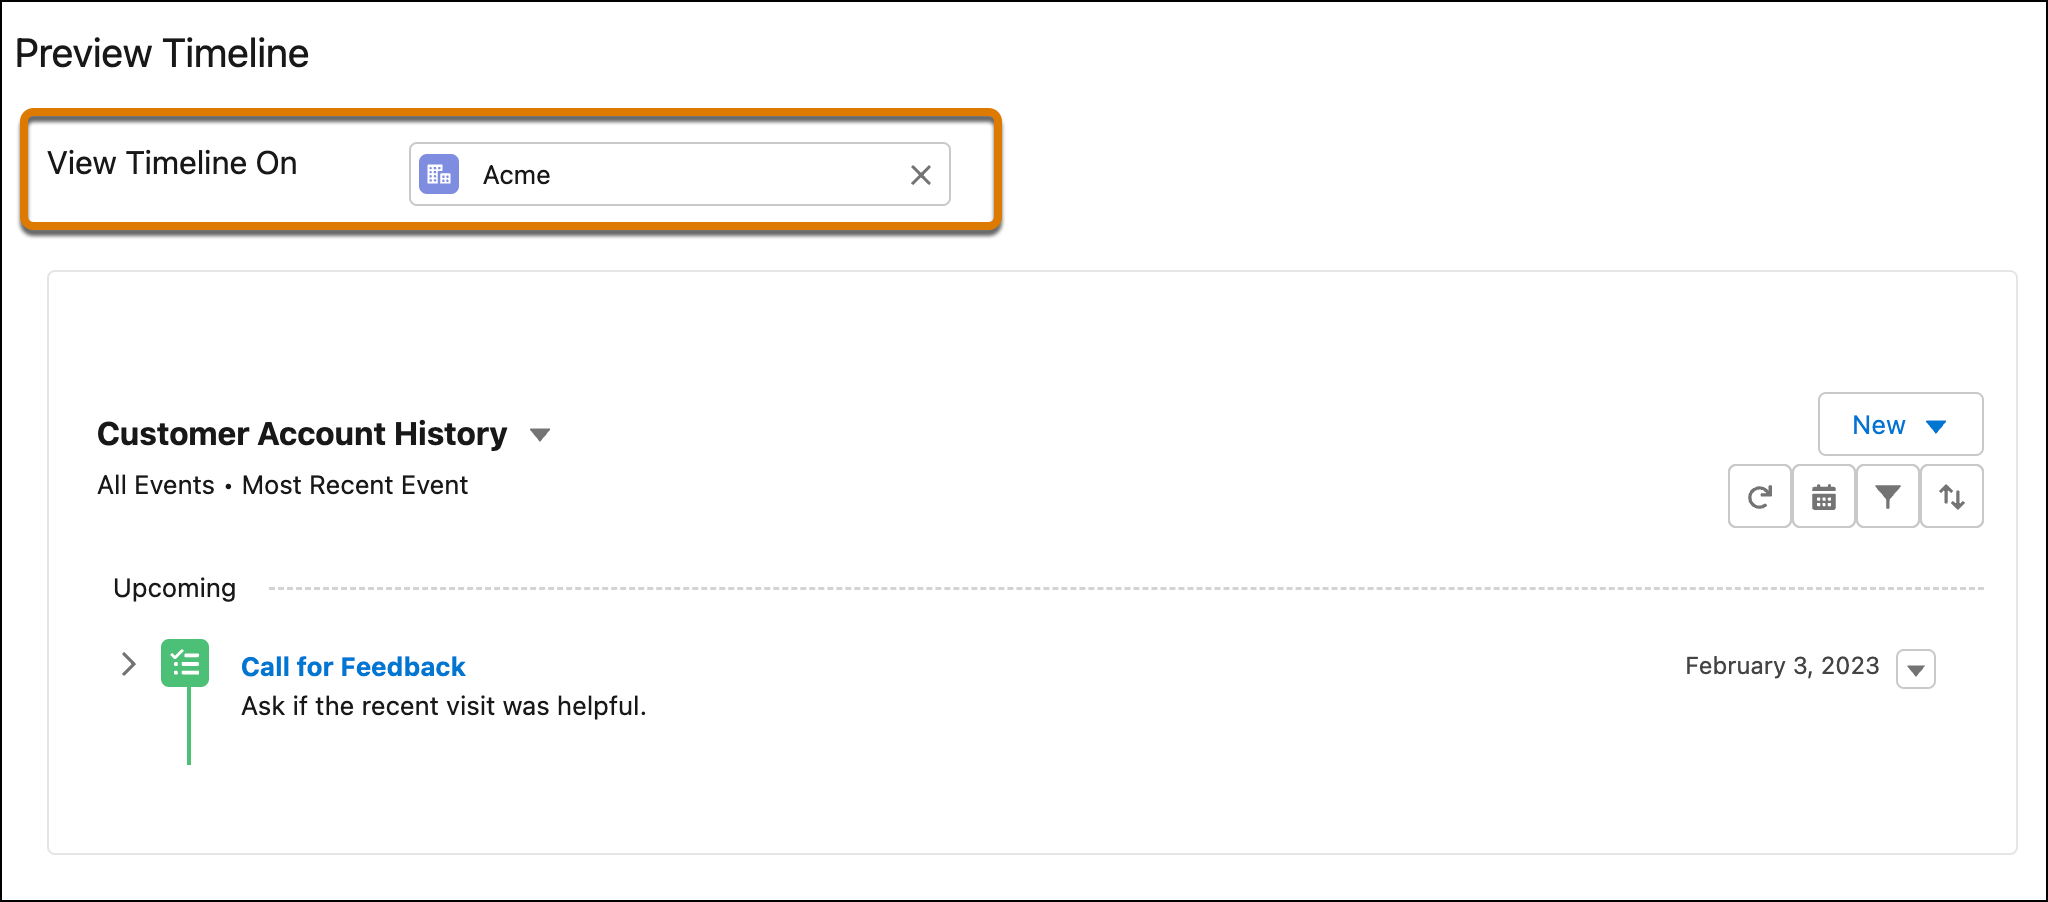
Preview the timeline you’ve configured by selecting a base object record in the View
Timeline On field.
Did this article solve your issue?
Let us know so we can improve!
