You are here:
Conditionalizing a Section Using Entity Filters
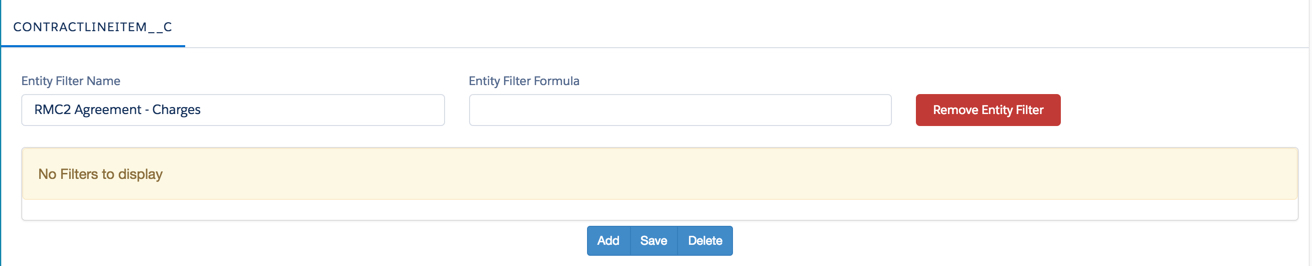
You can include a Vlocity Web Template section in a contract only if certain criteria are met using entity filters. The entity filter operates on the Contract Line Item object.
You can use entity filters to create conditional contract document sections. For example, you can show a section only if the entity filter conditions match, such as showing a clause only for customers who are in California. You can use only one entity filter per contract document section.
Advanced conditions use entity filters to specify the conditions in which a section should appear in a contract document. The entity filter operates on the Contract Line Item object. You can use any field in the Contract Line Item object or its parent object to build a condition. If the condition is true, then the section appears in the contract document. If the condition is false, then the section does not appear in the contract document.
For example, you can display an embedded template section if the product family contains “Wireless” and the Contract Total Price > 50000 and Tariff Flag = False.
To conditionalize a section using entity filters:
- In the Document Template Designer, click Use Advanced Entity Filters.
- To use a previously defined entity filter, from the Select Existing Entity Filter list, select the entity filter to use.
- To create a new entity filter, enter the Entity Filter Name.
- Click Create Filter.
- Click Add.
-
From the Type picklist, select the appropriate
value.
-
Use Attribute when creating a condition on a JSON attribute.
-
Use Field when creating a condition on a field.
-
Use Filter when creating a condition on another internal filter.
-
-
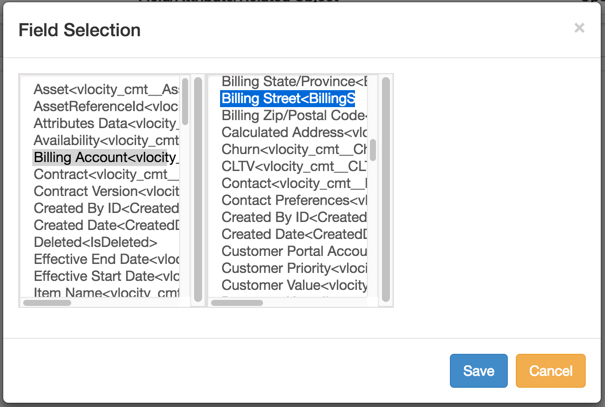
In the Field/Attribute/Related Object field, click
Select.
The Field or Attribute Selection dialog box opens. The option you select in the first column may expose more columns. For example, in this procedure, selecting the Billing Account <vlocity_cmt_BillingAccountId__c> field exposes another column from which you can select Billing State/Province<BillingState>.
- Select the appropriate options and click Save.
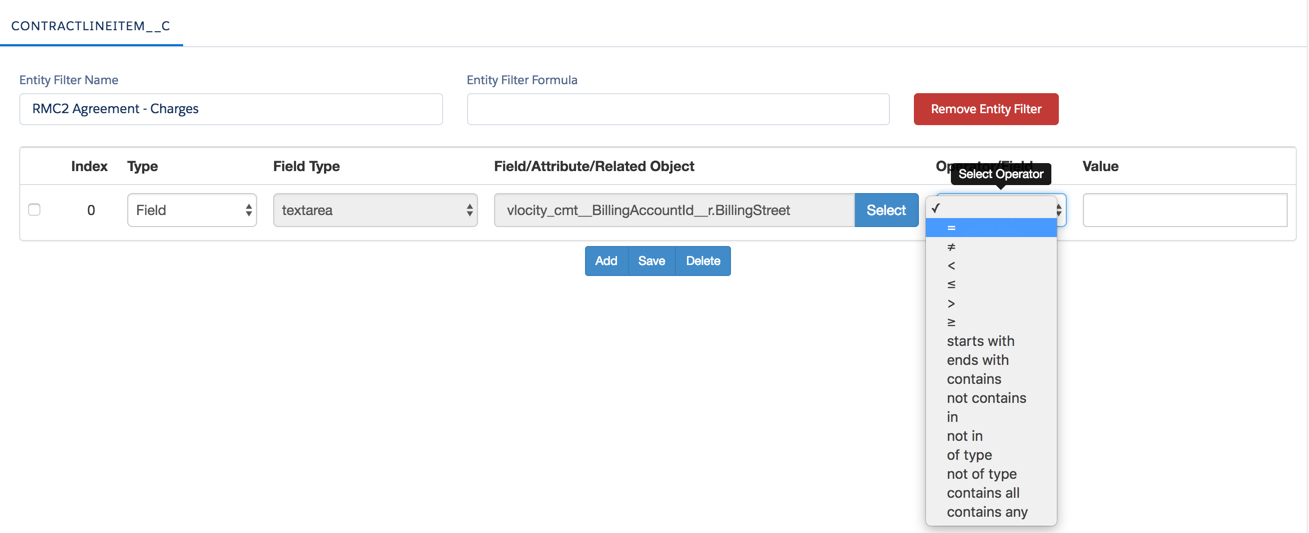
- From the Operator picklist, select the appropriate condition operator. In this example, select = (equal sign) for the state.
- In Value , enter the appropriate value.
- Repeat steps 5 through 10 to define all of the conditions.
- Click Save.
- Click Edit Section, located in the upper right corner of the window.