
You are here:
Create a Slack Rule
Create a rule in Slack to trigger alerts based on specific KPIs or by a particular date and time. Use rules to stay updated on the progress of your data.
| REQUIRED USER ROLE | |
|---|---|
| To share in Slack | Admin and Power User |
- Go to the dashboard page or widget you want to share.
- Click the Share icon.
- Click Slack.
-
Click Create Rule, and define the rule.
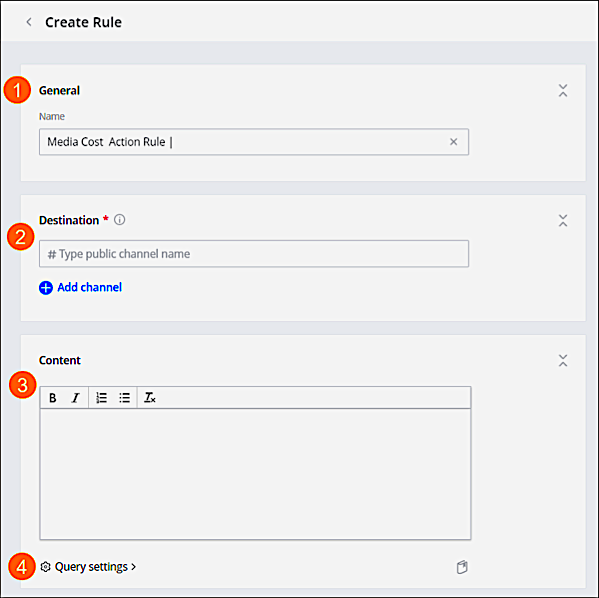
- Name your rule (1).
- Add the Slack channel you want to notify (2). If you defined the channel in the sharing setting, the channel is automatically populated.
- Add a message or information you want to share (3).
- You can add queries to your rule to make the data dynamic and interactive (4). When adding a query, make sure that the selected measurements and dimensions are available in your data.
-
Define the trigger for your alert.
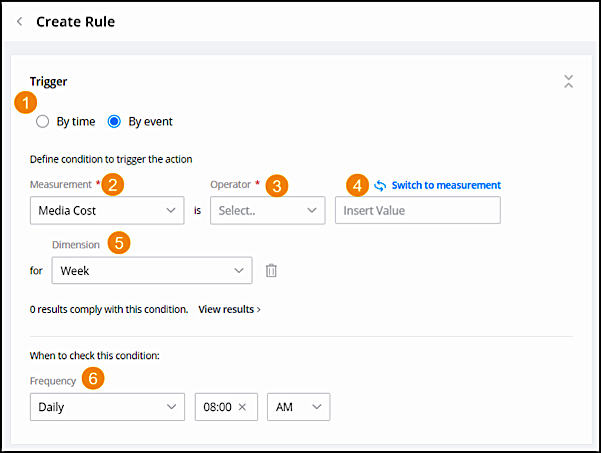
- Choose whether it’s by time or event (1).
- If you’re using by event, select the measurement to apply (2) and the operator (3).
- Add a value (4). For example, you want to be notified when your Message Total Clicks drops below 100.
- You can add a dimension (5). If you’re creating a rule from a widget that already contains a dimension, it’s automatically populated.
- Define how often you want to check if the conditions are true (6).
-
Define filter settings.
In the Filters section, you can see all the filters that are applied to your rule and edit them. You can also edit the date range.
 Note When creating a generic rule that is scheduled to run in the future, it’s recommended to set the date range as a relative date so that the data from the rule is always relevant. For example, last week.
 -
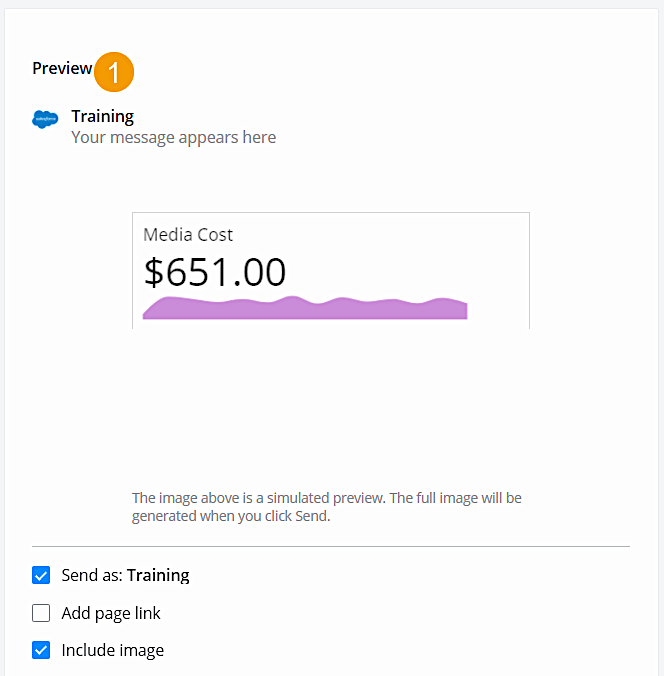
Preview the content you are going to send (1).
- Click Create Rule
Did this article solve your issue?
Let us know so we can improve!