
You are here:
Add the Personalization Data Action Element to a Flow
Create an action element that maps how to send data to a specific Personalization dataset after changes to a record occur.
Required Editions
| Available in: Premium edition |
| Permissions Needed | |
|---|---|
| To add an Action element to a flow: | A role with permissions to access and work with action flows |
Before adding the Personalization Data Action Element to a flow, make sure to set up your environment as described in Personalization for Sales and Service Cloud Integration Setup.
Make sure to provide non-administrator users with proper Apex class access permissions for working with the Personalization Data Action flow element. For more information, see Set Apex Class Access from Profiles.
When adding the Personalization data action element to a flow, also keep the following in mind:
- To save the action element, you must map a Value and Attribute pair for at least one Identity.
- Mapping any Value and Attribute pairs for user attributes or profile objects is optional.
- Values are sourced from Sales or Service Cloud. Value data is sent to its associated Attribute or Object Type destination in Personalization when the flow is triggered. Attributes and object types are sourced from the Personalization dataset that you select.
- If you’re modifying an existing Record-Triggered flow, open Flow Builder, and then open the flow you want to modify.
-
Under the Run Asynchronously branch of the flow, and after any other Get Records or
Assignment elements, click the Add Element option (
 ).
).
- Under Interaction, select the Action flow element.
- In the left pane, click Personalization.
- Click the Action field in the right panel and select the Automate Data Sent for Personalization action.
-
Give the new Action element a label. The element assigns an API Name value for the
element.
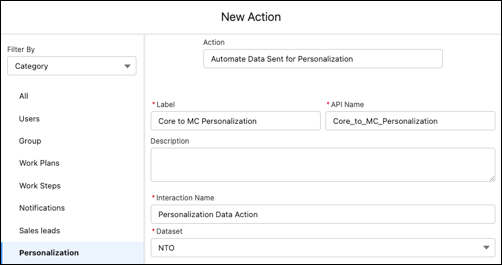
- (Optional) Provide a description for the element.
- Provide an Interaction Name. This value identifies the flow action within Marketing Cloud Personalization and enables more streamlined segment creation based on events coming from Sales and Service Cloud.
- From the Dataset dropdown menu, select a Personalization dataset.
-
In the Identities section, map Sales or Service Cloud values to
their respective Personalization attributes. The identity value either resolves to an existing
Named Individual Profile, or creates a New Named Individual profile.

-
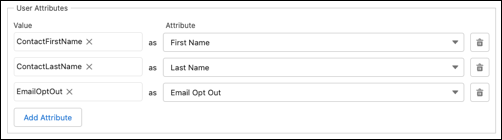
(Optional) In the User Attributes section, click Add
Attribute, and then map Sales or Service Cloud values to their respective
Personalization attributes.
-
(Optional) In the Profile Objects section, click Add
Profile Object, and then map Sales or Service Cloud ID values to their respective
profile object types.
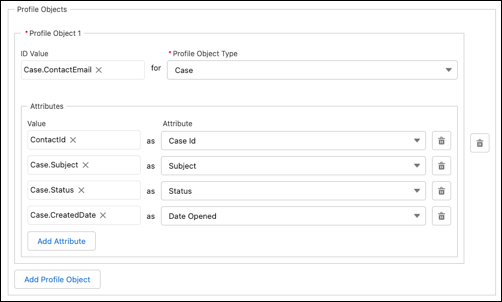
- (Optional) Add profile object attributes by mapping their Sales or Service Cloud values to their respective Personalization attributes.
-
(Optional) If an Asynchronous Apex process handles the creation or update of records and
fields that trigger the Record-Triggered Flow, select Increase Batch
Size to change the batch processing limit from 25 to 100 records per
transaction.
 Note This increased processing limit matches the Apex limit of 100 total callouts (HTTP requests or web services calls) in a transaction. It improves performance but results in the removal of runtime validation for datasets, attributes, and profile objects. For more information, see the developer documentation: Apex Governor Limits.
 - Click Done to save your changes.
Did this article solve your issue?
Let us know so we can improve!