
You are here:
Push Multiple Views from MDP to Tableau
When you push multiple views, you match the values between the views in Tableau Desktop. You can then publish to Tableau Server or Online.
- Go to Export.
- Select Tableau Data Connection.
- Create a Tableau view.
-
On the Create New View page, enter these details:
- Name the report.
- For Export Format, the default is Tableau, and it’s recommended to leave as is.
- Select the number of days after which reports are deleted. For example, if you enter 30, after 30 days all reports are deleted from MDP. By default, the number of days is 180, which is also the maximum number of days you can save history.
- Select the time period from which you want to retrieve data.
- Select the measurements that you want to include in the report.
- Select the dimensions that you want to include in the report.
- To add a filter, click Add Filters.
- Save and run your report.
-
Click Create New Tableau Feed.
- Enter the data source name.
- In the Views List, select the Tableau views that you created.
- Click Create New View to create a view directly from here.
- To send the view to Tableau Server or Tableau Online, select Send to Tableau Server/Online. You will need to define delivery setup details at a later time in the process.
- Click Create. The system builds a hyper file containing all your grouped views.
-
To download the hyper file, click Download File.
 Note It’s highly recommended that you download the hyper file at this point because you need it to open the views in Tableau Desktop. You can also download it at a later time.
 - Open the hyper file. You’re redirected to Tableau Desktop to set up your tables.
-
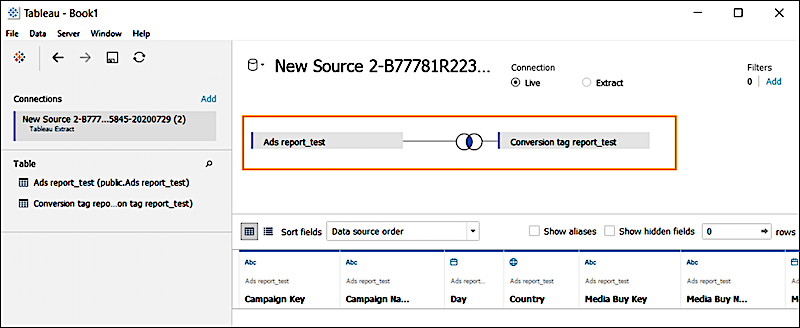
Set up your tables in Tableau:
- Drag your tables to the Tableau desktop.
- Create a join between the tables by selecting fields that have matching values between them.
-
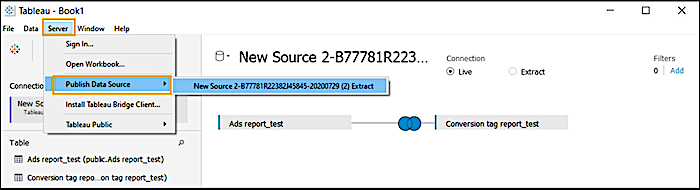
On the Server tab, select Publish Data Source.
- After the file is uploaded to the server, authenticate with your Tableau credentials.
- Name your data source.
- Click Publish. When you see the Publishing Complete message, you can set up automatic data refresh from MDP to Tableau.
- Click Done, and then go back to MDP.
-
Define the delivery setup.
- In MDP, click Next.
- To use a private access token instead of a username and password, enable Private Access Token, and enter the token name and secret. A token is especially useful for customers who use SSO, Active Directory, or LDAP authentication. For more information see Personal Access Tokens.
- If you don’t want to use a token, enter your Tableau username and password.
-
Enter your server URL and site name. The server URL includes everything from https to
tableau.com, for example,
https://10ax.online.tableau.com. The site name is after site/, for example,datoramademo.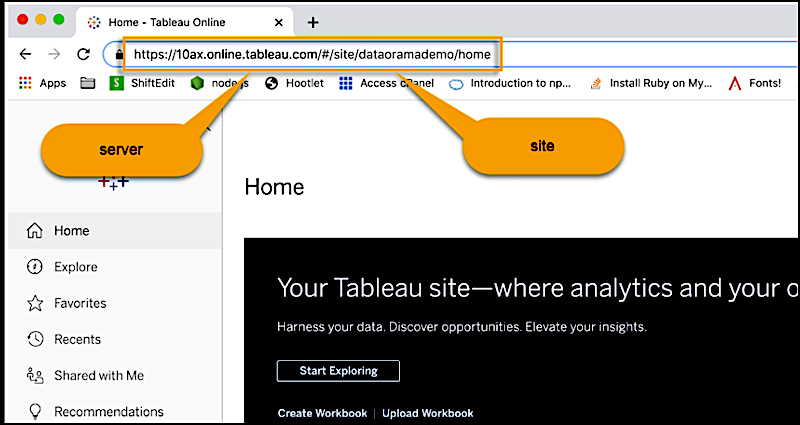 Note If the URL doesn’t include a site name or if there’s a #, it’s the default site, so enter Default.
After entering the server and site information, the Tableau Project Name is generated.
- Select the data source that you just published.
- Save your work.
Did this article solve your issue?
Let us know so we can improve!