
You are here:
Add Structure and Logic to a Marketing Flow
A marketing flow contains elements that represent certain actions along a customer's journey. To create the structure, you can add, remove, and move elements around the flow canvas. To customize the customer experience more, you can also add logic, such as branching paths and exit rule filters.
Required Editions
| Available in: Salesforce Enterprise and Unlimited Editions with Marketing Cloud Next Growth or Advanced Edition |
| User Permissions Needed | |
|---|---|
| To create and edit flows: | Marketing Cloud Manager permission set OR View Flows and Create and Edit Flows user permissions AND Permissions to all elements in the flow |
| To add a decision element to a flow: | Add Decision Element to Flows |
In this topic:
Add and Move Elements
To organize the steps in a customer journey, position flow elements on the canvas from top to bottom. Click an element to move it or to open its detail panel.
-
To add an element between two elements, hover over the circle and click
+.
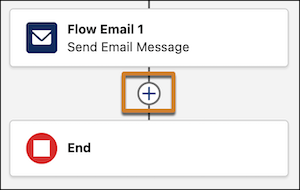
- Select an element from the list.
- In the panel, add a label and any other required information.
-
To move one element:
- Click the element that you want to move.
- Select Cut Element.
-
In the new location, hover over the circle between two elements and click the
plus sign that appears.
The element appears in that location.
-
To copy and paste one element:
- Click the element that you want to copy.
- Select Copy Element.
- In the new location, hover over the circle between two elements and click the plus sign that appears. Then select Paste 1 Element.
-
To copy and paste multiple elements:
- Click Select Elements on the button bar.
- Click the plus sign for each element you want to copy.
- Click the clipboard icon on the button bar.
- In the new location, hover over the circle between two elements and click the plus sign that appears. Then select Paste Elements.
- To delete an element, click the element, and then select Delete Element.
Branch a Flow Path
The Decision element creates a branch in your marketing flow, similar to an IF/ELSE statement in code. You configure one or more outcome paths, and any remaining records follow the default outcome path.
To select record fields in a Decision outcome, first select a segment in the Start element. The system evaluates Decision outcomes in the order that they appear in the outcome list. For data graph resources, you can add nested condition groups, use aggregation functions on related numeric fields, and use date and calendar operators when the resource data type is date. For more operator behavior information, see Flow Operators in Decision, Wait, and Collection Filter Elements and Decision Flow Element.
- On the flow canvas, add a Decision element.
- Give the element an internal name.
- Configure outcome conditions for each flow path.
- To add another outcome and flow path, click the plus sign icon in the Outcome Order section.
- To change the order flow follows to evaluate outcomes, drag and rearrange the outcome elements.
Ursa Major Solar hosts an event at their industry convention. Account rep Lincoln wants to send a welcome email to contacts created after the conference and send a conference recap email to remaining contacts. In a flow with a series of messages, they add a decision element at the beginning of the flow canvas.
Then, Lincoln configure the Decision element.
- They label the Decision element New Conference Contact? and the first outcome Yes.
- For Condition Requirement to Execute Outcome, Lincoln selects All Conditions are Met (AND).
- For the Resource, Lincoln selects $Record > ssot__Created Date__c.
- For the Operator, Lincoln selects Greater Than or Equal to and gives the Value the start date and time of the conference.
- For the default outcome, Lincoln changes the name to No, so that it’s clear on the canvas which path is which.
Then, Lincoln adds a Send Email Message element to each path, and selects the right message for each one. New contacts receive the welcome email and remaining contacts on the default outcome path receive an email with a recap of the conference. Lincoln notices an extra Wait element on the canvas, but they don't need it. Lincoln deletes the Wait element, and activates the flow.
They could also branch on recency with an expanded operator—for example, Last Number of Days with Value set to 7.

When someone in the flow meets the condition for an outcome, they take that path. If an individual meets multiple outcome conditions, the flow takes the first one listed. If no outcome conditions are met, the flow follows the default outcome path.
Remove a User from a Flow
To remove a customer from a flow when they meet certain conditions, apply an exit rule. An exit rule is like a filter that identifies people to remove from a flow. For example, you can create a rule that sends someone to the end of a flow after they renew a contract.
The flow evaluates the exit rules each time a user starts a flow or resumes a flow after a pause. You can add up to 10 exit rules to a flow. Create rule conditions based on global attributes of the flow or Data 360 data graph attributes, related attributes, or calculated insights. Available operators depend on the attribute’s data type. When you use a numeric attribute, you can use aggregation functions, such as Average, Sum, Max, or Min.
-
Open a flow for editing.
- From a single email campaign, click the action menu, and then select Edit Flow.
- From other campaigns, click Edit Flow.
- From the Flows tab, click a row action menu, and then select View Flow.
- In the Start node, click Edit next to the count of exit rules.
- In the Exit Rules pane, click Add Exit Rule
-
Configure the exit rule.
- Enter a label.
- Use the default API name or enter a unique value without any spaces.
- Add conditions to determine when to end a flow for someone.
-
Configure the first condition of the exit rule.
- In the Resource field, select the attribute you want to filter on.
- Select an operator, such as Contains.
- Enter a value.
- To add more conditions to the exit rule, click Add Condition.
- To add more exit rules, click Add Exit Rule.
- Save your work.