
You are here:
Configure the Agent
Configure and update your agent to handle user queries and deliver personalized recommendations.
Required Editions
| User Permissions Needed | |
|---|---|
| To build and manage Service Agents: | Manage Agentforce Service Agents AND Manage AI Agents OR Customize Application |
Meet these prerequisites before configuring the agent to identify the individual and provide recommendations.
- Set Up Einstein Generative AI.
- Set Up a Service Agent.
- Connect the service agent to your website. For detailed instructions, see Prepare a Salesforce Org for Enhanced Chat.
-
Use the following method to identify the individual through pre-chat data, and map the
data to the flow variables. To send query events, your agent needs your connector's App
Source ID and the Tenant-Specific Endpoint for your Data 360 instance along with the Individual
ID.
- In the Messaging Session object, create two custom text fields named Individual_ID and Connector_App_Source_Id. For more information, see Create Custom Fields.
- In the Agent Builder, add the created fields to the Included Fields list in the Context Variables for the agent to use. For more information, see Use Context Variables in Agent Conversations.
- Create a pre-chat form and add the hidden custom fields Individual_ID and Connector_App_Source_Id to it. For more information, see Customize Pre-Chat for Enhanced Chat.
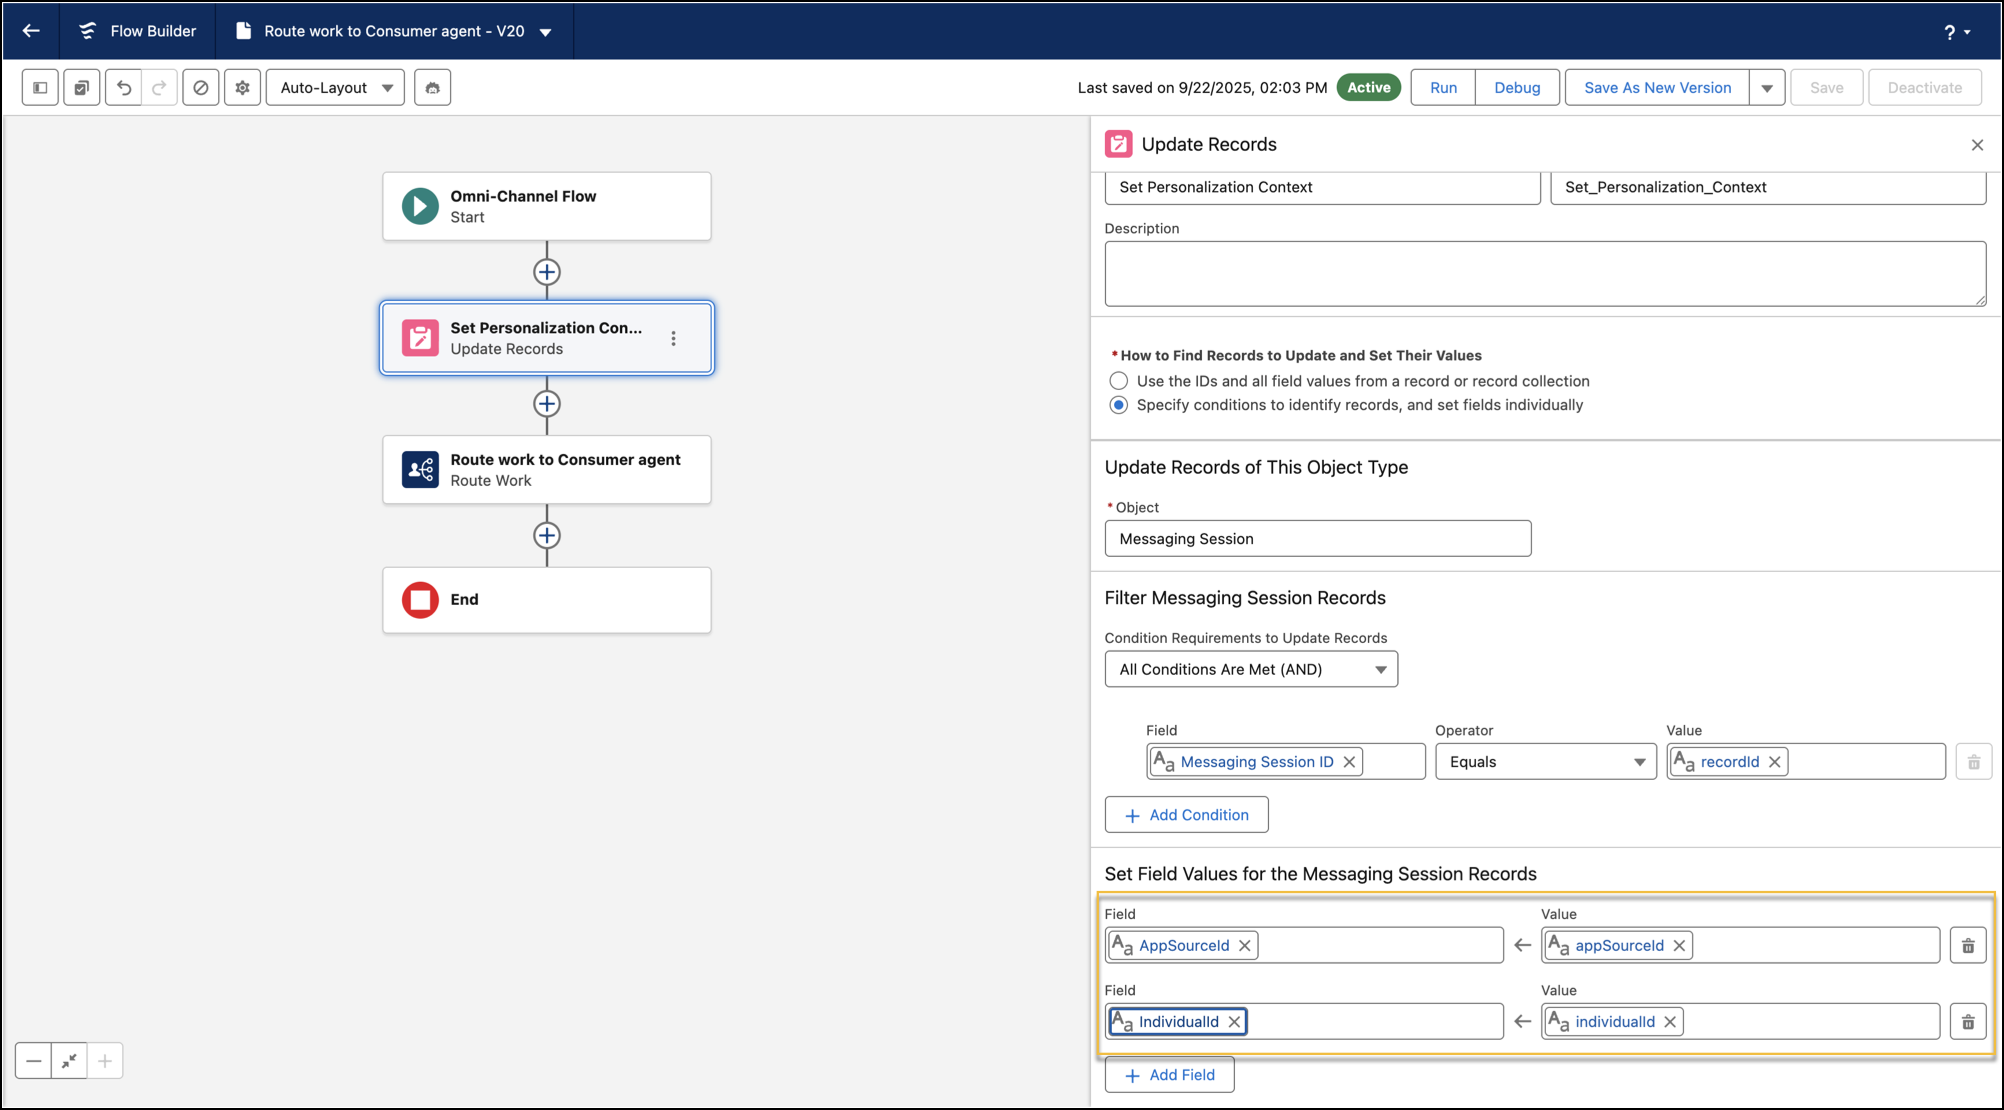
-
Map the pre-chat custom fields Individual_ID and
Connector_App_Source_Id to the messaging channel and update
the inbound omni-channel to store the field value in the Messaging Session object. For
more information, see Map Pre-Chat Values in Omni-Channel
Flow.
- Route the records to your agent. For more information on routing to your agent, see Route Work Items to Queues.
- In Data Cloud Setup, search for and select Websites & Mobile Apps.
-
Select the website and scroll to the bottom to find the App Source ID under
Integration Guide.
The App Source ID is highlighted in the following image.
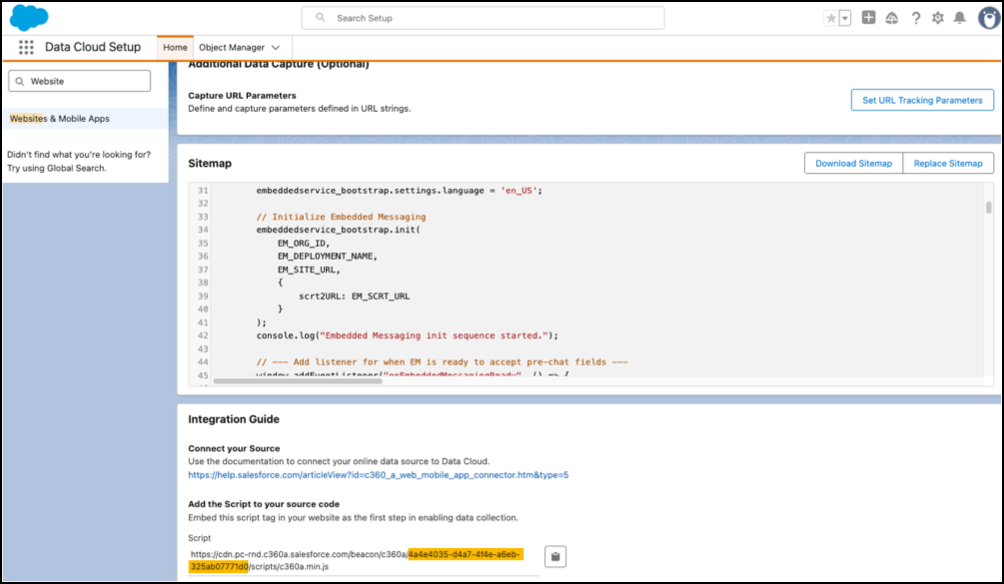
- Copy the ID.
-
To fetch the Individual ID from the Web SDK, use this JavaScript snippet in your
website code, depending on the website type.
// Fetch Individual ID using getAnonymousId function from SalesforceInteractions SDK const chatIndividualId = SalesforceInteractions.getAnonymousId(); -
To send the Individual ID as well as the copied App Source ID to the agent, use
this JavaScript snippet in your website code, depending on the website type.
// Send Individual ID and Connector_App_Source_Id to ASA
                  embeddedservice_bootstrap.prechatAPI.setHiddenPrechatFields({"Individual_Id" :
                  chatIndividualId, "AppSource_Id": "e9afad00-1b84-4381-b76e-984e1fa26841";})
For more information, see Hidden Pre-Chat in Enhanced Web Chat.
- In Agent Builder, add the Personalized Recommendations topic to your agent. This topic includes two key actions: Personalization: Understand User Intent and Personalization: Get Personalization Recommendations. For more information, see Add a Topic from the Asset Library.
- Edit the topic instructions to update the response format to match your product or content catalog. For information on editing a topic, see Edit a Standard Topic.