
You are here:
Evolve a Flow with Agentforce (Beta)
Improve and modify your existing flows by using natural language in the Agentforce panel. Through conversational prompts, add new elements, update properties and conditions, and remove outdated components.
Required Editions
| Available in: Lightning Experience |
| View supported editions. |
| This feature requires the Foundations or Agentforce 1 editions. To purchase, contact your Salesforce account executive. |

| User Permissions Needed | |
|---|---|
| To open, edit, create, activate or deactivate a flow using all flow types, elements, and features available in Flow Builder, including Einstein and Agentforce for Flow: | Manage Flow |
Flow evolution works with AI-generated flows, manually created flows, and previously saved flows, maintaining context throughout your modification session.
Set Up Agentforce for Flow Evolution
Complete these one-time setup steps before you use Agentforce to evolve flows.
- Turn on Einstein Generative AI in Setup.
- Provision and turn on Data 360.
- From Setup, in the Quick Find box, enter Agentforce Agents, select Agentforce Agents, and then turn on Agentforce.
- From Setup, in the Quick Find box, enter Process Automation Settings, and then select Process Automation Settings.
- Select Agentforce flow automation (Beta) and save the settings.
-
Open any flow in Flow Builder, click
 , and click Migrate to Agentforce.
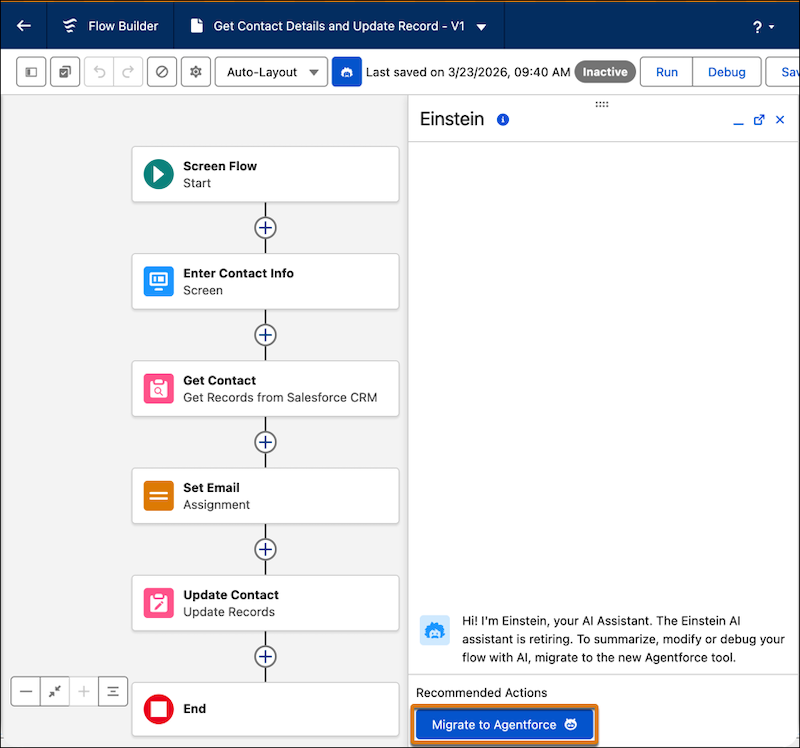
- In the Migrate to Agentforce window, click Migrate.
Request Flow Modifications
Open your flow in Flow Builder and describe the changes you want Agentforce to make.
- Open the flow that you want to modify in Flow Builder.
- Open the Agentforce panel if it's not visible.
-
In the Agentforce panel, describe the modification you want to make to
your flow. Write clear, specific instructions about what you want to change. For
example:
- "Add a decision element to check if the opportunity stage is Closed Won"
- "Update the email template used in the Send Email action"
- "Remove the loop element that processes inactive accounts"
- “Modify this flow to show the user an overview of the updated contact record and ask for confirmation before updating the email address”
The Flow Builder canvas shows the modified flow.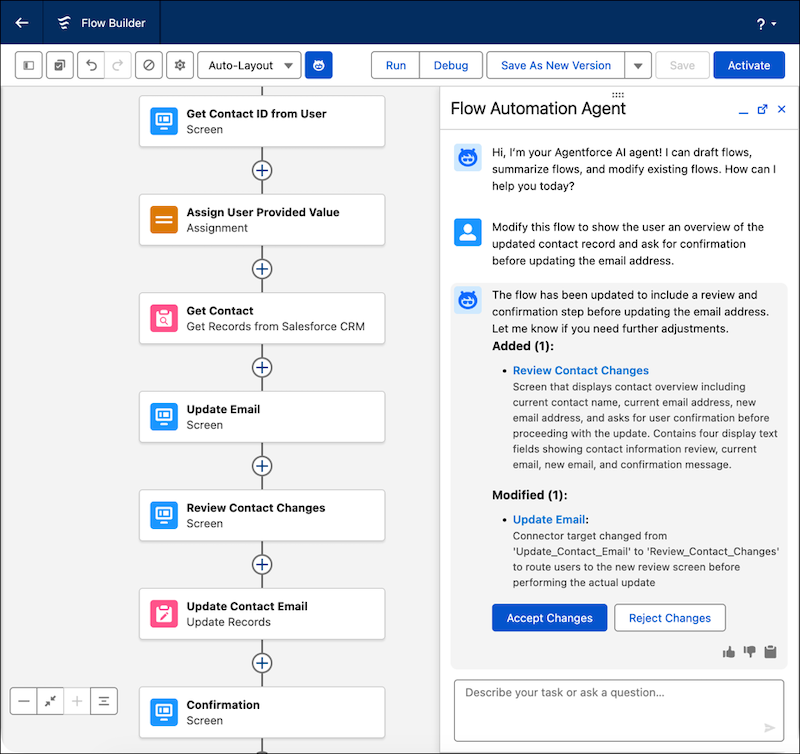
Review and Validate the Evolved Flow
Inspect the AI-generated changes on the Flow Builder canvas, and confirm that the flow works as expected before you activate it. A flow comparison view shows the differences between the previous and current versions.
- Review the changes. To approve them, click Accept Changes. To request further modifications, click Reject Changes.
-
Test and validate your evolved flow.
- Debug the flow to make sure that the modifications work as expected.
- Check each modified element for accuracy and proper configuration.
- When you're satisfied with the changes, save and activate the flow.
