
You are here:
Review and Resolve Conflicts in Your Source Control
In cases where DevOps Center can’t combine work items or you choose not to combine, DevOps Center blocks the promotion. In this case, you manually edit the files directly in your source control to resolve the conflict in the affected branch.
Required Editions
| Available in: Lightning Experience in Professional (API access required), Enterprise, Performance, Unlimited, and Developer Editions |
| Available in: Government Cloud Plus as interoperable. Turning on DevOps Center in Government Cloud Plus orgs can send data outside the authorization boundary. Contact your Salesforce account executive for more details. |
| Not available in: EU Operating Zone. EU Operating zone is a special paid offering that provides an enhanced level of data residency commitment. DevOps Center is supported in orgs in the EU that aren’t part of EU OZ, per standard product terms and conditions. |
| User Permissions Needed | |
|---|---|
| To resolve merge conflict in source control: | DevOps Center Deployment Manager |
These steps apply to GitHub. To resolve merge conflicts manually in Bitbucket, see Resolve merge conflicts.
-
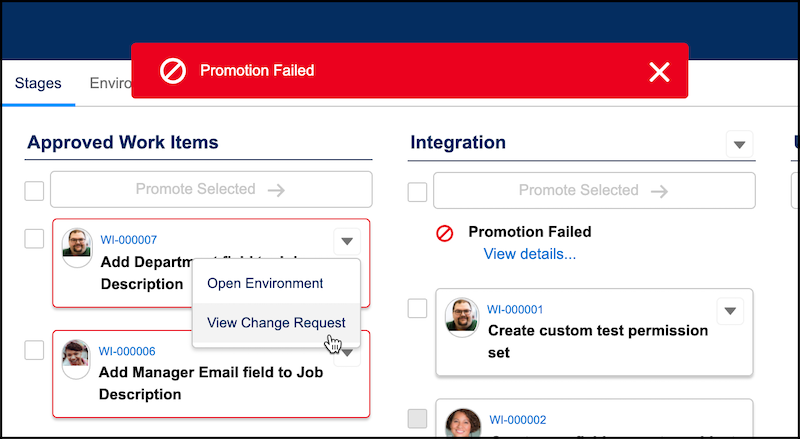
From the work item dropdown (on the stage or work item you’re promoting from), select
View Change Request to go into GitHub to view the pull request and see
the merge conflicts.
Repeat these steps for all work items where the promotion failed.
-
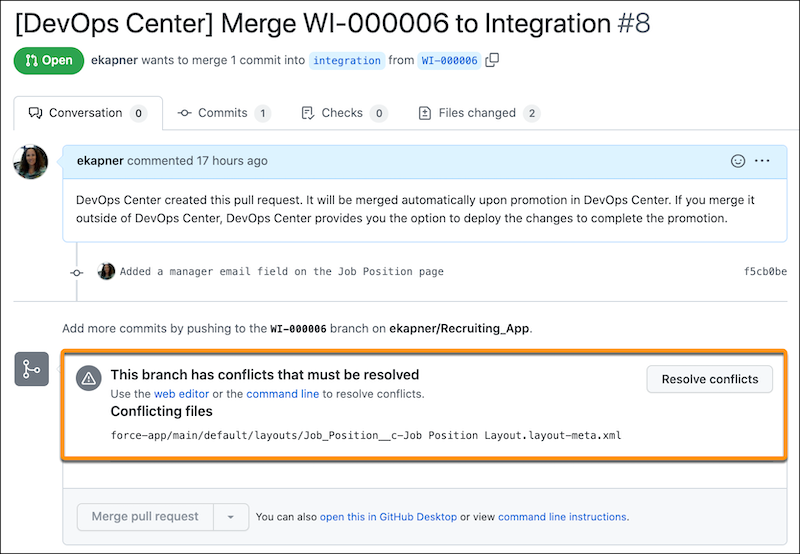
In GitHub, click Resolve Conflicts.
In our example scenario, GitHub has identified one conflict (1) in one file, the Job Position Layout (2). If GitHub detects multiple conflicts in a file, you can use the Prev and Next links (3) to address each conflict one-by-one.
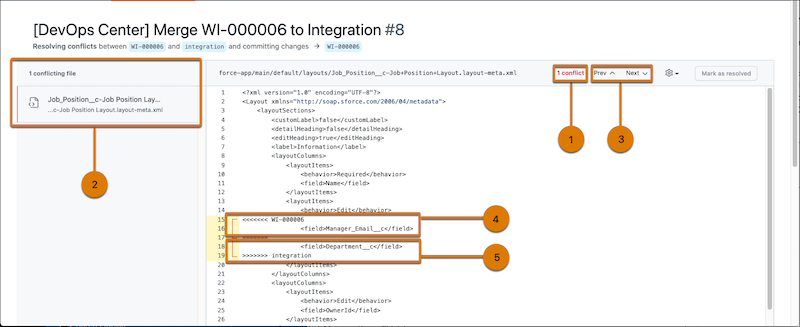
The format of the conflict as shown in GitHub is:
In this example, the work item you attempted to promote (4) in branch WI-000006 is introducing a new field, while the CRM Integration branch doesn’t contain that new field. Also, the CRM Integration branch contains a field that the work item branch doesn’t contain (5), which was likely introduced by a different work item. In this case, you want to keep both these new fields, so you modify the file to eliminate the conflict.<<<<<<<<<< <branch 1 name> <code in branch 1> ========== <code in branch 2> >>>>>>>>>> <branch 2 name>The Metadata API Developer Guide provides the schema for each metadata type to assist you with editing the files directly. In this case, we can look at “Layout” in the guide to view the schema for <layoutItems>.
The resulting changes now look like this:
<layoutItems> <behavior>Edit</behavior> <field>Manager_Email__c</field> </layoutItems> <layoutItems> <behavior>Edit</behavior> <field>Department__c</field> </layoutItems> - At the top of the file, click Mark as Resolved.
- Continue until you resolve all conflicts in the listed files.
-
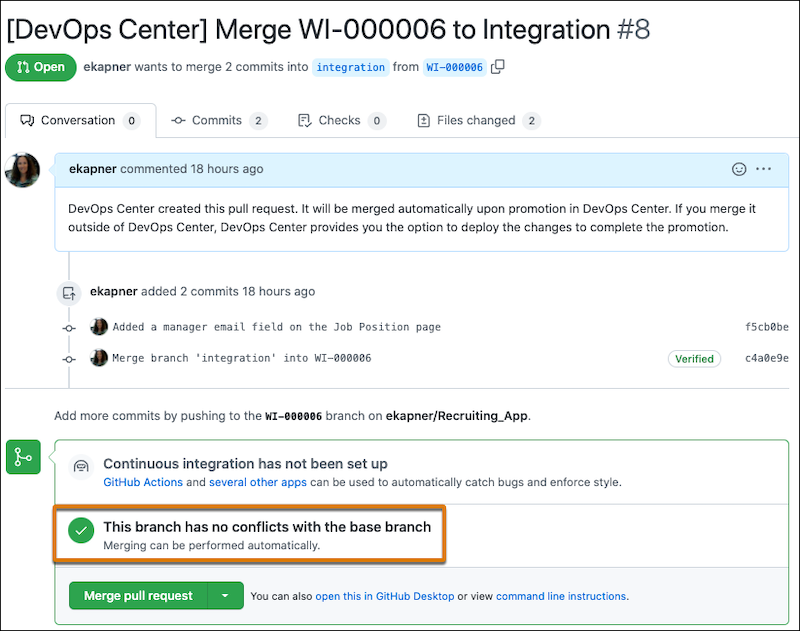
Click Commit Merge, which saves your changes in the work item
branch, W-000006.
Notice that the conflicts are now resolved.
- Return to DevOps Center to promote the work item, which merges the branch with the branch in the next stage, in this case, Integration.
-
In DevOps Center, promote the work items again.
Alternatively, you can merge the change request in GitHub, then complete the promotion in DevOps Center or by using Salesforce CLI.
After you resolve conflicts, your development environments are out of sync with downstream pipeline environments, so we recommend that you synchronize your dev environment.