
You are here:
Add the Local DX Project Files to the GitHub Repository
In Salesforce Extensions for VS Code, add the files you retrieved from your org to the DevOps Center project’s GitHub repository. The GitHub repository has the same name as the DevOps Center project name. After you add the files to the source control repository, the process creates the main branch, which you’ll associate with your release environment. Other branches for pipeline stages are created when you build your pipeline in DevOps Center.
Before you begin, retrieve metadata from the production org to your local DX project. Use the same public GitHub account that you created for DevOps Center.
If your project contains fewer than 100 files, you can upload them directly in GitHub, then commit and merge them into the main branch. This method is straight-forward for small repositories. See GitHub Docs: Adding a file to a repository.
If your project contains more than 100 files, use this method to populate the source control repository using the click-based Git functionality in VS Code. After you become comfortable using Git within VS Code, you can use this method for any number of files.
- In VS Code, open the project, then click the Code Fork icon.
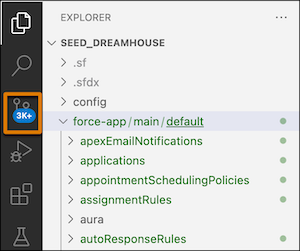
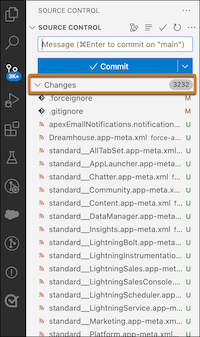
- Under Changes, see the metadata that you retrieved from your org.
Each file is tagged as Untracked (U), which means that GitHub is now aware of it as a new file but it isn’t yet synched with the repository.
- Click the Changes bar, then click + to
stage all changes, which creates a snapshot of the files so you can commit them.
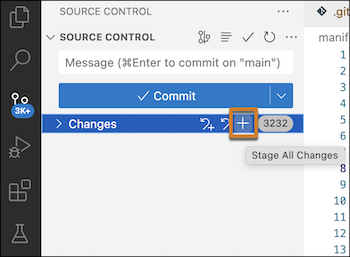
VS Code denotes staged files with an A.
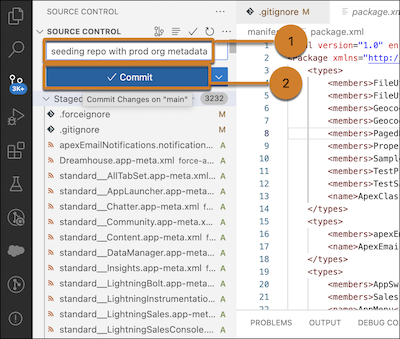
- Enter a commit message (1), then click Commit (2), which commits
and pushes the files to the main branch.
- (Optional) If you modified the .gitignore or .forceignore files, click Sync Changes to push them to the main branch in the repository.
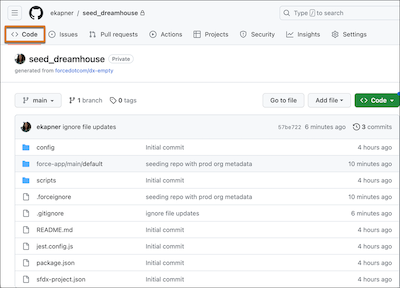
- Go to GitHub to view your seeded project repository.
In GitHub, find the repository, or click the Repository URL link from within DevOps Center. To see your files listed in the main branch, click the Code tab.
You have successfully added files from your production org to a source control repository and created the main branch. When you build your release pipeline within DevOps Center, you create the rest of your branches when you define each pipeline stage.
Next: In DevOps Center, continue configuring your DevOps Center project. Then add the release environment (production org) and then build your release pipeline.