You are here:
End-to-end Example with Flow
In this Flow example, design and test the automation that sends a user’s information from Salesforce to the external employee banking system. Create the variables for user phone numbers, and combine different phone numbers into one piece of data. Then use the external service action to create the user.
-
Define a named credential
For this simplified example, use "legacy" Named Credentials. Instead of clicking New, select New Legacy from the dropdown menu next to the New button. For the named credential that your org uses to access the banking system, assign the Bank label. Assign a placeholder URL, such as https://api.example.com. Use example.com because you paste in the schema at registration time, instead of using a URL to point to an API spec.
In the case where you use a URL, the named credential URL corresponds to the declared host of the API spec and one of its transfer protocol schemes or URL protocols. The URL can point to a different endpoint as long as it hosts the same external service. The base path is added to the named credential URL on callout.
- Register the employee banking system’s external service, using the steps described in Register an External Service as a guide. Use the BankService name and the Bank named credential, and then copy the schema from the “External Services API Spec Example 2”, found in the topic External Services OpenAPI 2.0 Schema.
- Click New Flow.
- Select Start From Scratch and click Next.
-
Then, select Screen Flow and click
Create.
This example uses static values for simplicity. In contrast, a production flow with user data includes elements to get user records, store values to variables, and communicate these values to the external service.
-
To handle the multiple phone numbers nested below the
BankService_Phonevalue, add the two variable resources.- Click Manager, and then click New Resource.
- For the resource type, select Variable.
- For the API name, enter WorkPhone.
- For the data type, select Apex-Defined.
-
For the Apex class, select ExternalService__BankService_Phone.

- Click Done.
- Repeat these steps using the API name CellPhone.
-
Add the variable resource that acts as the array for the phone number
values.
- Click New Resource.
- For the resource type, select Variable.
- For the API name, enter Phones.
- For the data type, select Apex-Defined, and select the Allow multiple values (collection) option.
-
For the Apex class, select ExternalService__BankService_Phone.
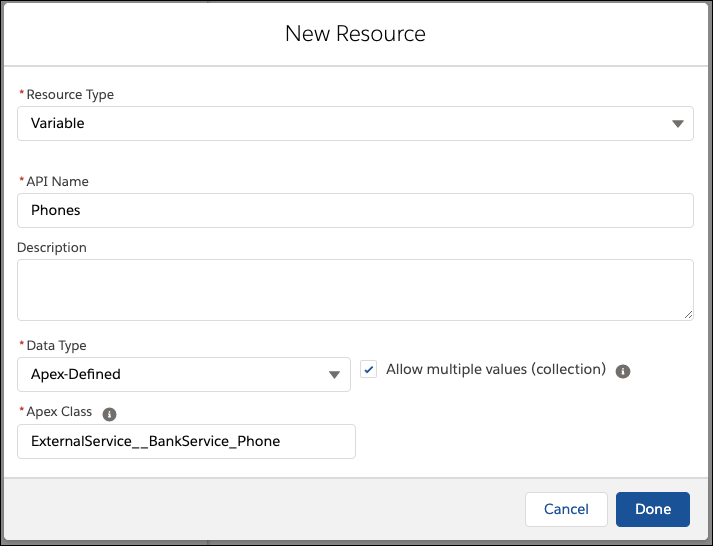
- Click Done.
-
Add the variable resource that stores the user’s name.
- Click New Resource.
- For the resource type, select Variable.
- For the API name, enter User.
- For the data type, select Apex-Defined.
-
For the Apex class, select
ExternalService__BankService_User. - Click Done.
-
Assign values to the work phone variable.
- From the Toolbox, click Elements.
- Drag an Assignment element to the canvas.
- For Label, enter Assign Work Phone, and let the API name autopopulate.
-
Click Search variables, select
WorkPhone, then select
phone. The variable
{!WorkPhone.phone}appears. - For Value, enter 1234567890.
- Click Add Assignment.
-
Click Search variables, select
WorkPhone, then select
typeofphone. The variable
{!WorkPhone.typeofphone}appears. -
For Value, enter Work.
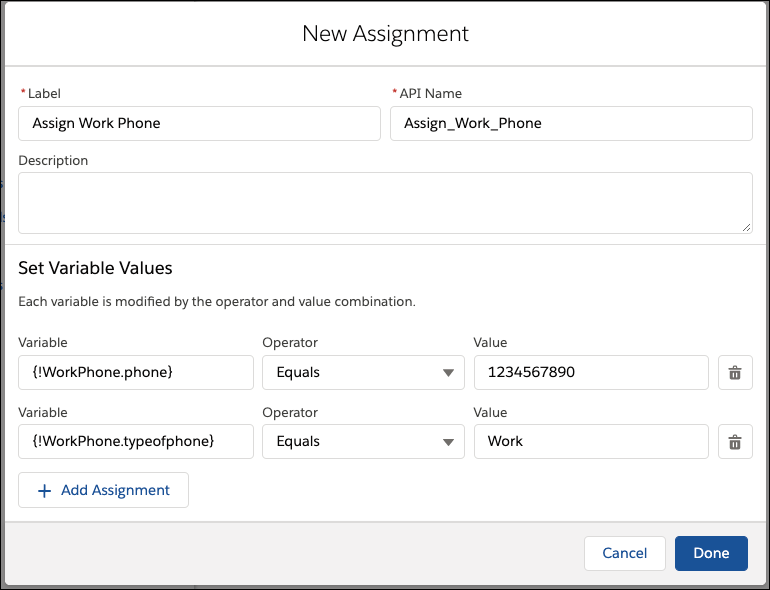
- Click Done.
- Connect the Start element to this assignment element.
-
Assign values to the cell phone variable.
- Drag an Assignment element to the canvas.
- For Label, enter Assign Cell Phone, and let the API name autopopulate.
-
Click Search variables, select
CellPhone, then select
phone. The variable
{!CellPhone.phone}appears. - For Value, enter 0987654321
- Click Add Assignment.
-
Click Search variables, select
CellPhone, then select
typeofphone. The variable
{!CellPhone.typeofphone}appears. - For Value enter Cell.
- Click Done.
- Connect the last element to this one.
-
Assign multiple phone values to the single phone array variable.
- Drag an Assignment element to the canvas.
- For Label, enter Assign Phones, and let the API name autopopulate.
-
Click Search variables then select
Phones. The variable
{!Phones}appears. - Change the Operator to Add.
- For Value, select Workphone.
- Click Add Assignment.
- Click Search variables then select Phones again.
- Change the Operator to Add.
-
For Value select Cellphone.
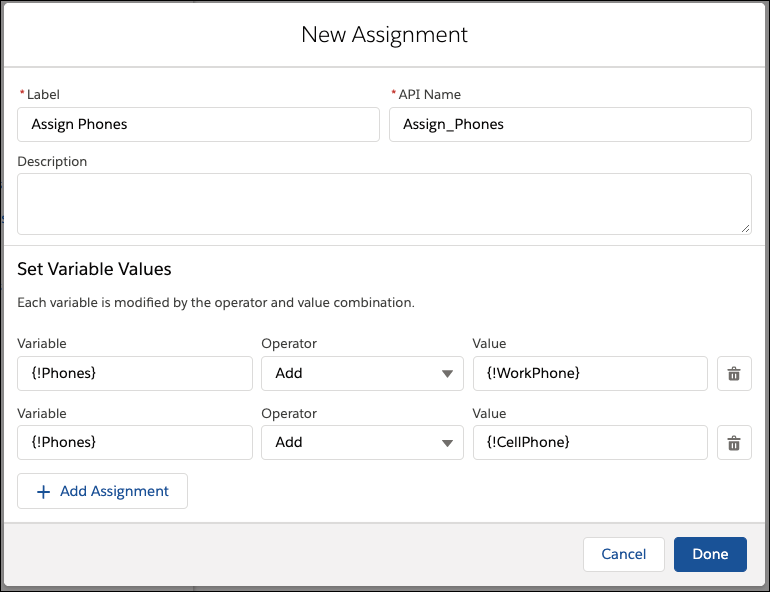
- Click Done.
- Connect the last element to this one.
-
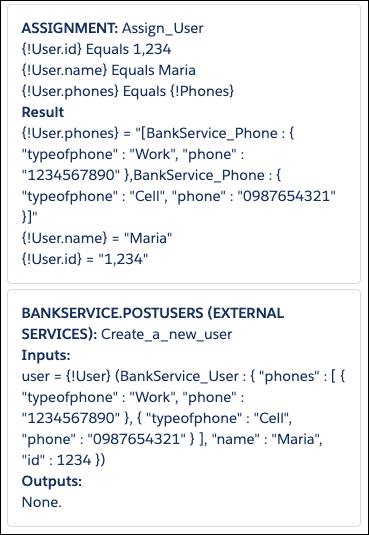
Assign the user values.
- Drag an Assignment element to the canvas.
- For Label, enter Assign User, and let the API name autopopulate.
-
Click Search variables, select
User, then id. The
variable
{!User.id}appears. - For Value, enter 1234.
- Click Add Assignment.
-
Click Search variables, select
User, then name. The
variable
{!User.name}appears. - For Value, enter Maria.
- Click Add Assignment.
-
Click Search variables, select
User, then phones. The
variable
{!User.phones}appears. -
For Value, select Phones.
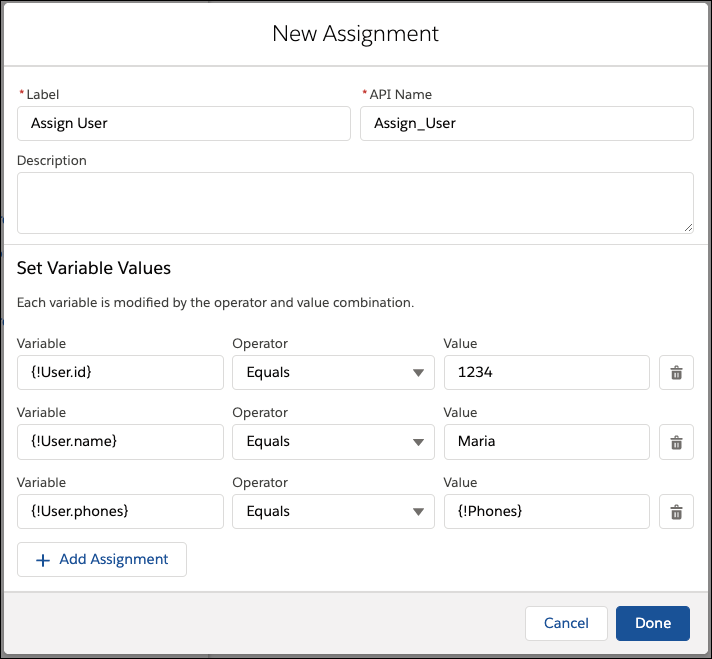
- Click Done.
- Connect the last element to this one.
-
To create users on the external bank system, add the action generated by your
external service schema.
- Drag an Action element to the canvas.
- Filter the actions by type, and select External Service.
- Select postUser.
- For Label, enter Create a new user, and let the API name autopopulate.
- Next to >_user, toggle Included to include input values.
-
From the lookup, select User.
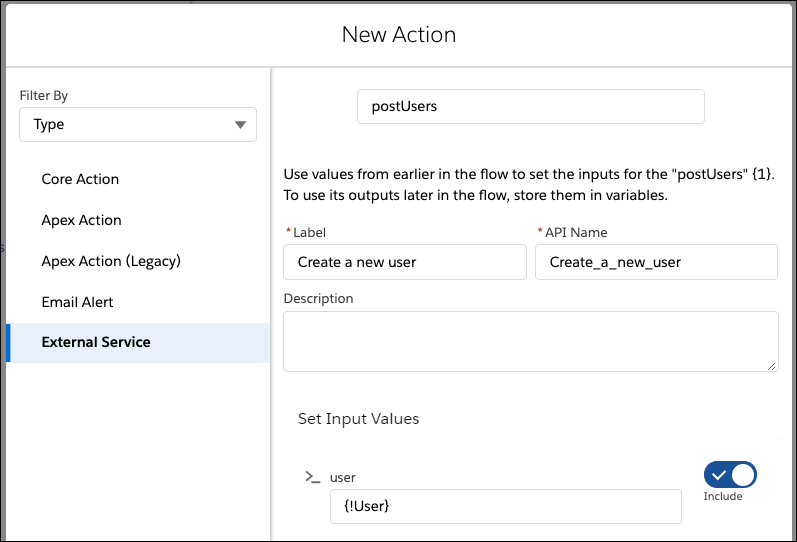
- Click Done.
-
Connect the last element to this one. Your canvas includes these
elements.

-
Save and debug the flow. A successful debug includes the assignment and
External Service callout.