
Create and Configure Lightning Experience Record Pages
Use the Lightning App Builder to add, remove, or reorder components on a record page to give users a customized view for each object’s records.
Required Editions
| Lightning App Builder available in: both Salesforce Classic and Lightning Experience |
| Lightning Home and utility bar pages available in: Lightning Experience |
| Lightning app and record pages available in: both the Salesforce mobile app and Lightning Experience |
| Email application pane pages available in: both Salesforce Classic and Lightning Experience |
Available in: Group, Essentials, Professional, Enterprise, Performance, Unlimited, and Developer Editions |
| User Permissions Needed | |
|---|---|
| To create and save Lightning pages in the Lightning App Builder: | Customize Application |
-
Create a record page for Lightning Experience in one of these ways.
- From the Setup menu on a record page, select Edit
Page.
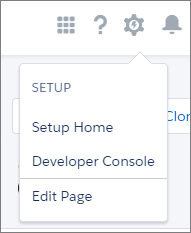
When you select Edit Page for the first time, Salesforce makes a copy of the standard page. This copy is what you edit in the Lightning App Builder. If a customized page exists and is active, selecting Edit Page opens that page to edit.
- Create a page from the Lightning App Builder list page in Setup. Enter
App Builder in the Quick Find box, then select
Lightning App Builder, click New, and
step through the page creation wizard.
To create an empty page, select a page template. To create a page prepopulated with standard components, clone the system default page.
- Clone an existing custom Lightning page from its detail page or from the Lightning page list in Setup.
- Click New Page from the Pages list inside the Lightning App Builder.
- From the Setup menu on a record page, select Edit
Page.
-
In the Lightning App Builder, add, edit, or remove components to change the page’s
layout.
To add a component, drag it from the list of components onto the canvas. To remove a component from the canvas, select it and then click
 , or press Delete on your keyboard. Reorder components by dragging them around
the canvas.
, or press Delete on your keyboard. Reorder components by dragging them around
the canvas. -
In the page properties, give your customized page a unique, descriptive label.
To get to the page properties, click Page from the breadcrumb at the top of the properties pane.
-
Save your page.
Hang on, you’re not done yet! To make your customized record page available to your Lightning Experience and mobile users, you must activate it. You can activate the page from the Save dialog when you save it for the first time or later using the Activation button.