Loading
Feature degradation | Gmail Email delivery failureRead More
Manage Appointments with Salesforce Scheduler
Table of Contents
Select Filters

          No results
          No results
          Here are some search tips

          Check the spelling of your keywords.
          Use more general search terms.
          Select fewer filters to broaden your search.

          Search all of Salesforce Help
          Skip the Service Territory Selection Screen

          Skip the Service Territory Selection Screen

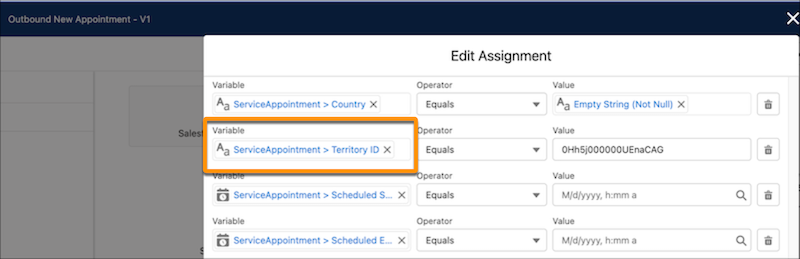
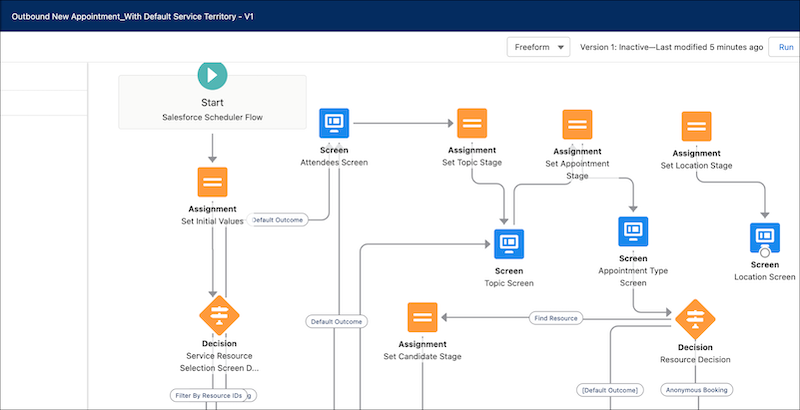
          If you want to use virtual territories or set a default service territory, modify the flow to set a default service territory and skip the Select Service Territory screen. You can skip the service territory selection screen for the Outbound New Appointment, Inbound New Appointment, and Inbound New Guest Appointment flows and their instances. You can also show the service territory address on the review screen if necessary.

          Required Editions

          Available in: Lightning Experience.
          Available in: Enterprise and Unlimited Editions
          User Permissions Needed
          To open, edit, or create a flow in Flow Builder: Manage Flow
          To run a flow: Run Flows
          To modify page layouts for Service Appointment:
          • View Setup and Configuration
          • Customize Application
          1. Click the Service Territories tab.
          2. Click the service territory record that you want to set as default.
          3. Copy the Salesforce ID of the service territory.
          4. From Setup, in the Quick Find box, enter Flows, and then select Flows.
          5. Click the flow for which you want to skip the service territory selection screen.
          6. Perform a step:
            • If you’re modifying the Outbound New Appointment flow, double-click Set Initial Values.
            • If you’re modifying the Inbound New Appointment or the Inbound New Guest Appointment ​​flow, double-click Initial Assignment.
          7. In the value column of the Service Territory > Territory ID variable, paste the copied Salesforce ID of the service territory.
            An image of the Edit Assignment dialog box with the Territory ID variable and its value.
          8. If you want the review appointment screen to show address details, enter values for the address-related fields: Street, City, State/Province, Zip/Postal Code, and Country.
          9. Click Done.
          10. Delete these flow connectors:
            • The connector from the Appointment Type Screen component to the Set Location Stage component.
            • The connector from the Location Screen component to the Resource Decision component.
          11. Add a connector from the Appointment Type Screen component to the Resource Decision component.
            An image of the modified Outbound New Appointment flow after adding a connector from the Appointment Type Screen component to the Resource Decision component.
          12. Delete the Set Location Stage and Location Screen components and the connector between them.
          13. Click Save As.
          14. Enter values for Flow Label and Flow API Name, and then save your changes.
            An instance of the flow is created.
          15. Activate the flow.
          16. Add the flow instance to the page layout from which the flow is to be used.
            For more information, see Set Up a Custom Outbound Flow (Optional).

          As Salesforce Scheduler checks internal and external calendars in real time to determine time slots, test your setup's performance after you make these changes.

           
          Loading
          Salesforce Help | Article