
You are here:
Create an Email Template in Lightning Experience
Use email templates to save time and standardize email that you or others in your organization send. Templates you create are automatically private, but you can make them available for use by others in your organization.
Required Editions
| Available in: Lightning Experience |
| Available in: Essentials, Professional, Enterprise, Performance, Unlimited, and Developer Editions |
| User Permissions Needed | |
|---|---|
| To create and send email templates: | Lightning Experience User |
| To attach files to emails or email templates: | Lightning Experience User AND Access to the file you’re attaching AND Edit rights to the email or the email template’s folder |
| To delete email templates: | Modify All Data, template ownership, or Edit rights to the email template folder OR If the template is in a public folder: Manage Public Lightning Email Templates permission |
| To update email templates: | For public email templates: Modify All Data, Manage Public Lightning Email Templates permission, or template ownership For email templates in an Enhanced folder: Modify All data, Edit access to the folder, or template ownership For private email templates: Modify All Data or template ownership |
If you’re using Service, the Service Setup Assistant provides you with basic email templates and sets up case notifications that email the case contact when a case is created, updated, assigned, and closed.
- From the email composer, open a record, such as an opportunity or account, that offers email.
- Click the Activity tab, then click the Email tab.
- If you want, select an entity in the Related To field. The kind of record you choose affects which merge fields are available in the merge picker. If you select Contact or Lead, or leave the field blank, the template is a global template. A global template can use global merge fields only.
- Compose the email to use as your template, or select an existing email template. Quick text works with the Salesforce Merge Language (SML) used in Salesforce Classic email templates and Lightning email templates created before Summer ‘18. It doesn’t work with the Handlebars Merge Language (HML) used in Lightning email templates.
- Add a subject. To include merge fields, type them in manually.
- Add any images you want in the template. Use the Insert Images icon or copy and paste the image.
- Click the Merge icon and use the merge picker to insert merge fields.
-
Click the Source icon to add HTML code. If you want to navigate
to the record or other Salesforce pages as you work, pop out the composer window. Some
email clients don’t respect the
<style>tag, so use inline styles to format text. - Add any attachments you want in the template. After a template is saved, any content document links (Salesforce file links) are converted to content asset links. If an email template has an attachment, you can’t use Save or Save As to make a copy of it from the email composer.
- Click the Merge icon and use the merge picker to insert merge fields.
- Click the Templates icon and then save the email template as new. To associate an enhanced letterhead with the email template, edit the existing template from the Email Templates page. From the Enhanced Letterhead dropdown list, select a letterhead.
See Also
Create a Template from the Email Templates Page
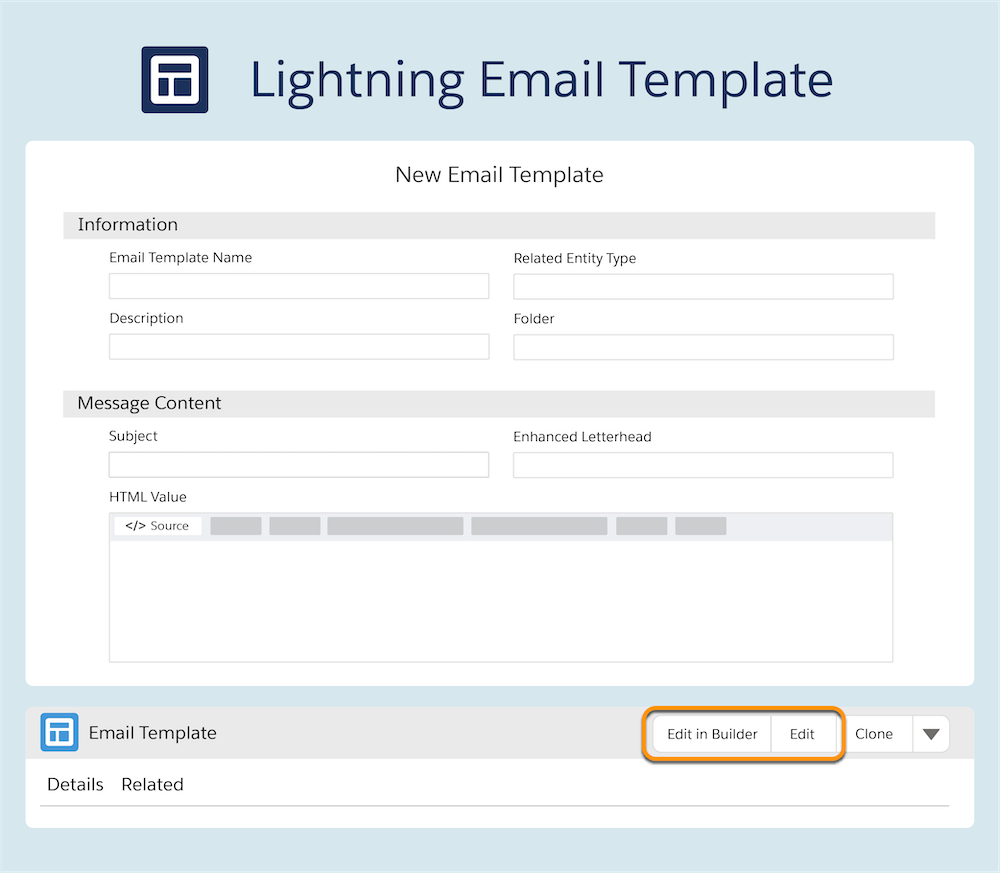
- On the Email Templates page, click New Email Template.
-
Enter the template’s name and add a subject.
To include merge fields in the subject, type them manually.
- To limit the email template’s availability to a specific Related To record, select an item from the Related Entity Type dropdown list.
- To include a letterhead in the email, select a letterhead from the Enhanced Letterhead dropdown list.
-
Compose the email template in the HTML Value area. Use the icons to establish
styling, include source code, and to add images and attachments. Use the
Merge in the lower corner to insert merge fields.
You can also choose to save the template record details and then edit the details of the email body after saving.
- Save your changes.
When you clone a template, or choose Save As while editing a template in an email composer, the associated letterhead is saved with the new template.
As of Summer '19, agents and reps using case emails can no longer use Save or Save As to edit or create email templates.