
You are here:
Install and Set Up Salesforce for Outlook (Retiring)
Follow these steps to install Salesforce for Outlook in your org.
Required Editions
| Available in: Salesforce Classic |
| Available in: Lightning Experience, if Salesforce Classic is available in your org. |
| Available with the purchase of Sales Cloud or Government Cloud in: Personal, Contact Manager, Professional, Enterprise, Performance, Unlimited, and Developer Editions |
Important Full product retirement for Salesforce for
Outlook is scheduled for December 2027. See Salesforce for Outlook Retirement. To keep
integrating Microsoft Outlook with Salesforce, check out our next-generation products: the
Outlook integration and Einstein Activity Capture. See Move from
Salesforce for Outlook (Retiring) to the Next-Generation Products.
-
Open the installation file you downloaded and saved, and complete the installation
wizard.
 Note If you don't yet have .NET 4 installed, the installation wizard installs it for you. Keep in mind that the installation wizard prompts you to restart your machine after it installs .NET 4. After restarting, run the installation wizard again to complete the installation process.
 -
Open Microsoft® Outlook®. The setup wizard opens, and the Salesforce for
Outlook icon (
 ) appears in
your system tray. If the wizard doesn't open, you can start it manually. Right-click
and click
Settings.
) appears in
your system tray. If the wizard doesn't open, you can start it manually. Right-click
and click
Settings.
- If you want to log in to a site other than the default, click Change URL and pick the server to which you want to connect. If the server you want isn't listed, select Other... and enter the URL, such as a custom domain used by your organization.
- Enter your username and password.
-
Click Approve. Doing so creates a secure
connection between Outlook and Salesforce. You don’t have to log in again unless you
encounter an error.
Note If your organization restricts IP addresses, logins from untrusted IPs are blocked until they're activated. Salesforce automatically sends you an activation email that you can use to log in. Doing so lets you connect without IP restrictions from anywhere.
-
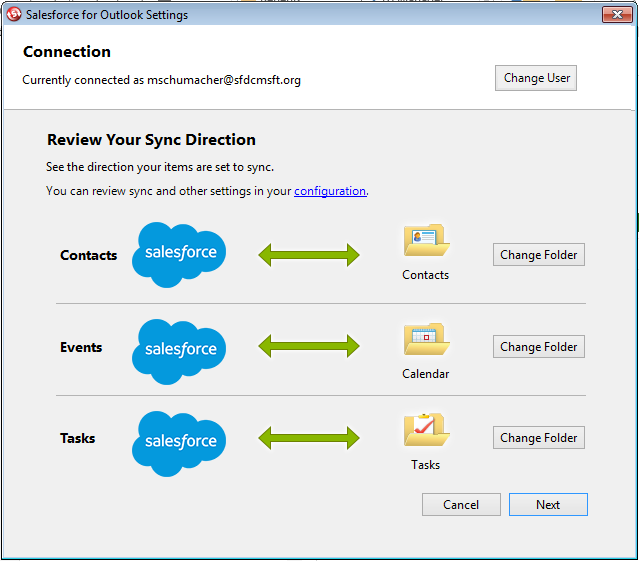
Click Next, and review the sync directions
set up by your administrator.
To sync your Outlook items to different folders, click
Change Folder and select folders that are within your default
folder or the main Mailbox folder.
-
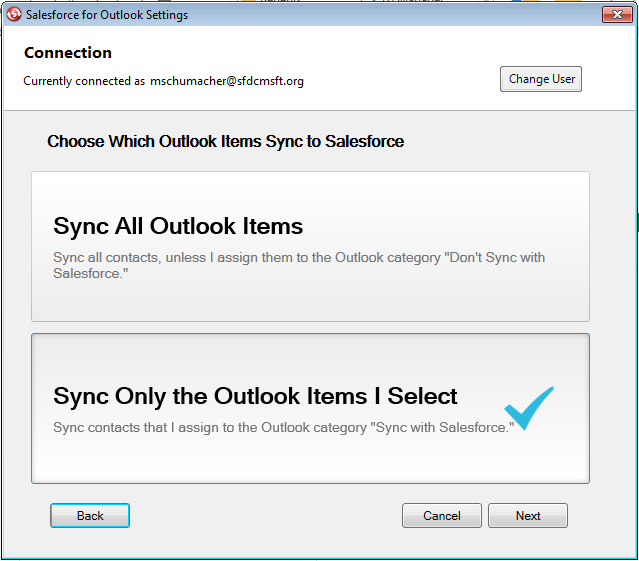
Click Next, and then select your sync method.
- Choose to sync all your contacts, events, and tasks. Mark items that you don’t want to sync with the “Don’t Sync with Salesforce” category in Outlook.
- Choose to sync individual contacts, events, and tasks. Mark items that you want to sync with the “Sync with Salesforce” category in Outlook.
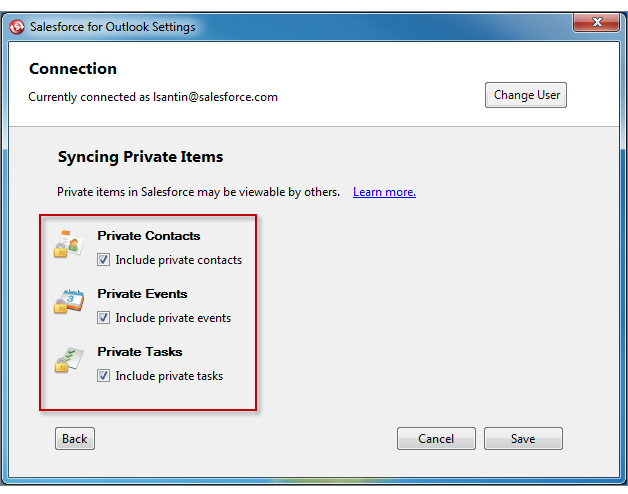
-
Click Next, and then select the kinds of private items you want
to sync.
-
Click Save. A welcome message appears at the system tray icon
 , which is now
active.
If you're configured to sync Outlook items, and you chose Sync Only the Outlook Items I Select for your sync method, all items in the folders you chose start syncing automatically. The icon spins during every sync cycle.
, which is now
active.
If you're configured to sync Outlook items, and you chose Sync Only the Outlook Items I Select for your sync method, all items in the folders you chose start syncing automatically. The icon spins during every sync cycle.
Did this article solve your issue?
Let us know so we can improve!