You are here:
Set Up Single Sign-On for Salesforce Spiff
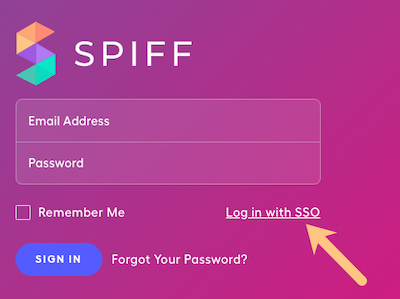
Support a more efficient experience for users who log in to Salesforce Spiff by setting up SAML single sign-on (SSO) with an identity provider, including Google, Okta, and Microsoft Azure Active Directory. Configure settings in your identity provider and in Spiff.
Required Editions
| Available in: both Salesforce Classic (not available in all orgs) and Lightning Experience |
| Available in: Enterprise, Unlimited, and Developer Editions |
| Available for an additional cost in: Professional Edition with Web Services API Enabled |
| User Permissions Needed | |
|---|---|
| To manage SSO settings in Spiff: | A Spiff user role with this permission turned on. SSO Settings: Manage |
Review Identity Provider Requirements
Review these important requirements for the identity provider that you select.
- Spiff is compatible with multiple identity providers that support the SAML 2.0 standard. The steps for setting up Google Workspace, Okta, or Microsoft Entra ID (Azure Active Directory) are available for your convenience, but Salesforce Customer Support can't advise or assist with setting up any identity provider.
- When you set up your identity provider, verify that the app signature uses the SHA-256 secure hash algorithm. Spiff doesn’t support the SHA-1 algorithm for SAML SSO.
Option 1: Set Up Google Workspace as an Identity Provider
Follow the steps in Set up your own custom SAML app in Google Workspace Admin Help.
- On the App details step, enter Spiff for the name.
-
On the Google Identity Provider details step, choose Download IdP metadata.
This XML file contains the identity provider details that you need for completing setup in Spiff.
-
On the Service provider details step, enter an ACS URL, depending on your region.
- If you’re in the US, enter https://us1.spiff.com/api/v1/saml_consume
- If you’re in the EU, enter https://eu1.spiff.com/api/v1/saml_consume
-
On the Service provider details step, enter an Entity ID, depending on your region.
- If you’re in the US, enter https://us1.spiff.com/api/v1/saml_metadata
- If you’re in the EU, enter https://eu1.spiff.com/api/v1/saml_metadata
-
On the Service provider details step, enter a Start URL, depending on your region.
- If you’re in the US, enter https://us1.spiff.com/api/v1/saml_init
- If you’re in the EU, enter https://eu1.spiff.com/api/v1/saml_init
- On the Attribute mapping step, don't modify any values.
- Click Finish.
Next, complete the setup in Spiff. See Configure SSO Settings in Spiff.
Option 2: Set Up Okta as an Identity Provider
Follow the steps in Create SAML app integrations in Okta Docs.
- On the General Settings step, enter Spiff for the App name.
-
On the Configure SAML step, enter a single sign-on URL, depending on your region.
- If you’re in the US, enter https://us1.spiff.com/api/v1/saml_consume
- If you’re in the EU, enter https://eu1.spiff.com/api/v1/saml_consume
-
On the Configure SAML step, enter an Audience URI (SP Entity ID), depending on your region.
- If you’re in the US, enter https://us1.spiff.com/api/v1/saml_metadata
- If you’re in the EU, enter https://eu1.spiff.com/api/v1/saml_metadata
- On the Configure SAML step, for Application username format, select Email.
- On the Feedback step, select I'm an Okta customer adding an internal app.
- Click Finish.
-
In Applications, go to the Spiff app, go to Sign on methods, click View IdP metadata, and save the page as an XML file.
This XML file contains the identity provider details that you need for completing setup in Spiff.
Next, complete the setup in Spiff. See Configure SSO Settings in Spiff.
Option 3: Set Up Microsoft Entra ID (Azure Active Directory) as an Identity Provider
Follow the steps in Enable single sign-on for an enterprise application with a relying party STS in Microsoft Entra documentation.
-
In the Basic SAML Configuration section, enter an Identifier (Entity ID), depending on your region.
- If you’re in the US, enter https://us1.spiff.com/api/v1/saml_metadata
- If you’re in the EU, enter https://eu1.spiff.com/api/v1/saml_metadata
-
In the Basic SAML Configuration section, enter a Reply URL (Assertion Consumer Service URL), depending on your region.
- If you’re in the US, enter https://us1.spiff.com/api/v1/saml_consume
- If you’re in the EU, enter https://eu1.spiff.com/api/v1/saml_consume
-
In the Attributes & Claims section, update the required claim.
- Select the row Unique User Identifier (Name ID).
- In the Manage claim window, enter user.mail for Source attribute.
- Save your changes.
-
In the SAML Certificates section, download Federation Metadata XML.
This XML file contains the identity provider details that you need for completing setup in Spiff.
Next, complete the setup in Spiff. See Configure SSO Settings in Spiff.
Configure SSO Settings in Spiff
- From the Admin menu, select Settings, and then click Security.
-
For SSO Email Domains, enter a domain for the email addresses that must use SSO to log in.
For example, to require users with email addresses that end with company.com to log in with SSO, enter company.com.Users with email addresses for other domains must log in with a Spiff username and password.
-
For SAML Settings, click Upload and select the XML file that you downloaded from Google Workspace, Okta, or Microsoft Entra ID (Azure Active Directory).
 Important If the XML file that you downloaded from the identity provider doesn't specify a redirect URL but includes a POST URL, Spiff uses the POST URL as the redirect URL. Spiff doesn't support POST authentication directly.
After you configure SSO settings successfully, the current authentication mode changes to SSO.
Users with the email domain that you specified must log in with SSO.